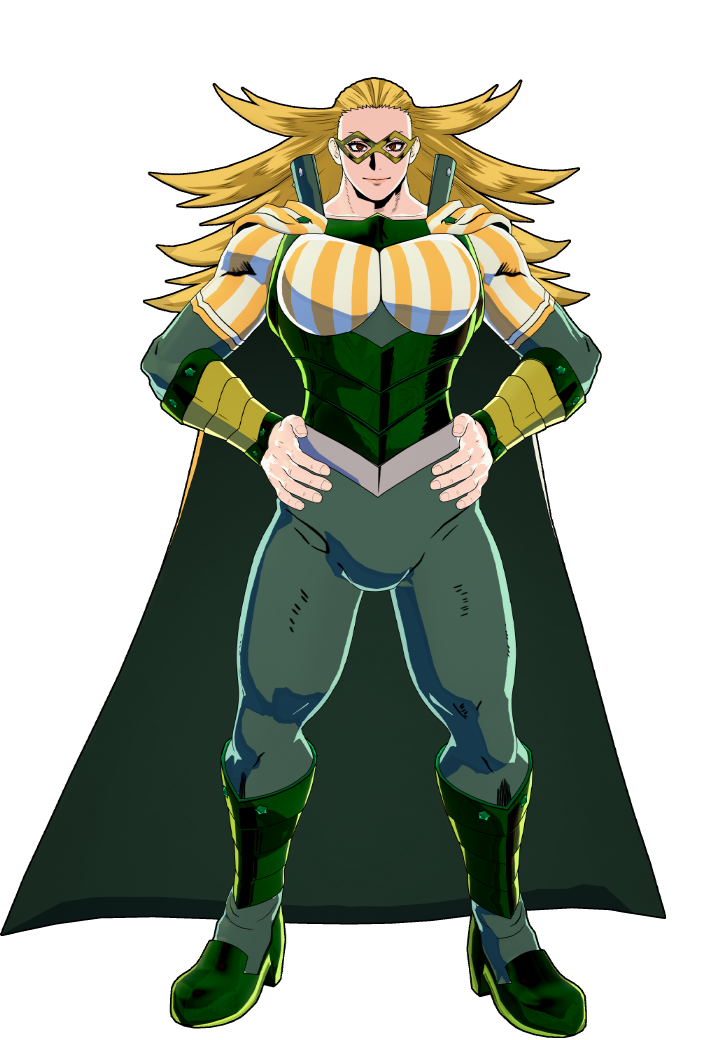
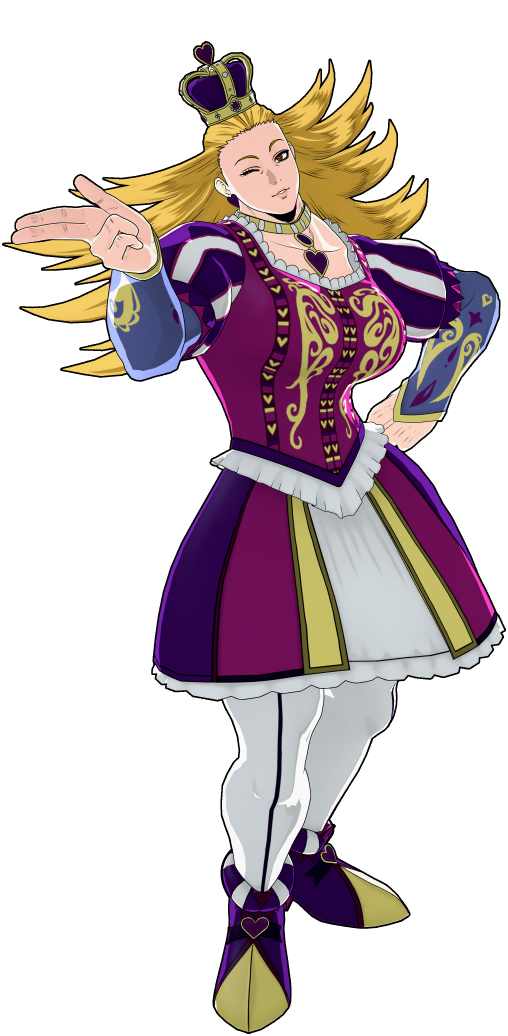
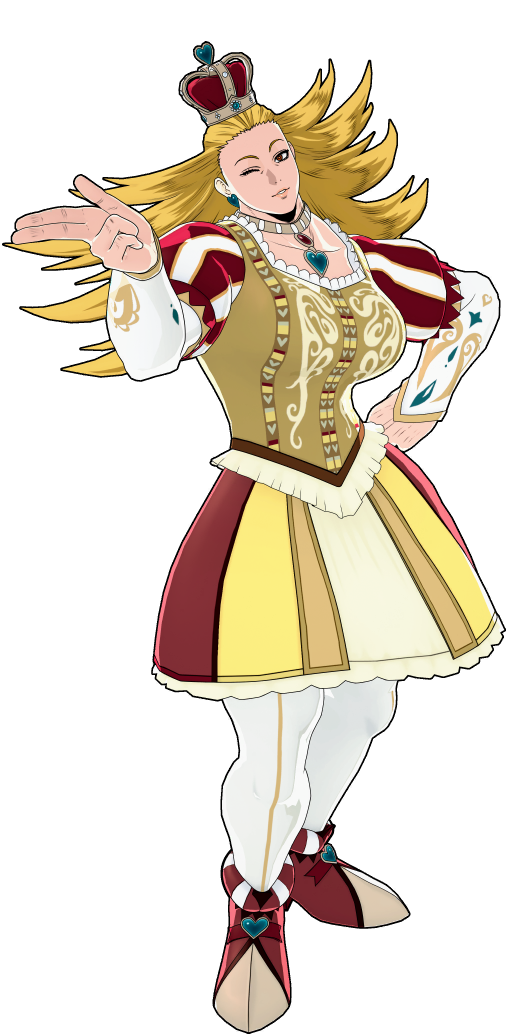
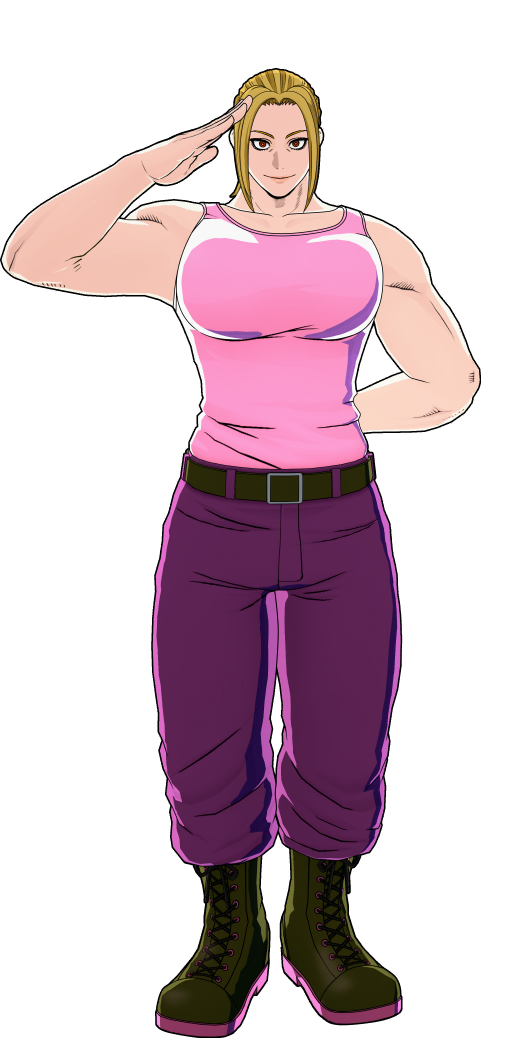
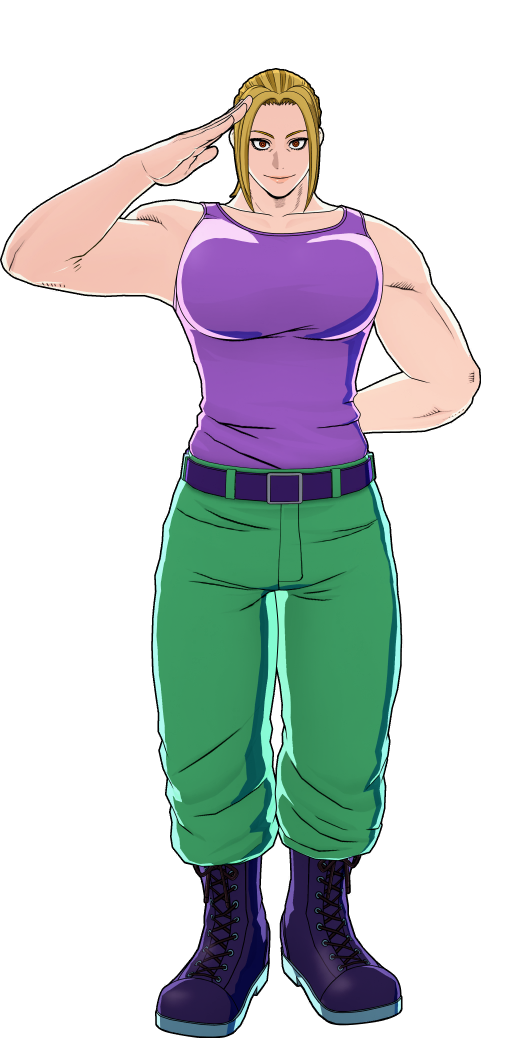
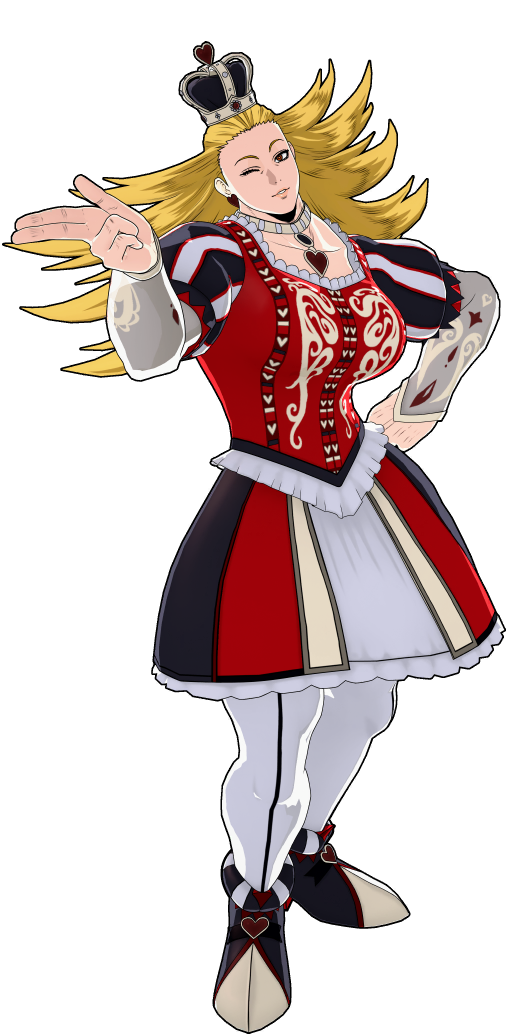
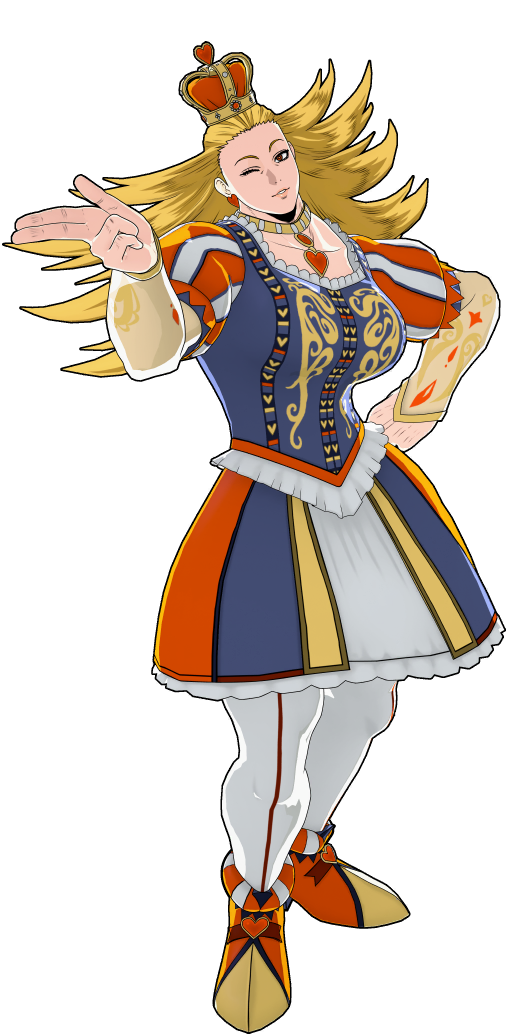
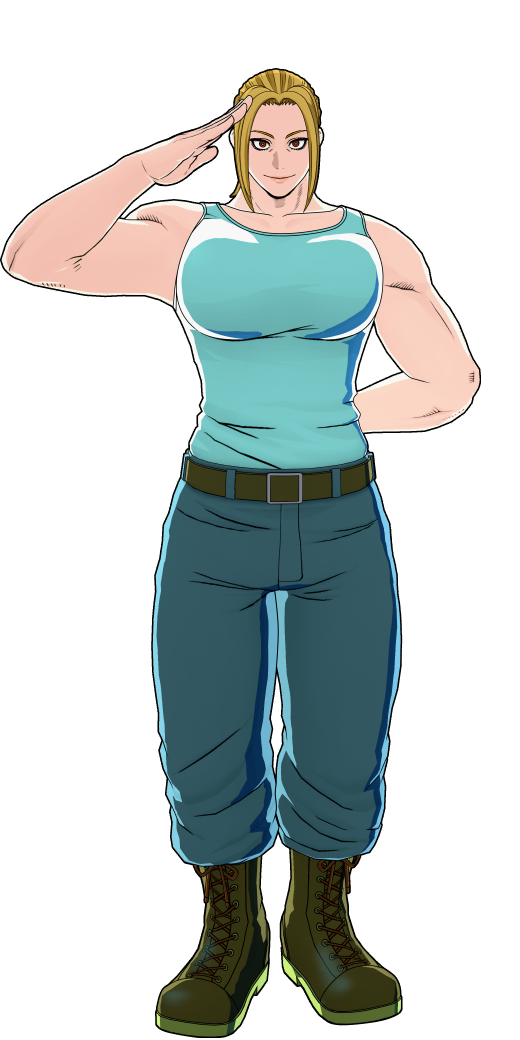
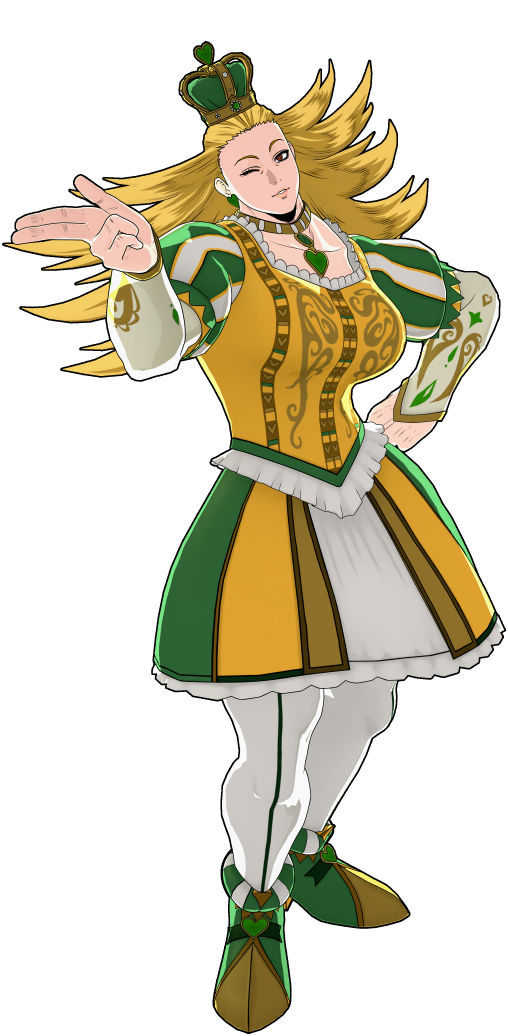
Guide developed and supervised by: Vateilika (Steam)
Contributors: Spongi (PS), Doc Huge Pollution (Xbox)
Last Update: August 24th, 2026
“As long as people help each other, someone who inherits the spirit of a hero will destroy you, without fail.”
Overview
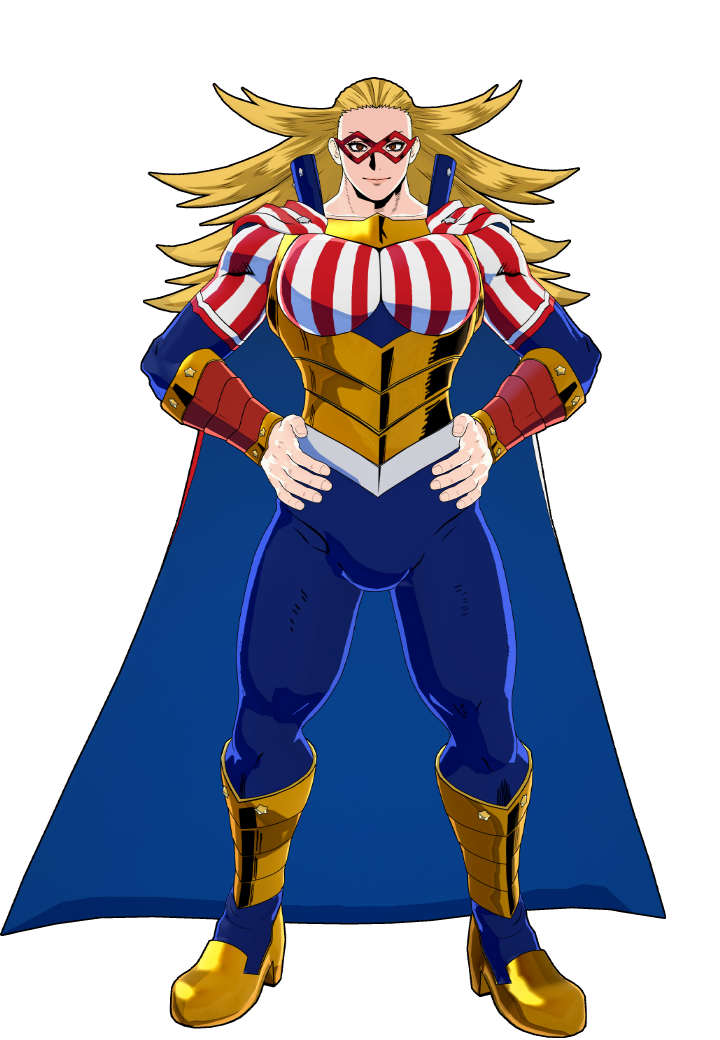
Star and Stripe is a powerhouse character that controls the battlefield with both devastating damage and rule bending. She boasts strong punishment for enemy mistakes, absurd burst area of effect damage, and team utility. However, she is hampered by high recovery on her skills, a large hitbox, and slow mobility.
Star's is a character that rewards strong aim and macro (Big-Picture decision making). She requires a slower and more methodical playstyle than some characters, but has some room to bend the rules.
Star can group up enemies to allow for teammates or even herself to easily dispatch them with AoE damage. Star can also bend the rules of the poison mist by granting a temporary poison mist immune area centered around herself or a teammate.
Star excels in the mid-game of a match where poison mist can be threatening and her special action duration is relatively manageable. Though her effectiveness with special action falls at the later phases, she can still put opponents in very uncomfortable situations through her base kit.
Pick if you like
Avoid if you dislike
Devastating damage and punishment
Amazing team utility
Strong storm play
Amazing AoE setup
Putting enemies in checkmate situations
Slow mobility
Large hitbox
Long recovery on moves leading to strong punishes on you
Fairly long penalty cooldowns on everything
Needing to hit projectiles for consistent damage
Best Map: UA Island, Chaos City, & Neo Academia
As long as the map has close-quarters, Star does very well. She's not bad in open maps such as USJ, but she does noticeably worse than the other maps. This is because depending on the zone, enemies are naturally more spread out. She has a harder time setting up strong betas and running away.
Alpha Skill - Diffusion Laser
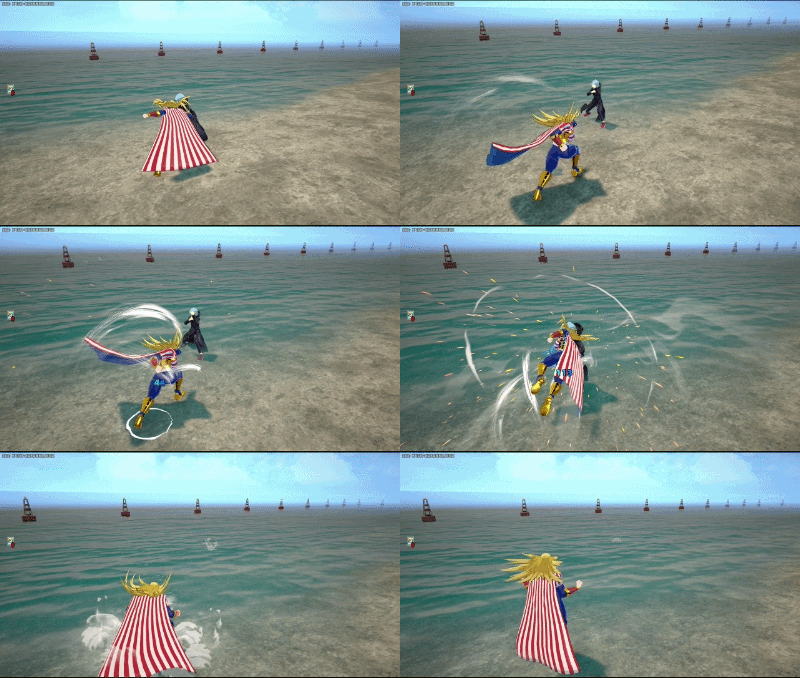
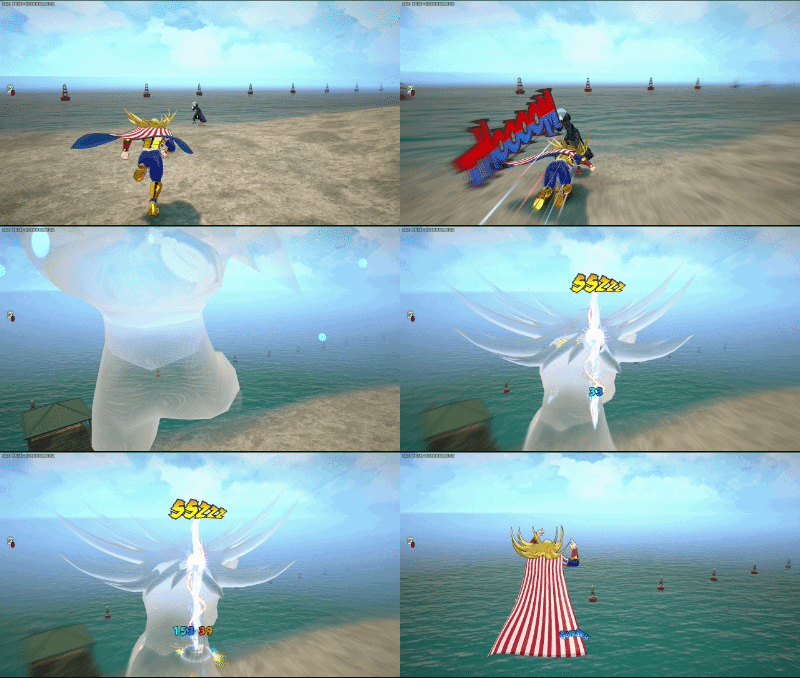
Star throws a laser that does damage on impact and upon contact explodes into a damaging AoE. This move can pierce enemies causing enemies hit to cause their own explosions. This damage can "echo" to other enemies when multiple enemies are pierced. It also boasts excellent range.
Star's Alpha is unique from most beamer projectiles in that it can be held by holding the fire button to have it ready to be thrown when released. Holding her Alpha will briefly pause the reload timer until the laser is created. It can also be rolled out of at any point to preserve ammo.
Enemies can dodge the laser, but the splash can still occur and hit other enemies. This means the enemy that is directly hit by Alpha will not receive damage, but other enemies nearby will be hit by the explosion damage that comes from Alpha.
At base damage, Star's level 9 Alpha does 20 damage on impact and 65 damage on splash. Totaling 85 damage on direct hit of Alpha.
Accounting for the Strike passive she receives, it does 21 damage on impact and 68.25 damage on splash. Totaling 89.25 (Rounded to 90) damage on direct hit of Alpha.
Despite it's high base damage, it's attack speed is the lowest in it's class of beamer projectiles.
The following is the key for this table:
# of people is the number of people that will be pierced by Alpha, max number of enemies pierced is 6
Full Pierces are Alphas that go through every single person in the group
Partial Pierces are the pierces that go through part of the group.
AoE Misses are the missed AoEs due to the Down Power Limit.
Max damage per Target is the highest damage that can occur on one target. Generally
this target
will
only receive full pierces.
Min damage per Target is the lowest damage that can occur on one target. Generally this
target
will
be knocked down early due to AoE misses, therefore will not receive a direct hit.
Total damage is the cumulative damage per # of people hit by Alpha until knockdown.
Without tuning the direct hit with splash damage will do the following damage on multiple pierces on enemies that are close to each other:
# of people
Full Pierces
Partial Pierces
AoE Misses
Max damage per Target
Min damage per Target
Total damage
1
7
0
0
624.75
624.75
624.75
2
3
1
1
561.75
540.75
1102.5
3
2
2
1
540.75
519.75
1601.25
4
1
1
1
519.75
498.75
2646
5
1
1
3
451.5
430.5
3617.25
6
1
1
5
383.25
362.25
4179
"Line of justice!"
"Laser blast!"
Tips for Star's Alpha:
When dealing with an enemy that likes to spam roll, hold Alpha and wait for the recovery of the roll to punish.
Mix in rolling and sprint jumping with Alpha to keep yourself mobile and unpredictable. Because Star's Alpha is roll-able, she can immediately roll after the Alpha projectile is thrown out.
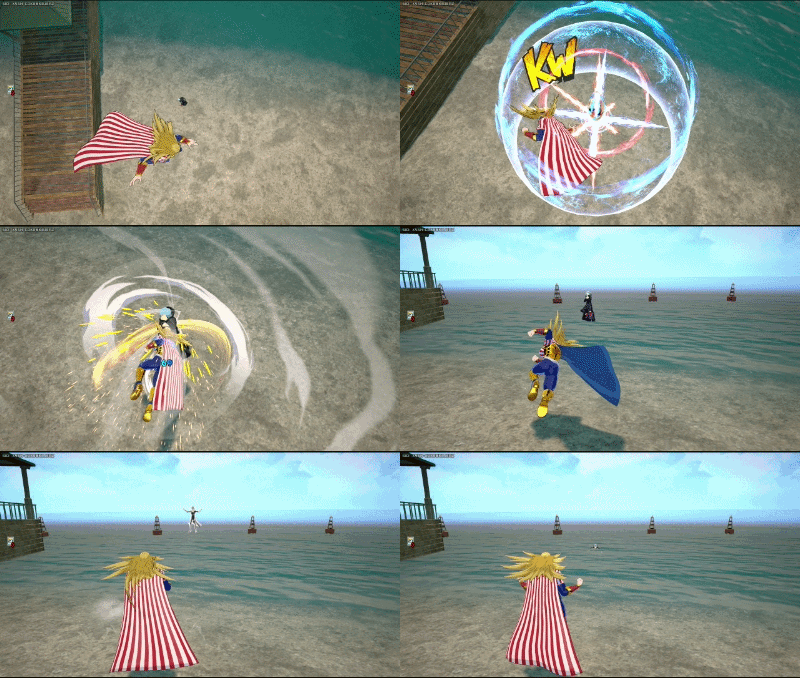
Beta Skill - Zero Air
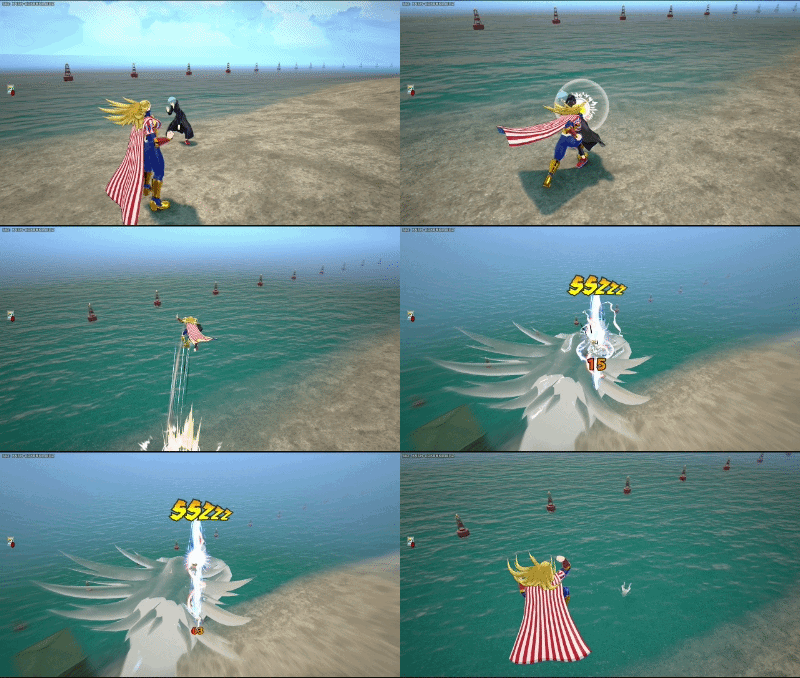
Star summons a vacuuming sphere of air in the target direction. It can be tapped to instantly place the sphere in-front of her or held to move the sphere forward in a fixed direction. Enemies caught within the sphere will be pulled to the center for 3 seconds. This strong vacuuming effect deals no damage and has no down power. Star is also slightly lifted up in the air while she is using Beta.
The sphere dramatically grows in size at level 4 and level 9, and it goes slightly down in cooldown at nearly every level.
Beta is a strong playmaking skill due to it's vacuuming effect. It can force enemies to take AoEs attacks from your teammates, keep them in place for your team to beam or start a combo, cover an opponent's wake-up escape, or even extend combos for teammates. The possibilities are endless.
Despite it's modest cooldown, the move takes time to setup, and Star is stationary until she completes the formation of the Sphere.
There can be specific conditions for some skills to escape from Star's Beta. Below is the key for
those conditions:
📐 denotes that require a specific angle, a jump, or both to escape Star's Beta.
⏲️ denotes that the following skill will last long than Star's Beta.
⏩ denotes that acceleration with this skill or a character's speed up skill is required to clear.
🥋 denotes that a specific technique with this skill is required to clear.
🚧 denotes that the center of Star's Beta can be covered or the user can be pushed away by this skill.
🤷 denotes the skill completely ignores the vacuum.
Character
Beta 1
Beta 4
Beta 9
Izuku Midoriya (OFA)
2 rolls⏩ 5th gear
3 rolls⏩ 5th gear
3 rolls⏩ 5th gear
Ochaco Uraraka - Zero Satellites
Beta⏲️ Gamma🚧
Beta⏲️ Gamma🚧
Beta⏲️ Gamma🚧
Tenya Iida
1 roll⏩ Recipro Turbo
2 rolls⏩ Recipro Turbo
2 rolls⏩ Recipro Turbo
Fumikage Tokoyami
Leap during Black Ankh
Leap during Black Ankh
Leap during Black Ankh⏩
Neito Monoma
Special ActionSkills in this table
Special ActionSkills in this table
Special ActionSkills in this table
Mirio Togata
Alpha🤷 Beta🤷 Special Action🤷
Alpha🤷 Beta🤷 Special Action🤷
Alpha🤷 Beta🤷 Special Action🤷
Mirio Togata - Sheer Counter
Alpha (Held)🤷 Beta (Held)🤷 Gamma
(Counter)🤷 Special Action🤷
Alpha (Held)🤷 Beta (Held)🤷 Gamma
(Counter)🤷 Special Action🤷
Alpha (Held)🤷 Beta (Held)🤷 Gamma
(Counter)🤷 Special Action🤷
All Might - Gatling
Beta📐 or ⏩
❌ cannot escape
❌ cannot escape
Armored All Might
Beta Special Action
Beta⏲️ Special Action
Beta⏲️ Special Action
Shota Aizawa - Flow Runner
Beta🤷
Beta🤷
Beta🤷
Cementoss
Alpha🚧 Beta🚧📐 Looking up Gamma🚧 Special
Action🚧
Alpha🚧 Beta🚧📐 Looking up Gamma🚧 Special
Action🚧
Alpha🚧 Beta🚧📐 Looking up Gamma🚧 Special
Action🚧
Endeavor - Inferno Fist
Special Action⏩🥋 Alpha Cancel
❌ cannot escape
❌ cannot escape
Hawks
Beta (Flight)⏲️ Special Action⏲️
Beta (Flight)⏲️ Special Action⏲️
Beta (Flight)⏲️ Special Action⏲️
Hawks - Slicing Wind
Special Action⏲️
Special Action⏲️
Special Action⏲️
Mt. Lady
Special Action🤷
Special Action🤷
Special Action🤷
All For One - Factor Fusion
Gamma (Alpha Infused)📐
❌ cannot escape
❌ cannot escape
All For One (Youth Age)
Special Action⏲️
Special Action⏲️
Special Action⏲️
Twice - Sad Man's Parade
Beta🚧 Gamma
Beta🚧 Gamma⏩
Beta🚧
Mr. Compress
Gamma
Gamma⏲️ requires 2 Gammas
Gamma⏲️ requires 2 Gammas
Kurogiri
Beta🤷 Gamma🤷
Beta🤷 Gamma🤷
Beta🤷 Gamma🤷
Overhaul - Blighted Precipice
Beta🚧
Beta🚧
Beta🚧
Gentle Criminal
Gamma⏲️ One Bounce
Gamma⏲️ One Bounce
Gamma⏲️ One Bounce
As a universal rule, characters under the effects of acceleration or 2 rapid cards can escape Star's
Beta within a specific number of rolls.
The number of rolls is determined by the level of Star's Beta and the timing of the rolls.
These are the minimum number of rolls at specific levels of Star's Beta:
Beta 1
2 rolls
Beta 4 & 9
3 rolls
Otherwise, the following characters cannot escape Star's Beta at any level.
Izuku Midoriya
Izuku Midoriya - Full Bullet
Katsuki Bakugo
Katsuki Bakugo - Machine Gun
Katsuki Bakugo - Cluster
Ochaco Uraraka
Shoto Todoroki
Shoto Todoroki - Ice Fang Wind Flame
Tsuyu Asui
Tsuyu Asui - Froppy Hopper
Eijiro Kirishima
Eijiro Kirishima - Red Drive
Momo Yaoyorozu
Denki Kaminari
Denki Kaminari - Lightning
Itsuka Kendo
Itsuka Kendo - Twin Palm Strike
Ibara Shiozaki
Tamaki Amajiki
Nejire Hado
Nejire Hado - Fairy
Hitoshi Shinso
All Might
Shota Aizawa
Present Mic
Present Mic - D.J. Board
Endeavor
Mirko
Stars and Stripes
Tomura Shigaraki
Tomura Shigaraki - Catastrophe
Tomura Shigaraki - Thousand-Hand Break
All For One
Dabi
Dabi - Crazy Torch
Himiko Toga
Himiko Toga - Sting Dance
Twice
Overhaul
Nagant
"Expansion!"
"Can you handle this!?"
Tips for Star's Beta:
Enemies on the floor can roll during Star's Beta, but if they're in the air they cannot. This turns the move into a combo/true damage tool.
Due to it's slow nature, it's better to use this move as a prediction tool rather than a reaction tool. Think about where your enemy wants to go in order to eliminate an options from them.
Gamma Skill - Keraunos
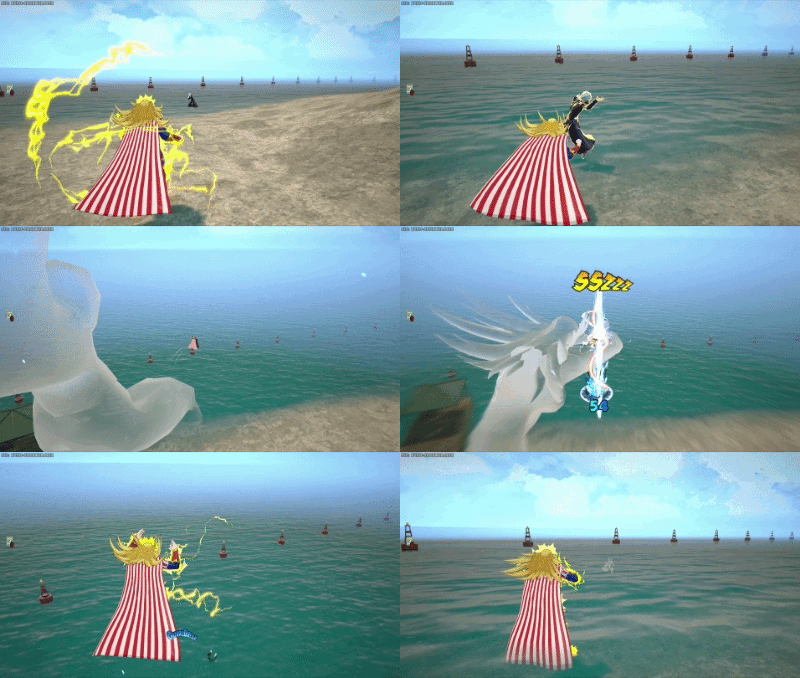
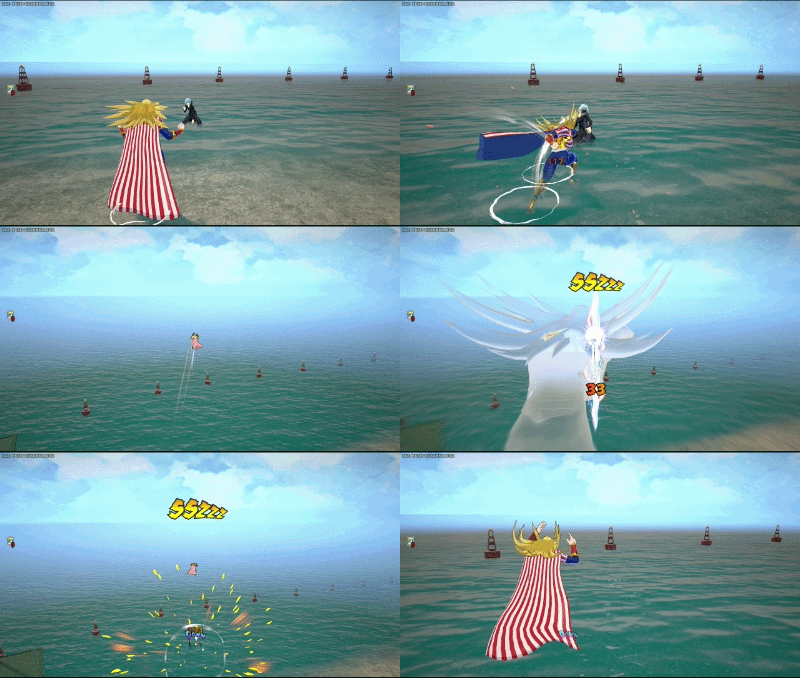
Star performs a long-distance dashing uppercut that grabs enemies and launches them into the air. A construct of herself then gathers energy into a laser that does continuous damage, followed by a large hit of damage at the end of the grab. The grab lasts 3 seconds, and Star gets an incredible amount of damage and knockdown resistance, making it hard to stop her after a successful grab.
She starts with two charges of this move and gets a third at level 4. The reload time is six seconds per charge, and is shortened to five seconds per charge at level 9.
For 21 ticks, every tick of damage from Gamma does 3 damage with only one down power. Star is also capable of grabbing multiple opponents that are at point blank range of each other. This combined with no damage scaling for teammates makes it a powerful tool for team combos.
This move is also her main long-range movement tool, having a good bit of range, while also letting you keep a bit of momentum, similar to Present Mic or Kaminari.
Despite it's strengths, Gamma's tracking is inconsistent either hitting perfectly or missing completely. It also has a large amount of start-up, which is very react-able, and a large amount of recovery when whiffed, which can lead to a strong punish for many characters.
"Beautiful right?"
"Inconsistent right?" - Some Star and Stripe Player
Tips for Star's Gamma:
When paired with Beta, Gamma can much more easily hit multiple enemies, though this varies with enemies on the ground, it's very strong with enemies stuck in the air.
It can sometimes be better to use air melee if you find yourself suddenly close to an enemy than Gamma due to it's slow start-up.
Special Action - Invert Area
Star raises her arm and uses New Order to invert the area around her or an ally turning any poison mist into a healing area. To Invert an area for an ally, aim down sights and use special action while looking at them.
The person with Invert Area must be within the converted poison mist in order to receive healing. This goes for allies nearby as well.
While Star is downed, she can use her special action on herself, but not allies.
Invert Area is also nicknamed "New Order" after her quirk.
Finisher takes 3.33 seconds to finish, but this will be rounded to 4 seconds.
Big Box takes 12 seconds to open
Revive Card takes 6 seconds to finish, if you roll immediately when it finishes.
Rescue takes 6 seconds to finish
Gold box takes 5 seconds to open
Full Support Drink takes 8 seconds to finish
Team HP Recovery takes 8 seconds to finish
HP Recovery Large takes 8 seconds to finish
HP Recovery Small takes 5 seconds to finish
Team GP Recovery takes 6 seconds to finish
GP Recovery Large takes 5.33 seconds to finish
GP Recovery Small takes 2.33 seconds to finish
Team Enhancemnet Kit takes 0.5 seconds to finish
Below is the key for this table:
✅ Means you can use Special Action to complete action and have extra time remaining
🟡 Means you can use Special to cover the action, but uses it's the entire duration
❌ Means Special will not cover the entire duration of the action
Phase
Special Action Duration
Drain per Second
Full Duration Heal
Big Box
Revive Card
Rescue
Gold Box
Full Support Drink
Team HP Recovery
Large HP Recovery
Small HP Recovery
Team GP Recovery
Large GP Recovery
Small GP Recovery
Team Enhancement Kit
1
20 seconds
5%
400 HP
✅ 40% remaining
✅ 70% remaining
✅ 70% remaining
✅ 75% remaining
✅ 60% remaining
✅ 70% remaining
✅ 70% remaining
✅ 85% remaining
✅ 70% remaining
✅ 73.5% remaining
✅ 88.5% remaining
✅ 97.5% remaining
2
18 seconds
5.56%
360 HP
✅ 33.33% remaining
✅ 66.67% remaining
✅ 66.67% remaining
✅ 72.22% remaining
✅ 55.56% remaining
✅ 66.67% remaining
✅ 66.67% remaining
✅ 83.33% remaining
✅ 66.67% remaining
✅ 70.56% remaining
✅ 87.22% remaining
✅ 97.22% remaining
3
14 seconds
7.14%
280 HP
✅ 14.29% remaining
✅ 57.14% remaining
✅ 57.14% remaining
✅ 64.29% remaining
✅ 42.86% remaining
✅ 57.14% remaining
✅ 57.14% remaining
✅ 78.57% remaining
✅ 57.14% remaining
✅ 62.14% remaining
✅ 83.57% remaining
✅ 96.43% remaining
4
10 seconds
10%
200 HP
❌
✅ 40% remaining
✅ 40% remaining
✅ 50% remaining
✅ 20% remaining
✅ 40% remaining
✅ 40% remaining
✅ 70% remaining
✅ 40% remaining
✅ 47% remaining
✅ 77% remaining
✅ 95% remaining
5
6 seconds
16.67%
120 HP
❌
🟡
🟡
✅ 16.67% remaining
❌
🟡
🟡
✅ 50% remaining
🟡
✅ 11.67% remaining
✅ 61.67% remaining
✅ 91.67% remaining
6
4 seconds
25%
80 HP
❌
❌
❌
❌
❌
❌
❌
✅ 25% remaining
❌
❌
✅ 42.5% remaining
✅ 87.5% remaining
7
4 seconds
25%
80 HP
❌
❌
❌
❌
❌
❌
❌
✅ 25% remaining
❌
❌
✅ 42.5% remaining
✅ 87.5% remaining
8
2 seconds
50%
40 HP
❌
❌
❌
❌
❌
❌
❌
❌
❌
❌
❌
✅ 75% remaining
"I'll rewrite the rules!"
You can do this on teammates?!
Get it together!
Tips for Star's Special Action:
When performing a storm play, don't use all of your special action unless it's absolutely necessary and you have a plan to get out of storm. Often times after you run out of Special Action, you die shortly after.
Inside of storm, you can toggle special action while downed to stall out your revive timer. This can allow teammate to come rescue you or potentially self-revive yourself in storm.
Star's special action works on teammate's clones, but doesn't prevent storm damage reduction or healing to clones.
Basic Attacks
Ground Melee
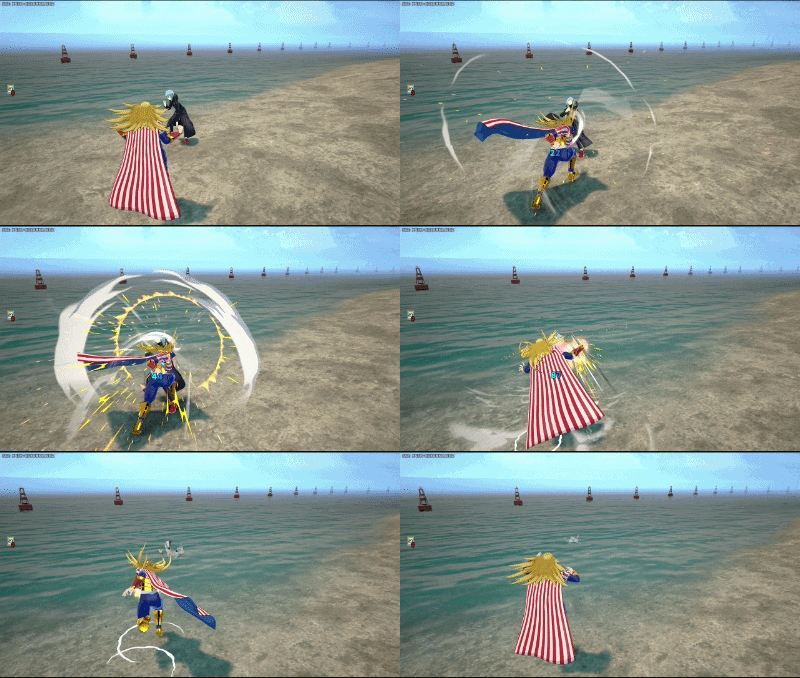
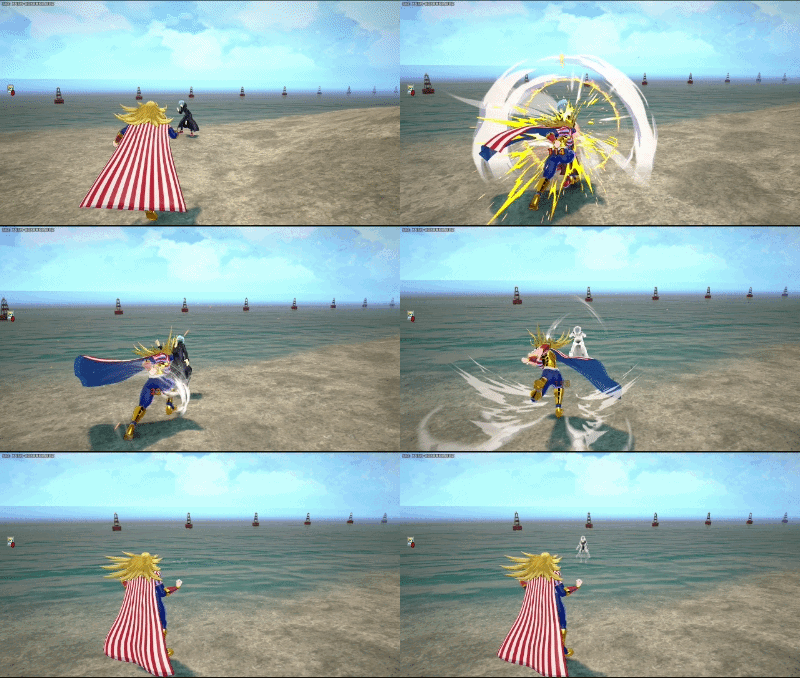
Star performs a lunging punch, then performs a two hit punch.
This move is good for quick and close-ranged punishes, where Gamma and Air would be too slow.
Melee 1 has decent tracking, but below average range.
Melee 2 has good tracking, but very little range.
Melee 2 can whiff at certain ranges and when hitting characters at certain heights due to Melee 1's knockback.
"Army Punch!"
Air Melee
Star dashes forward in the air and performs a swiping punch.
This move is for mid-ranged punishes, where Gamma would be too slow and Ground Melee would be too short.
Air Melee has terrific tracking making it very good for proccing melee tuning, but is on the slower side and has relatively long recovery. The melee is difficult to combo into without assistance from an Air Beta or teammate.
Due to the melee performing a dash, it can be used to traverse in the air without using Gamma. It can be used to air stall, but has diminishing height gain.
"Blow you away!"
Leveling Paths
Star benefits from level 4 in each of her skills, so it is in your best interest to get each of your skills to at least level 4.
Alpha gains 7 extra damage, aoe gets larger, and most importantly gets 2 extra ammo.
Beta receives a slight cooldown decrease, and it's size is greatly increased.
Gamma receives an extra charge.
Alpha Max Path
Leveling path for a beamer playstyle. Alpha can be leveled to 4 earlier for fights, but Beta and Gamma should be level 4 before Alpha is maxed.
Gamma Max Path
Leveling path for a brawly playstyle
All-in Damage Path
Maximizing damage for everything before utility
Tech
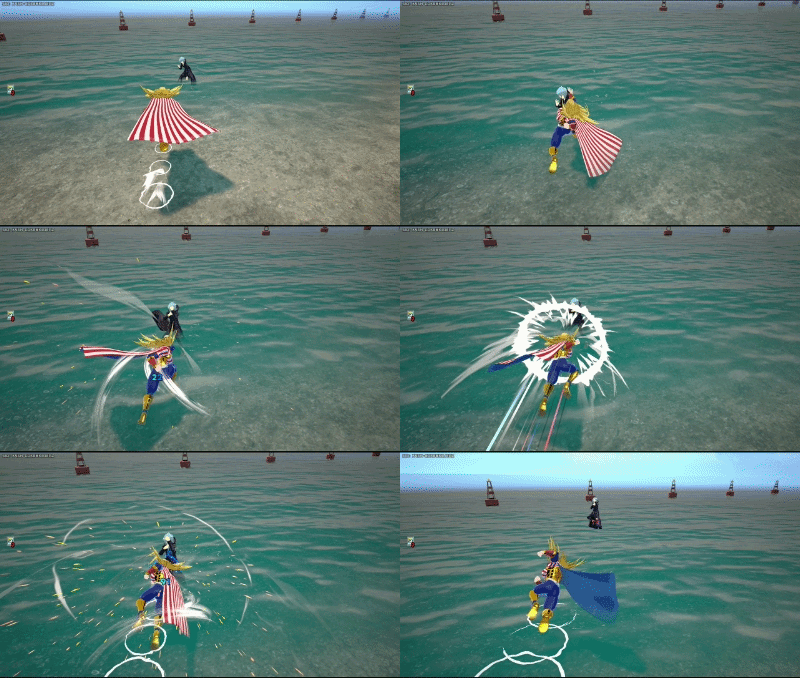
Alpha Ledge Cancel
Due Star being able to roll Alpha, you can roll after Alpha is thrown to cancel the recovery period when you move off a ledge. This allows you to perform any air action immediately after using Alpha.
Alpha Roll Cancel
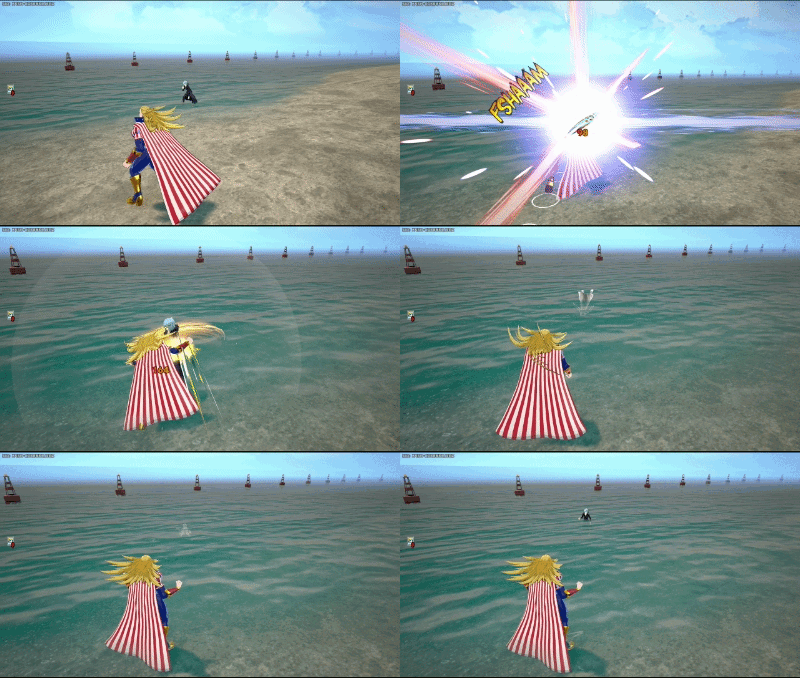
At a specific timing, rolling after Alpha can be cancelled into another action. The action can be any button press as long as a movement key is held. This allows Star to do untrue combo follow-ups from her Alpha.
This tech is much easier on Keyboard and Mouse, but is possible on controller.
When Alpha is double-tapped and roll is pressed at the timing, the recovery of Alpha and roll is instantly cancelled. This functionally doesn't do anything different that Alpha cancels does already, but is kind of cool.
From the front, this is visually the exact frame where roll should occur. This is not the timing where you start to press the button, but the one when it needs to be pressed down.
There are 3 different visual indicators for the timing that you can use:
The "FSH" from the onomonopeia
The ring beginning to spread
Star's arm reaching out.
FPS Manipulation
The cancel's time window is dependent on the frames per second of your game. On console, this is generally 60 fps minus Switch and on PC, this is more variable.
The lower the FPS, the easier the tech is to perform, with 30 fps being the easiest.
At higher FPS, you need to delay your timing slightly, the higher your FPS, the more you need to delay.
Cancel Examples
With good timing, Alpha rolls can be chained together. This can be done until Star runs out of ammo.
Good for keeping an enemy in place or setting up a death zone on a downed enemy
Good for catching an enemy off guard
Good for activating or deactivating Special during combat
Good for deactivating Special Action while keeping DPS uptime.
Great for starting combos
Good for quick burst damage
Alpha can be jumped out of to stay mobile.
Good for keeping mobile during a duel
Most practical use of Running out of an Alpha Roll
Strategy
Beta for Wake-ups
Beta is an excellent tool to prevent enemies from escaping on wake-up.
Due to Beta's long start-up and activation period, accurate placement is mainly used in a predictive manner rather than a reactive one. However, this is more lenient when Beta is level 9.
Whether fighting an enemy solo or with your team, you must be aware of knockdowns in order to set-up a wake-up Beta.
The most common knockdowns Star can get are from Gamma, Air melee, and Ground Melee.
Covering options
Flyers, Space Hop, and Gently Jump
Use Beta slightly above the ground, in the air.
Flyers will often will either jump and/or immediately use their movement option. By placing Beta slightly above ground, this ensures that you can cover ground options and air options. If they stay in the ground, they're still in Beta. If they go in the air, they're put in a significantly worse situation.
Like Flyers, Space Hoppers and to a lesser extent Gently Jumpers will use the tuning as a free way to get out. This is to your advantage as you can perform an air beta.
Construct characters
Construction characters generally build up from directly below them. Characters with platforms can cover Beta's line of sight by being placed underneath them.
To prevent this, you can Beta in the air and slightly off center of them to catch them in the air.
For Cementoss, he can simply place another Alpha to cover the Beta, but this isn't so bad as he uses up more of his resources.
Downed bait
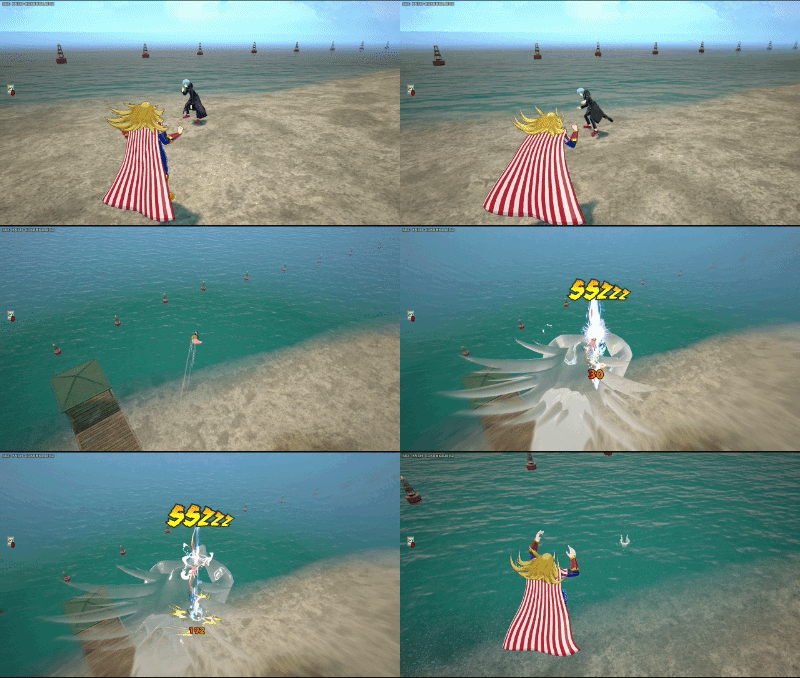
A downed enemy can be used as bait to setup a double Alpha pierce. When you down an enemy, teammates will generally try to save their ally. Once they get close to their ally, place beta to pull both of them and begin raining down Alphas on their downed ally.
The aim for this is to at worst case finish off their ally and at best case down another enemy.
This strategy can be countered by enemies with shields or place-able terrain. If you know they have either, then it's best to simply finish off their teammate.
Bait is set.
Air Beta
Catching an enemy in air beta is one of the most deadly situations to be placed in for most of the cast. The enemy is rendered completely helpless until Beta is finished and they land on the ground. Use this opportunity to get in free damage with Alphas, lock them down further with Gamma, or tack on damage with Alpha then Gamma while they're still helpless in the air.
Jump Pad
Jump pad is the easiest way to setup Air Beta and the most deadliest. The velocity of jump pad is too low to counteract the suction of Beta.
My game, my rules
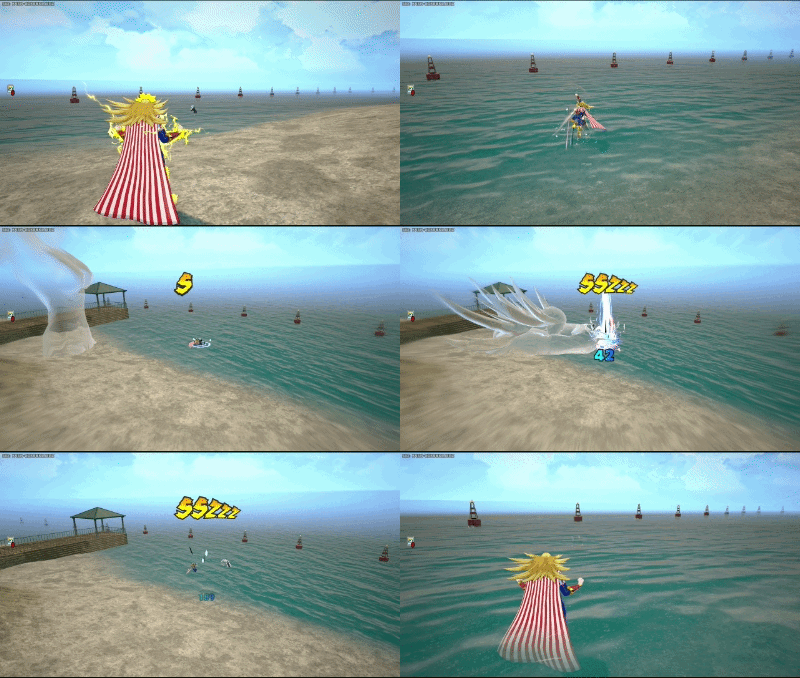
Ledge
Pulling enemies off of ledges is the 2nd most deadliest way to setup a death trap. Most of the cast will be pulled helplessly into the air. However, characters that can build structures can cover the center of Beta.
Yoink!
Storm Sickness Resets
A key part of Star's game plan is to use New Order to reset the poison sickness. This greatly extends the time Star can be inside storm.
Special action should be used to either heal to the large HP Recovery threshold or to reset poison sickness.
Once health is fully restored, the sequence for cycling healing is as follows:
Big Green -> New Order toggle -> Repeat
Tips:
While healing, it is a good idea to use reload cards in order to gain even more meter during the downtime.
If more Special Action meter is required but you're still very healthy, you can use small HP recoveries to recover more meter. This becomes more unfeasible the longer the game goes.
Refer to this guide for the HP thresholds to drink a large recovery.
Teamplay
Beta
Beta can be used as a defensive deterrent for enemies that are chasing your teammate as it will keep them in place for 3 seconds. If all else fails, sheer damage can be the best way to stop an enemy.
Beta can also be used to setup team combos or even extend team combos or depending on the situation.
Gamma
Gamma is a good option to keep enemies locked down, especially if they are distracted by your teammate. In rare situations, Gamma's laser can prevent entry in doorways because if an enemy comes in contact with the laser, they are vacuumed into the grab with their teammate.
Special Action
An incredibly underutilized portion of Star's kit is her Special action on teammates. Like for herself, Star can use Special Action to help her teammates recover in storm or extend their time in storm by resetting storm sickness.
Star's special action has infinite range, so you can easily help teammates that are deep in storm.
You must keep in mind both the positioning of your teammate, amount of Special Action you have, and the phase you are in.
Fighting against Star
This section is not specific to Star, but rather an expanded general section for people are looking for ways to counter Star or for Star players who are looking to counter strategies that other people may use against them. This section may repeat some things from above, so use this as a quick reference for yourself or someone else rather than a more detailed one.
Star is a large and slower character compared to most of the cast. Her hitbox is much easier to hit than other characters and all of her moves have a lot of recovery. As a team, it's very easy to focus her down. However, when left alone she can put you in bad situations later down the line.
Alpha
Alpha is quite slow, but hits very hard. Unlike other beamers, Star's Alpha has a start-up, meaning the projectile doesn't come out immediately. Because of this, there is a general rhythm to how Star shoots which you can learn to time your dodges.
However, Star has a way to counter this. She can also hold her Alpha to vary the timing. To counter this, you must also vary your roll timing.
Beta
Beta is a long ability that can easily put you in bad situations if you're careless.
When Star sets Beta down, depending on your character you will have different options to deal with it.
For characters that can build terrain, you want to cover the center of the Beta to cover it's line of sight doing so it will negate the vacuum effect.
For characters with shields, put up your shield for as long as possible even if the shield breaks. You want to prevent as much damage as possible even if you are protecting an enemy. This is because if Star's Alpha does a large collateral hit, it's bad for EVERYONE in the beta.
For everyone else or in general, below are the 2 rules when inside Beta:
Roll with varying timing and direction, and NEVER jump.
Varying your roll timing will require Star to adjust her Alpha timings to match the recovery of your roll, and varying your direction will make it much more difficult for Star to track you in the Beta.
Jumping mid-air can get you stuck mid-air, which will leave you susceptible to any attack for 3 seconds. This means Star can easily get 2-4 Alphas on you, untuned without the strike passive this can be at most 340 damage.
Gamma
Gamma has a lot of start-up and a lot of recovery. On reaction, you can dodge her Gamma and punish with nearly any move of your choice. When her Gamma is used in the air and you're a beamer character, you can easily take one free shot on her.
Special Action
Special Action prolongs Star's time in storm. The best way to deal with this is to take short trades against Star within storm. This prevents her from healing and will force her to use Special Action meter to reach healthy HP thresholds.
If you down a Star in storm, always KO Star. If Star has enough special action and the phase is 4 or below, she can self-revive within Storm or she can stall out her timer until a teammate arrives.
Combos
The different ways you can combine and chain various skills for higher damage within 500 DP (Downpower). The downpower of Star and Stripe's abilities are as follows:
Alpha: 90 DP
Beta: - DP
Gamma: 1 DP (per small tick), 20 DP (total for small ticks), 500 DP (for final burst)
"Melee 2 and Melee 3 will be referred to as 'Melee 2' due to the hits being forced together."
Melee 1: 200 DP
Melee 2: 0 DP
Melee 3: 300 DP
Air Melee: 250 DP
The text of the combos below will be colored by how true they are, in this case, we will define as "True" combos that, without 3rd party or tuning interference, can only be escaped/interrupted by Overhaul and/or Mirio, as those are special cases.
White Text means that part of the combo is True on both GP and HP. Green Text means that part of the combo is True if the target is on HP only or the hit guardbreaks. Blue Text means that part of the combo is True if the target is on GP only. Red Text means that part of the combo is Untrue, and therefore the enemy can escape it.
Melee 1 provides a long amount of hitstun and can be used to get an Alpha off or Gamma depending on if the opponent has GP or HP.
An air beta catch can make many combos true for most characters. This is because enemies cannot roll to avoid incoming damage, but some characters with counters or ones that can make structures can.
Gamma can trade with enemies causing you to get out of your grab animation early, but still applies the incredibly long stun to an enemy. This essentially allows you to combo them with pretty much anything you can throw at them until they reach the ground 3-4+ seconds have passed in the air and they decide to tech.
Combo Table
This table is for quick reference for combos. All combo damage is based off of base damage values at level 9 with Star's strike role passive applied. Below the table provides a visual guide for the combos themselves.
Basic combo used when falling down on an enemy. It gives quick burst damage and knockdown.
Melee 1 -> Air Melee
Basic combo that's significantly less damage than finishing her melee string, but used in the extremely rare case of bad spacing or height where Melee 2 will whiff.
Basic DMG- (There's no image for combos that do less than 100 :C )
True on HP Basic combo that does great damage and can proc melee tunings.
Electrocution -> Gamma
Electrocution can make hitting raw Gamma more consistent. Electrocution can prevent the enemy from going high in the air after the uppercut, but will still perform the command grab. This will keep Gamma low to the ground which can be a mixed blessing.
Melee 1 -> Melee 1 -> Air Melee
Another basic combo that's less damage than finishing her melee sting, but has higher lockdown time.
Melee 1 -> Melee 1 -> Melee 2
Decent damage and easy melee combo that works on both GP and HP.
Great damage combo that is true on HP and true on GP with acceleration. Works amazingly with melee tunings.
Air Melee -> Electrocution -> Gamma
Spacing dependent combat which can be ruined if done at close range. Air Melee's hit will proc Electrocution which will allow time to recover and do Gamma.
If Electrocution is procced first, then Air Melee will simply knockdown the opponent.
Devastating damage alternative combo. Alpha -> Melee can be rolled and Melee -> Gamma must be on HP or with Acceleration on GP to be true.
Team Combos
Star's kit allows for nasty team combos. This section does not cover specific moves that combo into each other, but rather focuses their properties to generalize their usage.
Team Combo Theory
Forced Ground Bounce
Forced Ground Bounce states in the air cannot be recovered from until they hit the ground or reach the down power threshold.
Star's Beta can extend the air-time of a ground bounce for up to 3 seconds.
This allows for potentially extreme damage before an enemy is knocked down.
Air melee follow-ups
Star's air melee does a fairly long duration launch on HP. This opportunity can be used by teammates to follow-up off your attack.
Star's Gamma as a combo starter
Although hard to hit, Star's Gamma is one of few grabs that have no team damage scaling. This means while an enemy is grabbed by Star, her teammates can fire at them for 100% damage.
Grab Chains
Whether from a teammate's melee grab or a tether-style grab, Star can Gamma as a follow-up for incredible burst damage.
Generally the type of finisher on a grab is the most important part of a grab. Depending on your teammate's build and character, Star's grab can be worse or better than theirs.
A general rule is if an enemy has GP, HP finishers take priority. If they are on HP, the highest damage ender takes priority. Star's grab has very low continuous damage, but a very high damage finisher.
This video showcases the potential of Star's Special Action for poison mist stalling.
This video showcases Star's team potential with a "bunker" team comp and a little bit of storm
play.
This video showcases Star's damage potential, ability to cover for her team, and set up ambushes from
poison
mist.
Normal Tunes
Quirk Skill α Attack Power+
Alpha is Star's most consistent damaging ability and very high
damage.
HP Attack Power+
Star can easily destroy an enemy's shields, so HP damage will
generally
happen quickly.
Quirk Skill γ Attack Power+
Although Gamma is very inconsistent, it still does tremendous
damage when
it does hit.
All other Strike small tunings
GP Attack Power+
GP Attack Power+ allows for Star to get consistent shield
breaks against an enemy's defensive tunings.
HP Defense+
Star can easily destroy an enemy's shields, so HP damage will
generally happen quickly.
Quirk Skill α Defense+
Due to Star's larger hitbox, she is easier to hit with beamer
projectiles. Quirk Skill α Defense+ helps to mitigate this.
All other Assault small tunings
Quirk Skill γ Attack Power+
Star's Gamma does incredible damage.
Quirk Skill α Reload+
Star's Alpha has a fairly long cooldown if fully exhausted.
Quirk Skill γ Reload+
Star's Gamma reload can be fairly long per charge and at lower
levels. It's good to have more long-ranged mobility and good punishes
Quirk Skill β Reload+
Star's Beta is not too bad of a cooldown, but having uptime on
it is very good for lockdown.
Melee Attack Power+
Star's Melees are decent. Her Air Melee has great tracking and
Ground Melee has a lot of stagger for combos.
All other Rapid small tunings
Max HP+
Star's HP pool is above average, meaning she gets more usage
out of Max HP+ than most of the cast.
Max GP+
Max GP+ is great for tanking extra damage before getting
staggered heavily on HP.
All other Support small tunings
Quirk Skill α Attack Power+
Denki provides reload and Alpha damage for Star both of which
are what Star wants.
HP Defense+
Shigaraki provides HP defense and Alpha reload which is great
for Star's high HP pool and Alpha uptime.
Special Action Reload+
Special Action Reload is great for playing within Storm.
Quirk Skill γ Attack Power+
Although Gamma is very inconsistent, it still does tremendous
damage when
it does hit.
Quirk Skill γ Reload+
Star's Gamma reload can be fairly long per charge and at lower
levels. It's good to have more long-ranged mobility and good punishes
Quirk Skill β Reload+
Star's Beta is not too bad of a cooldown, but having uptime on
it is very good for lockdown.
All other Technical small tunings
Special Tunes
Tuning categorizations
Highly Versatile 🧰
These tunings can be used a plethora of situations, synergizes extremely well with Star's kit, or can potentially change how Star plays.
Personal-Preference 🛠️
These tunings have good uses when needed and are ultimately up to a player's own individual playstyle.
Niche 🔨
These tunings have rare use cases and are often used in specific playstyles or gimmicks.
General Playstyle
These special tunings are geared towards general play with a focus on self reliance.
Wall RunnerHighly Versatile 🧰
Although, it has a bit of a skill floor. Wall runner allows for much more consistent movement for Star without any long recovery periods.
Bunny HopHighly Versatile 🧰
Bunny Hop lets Star create distance from a bad situation without the need for Gamma and it's long recovery all while having extra mobility for wall jumps.
AccelerationHighly Versatile 🧰
Acceleration is fairly easy for Star to proc via Air Melee. Once she does, she can play extremely aggressively and overpower her enemies with speed and damage.
Revenge SupportHighly Versatile 🧰
Revenge Support synergizes extremely well with New Order. Revenge Support doesn't work while inside of storm, but New Order overrides storm and allows it to function. New Order healing and Revenge Support is an insane combination to outlast enemies inside of Storm.
High-Speed HP ReplenishmentHighly Versatile 🧰
High Speed HP Replenishment allows Star to have more downtime while inside of Storm and can quickly top-up in low-hp scenarios in storm.
Space HopHighly Versatile 🧰
Space Hop provides great on-demand vertical mobility for Star and pairs nicely with her Gamma or Air Melee mobility.
Critical PermeationHighly Versatile 🧰
Critical Permeation is great for stalling out for Star's cooldowns while also being able to drink during so.
FixerPersonal Preference 🛠️
With the right small tunings, Fixer dramatically increases Star's already absurd damage. It ensures consistent damage thresholds to break shield or downs within a certain amount of ammo.
WillpowerPersonal-Preference 🛠️
Willpower is great for stalling out a fight. With Special Action, she can recover from within storm where most characters would die. Keep in mind, Star's mobility is slower than other characters, so Willpower can not always get you out of a fight.
Ability ManifestPersonal-Preference 🛠️
When combined with Special Action and Green cards, ability manifest can greatly prolong time within storm and potentially win storm fights.
Quick ReloadPersonal-Preference 🛠️
Although Star's Alpha has a slow attack speed, Quick Reload allows for Star to finish enemies that she otherwise wouldn't or lay in further pressure on enemies that are still alive within Beta.
Special Action Reload BoostPersonal-Preference 🛠️
Special Action Reload allows you to play in and out of storm whenever you down an opponent. Although it's good for extending time in storm, you may not always get to use it depending on the phase of the match and the storm's proximity to your fight.
EmbrittlementPersonal-Preference 🛠️
Embrittlement is fairly easy for Star to proc with air melee and can greatly boost her already strong damage output. On enemies on HP, Star's ground melee can combo into Gamma causing devastating damage.
Quirk Factor ReleasePersonal-Preference 🛠️
Star can very easily achieve guard breaks. QFR can help keep pressure in fights or buy time for Special Action to reload.
Gently LeapPersonal-Preference 🛠️
Gently Leap allows for Star to gain height without the use of Gamma and provides great air control for Star. Beta can help stall for the charge-up period for Gently Leap.
Speedy Self-ReviveNiche 🔨
Because of Star's ability to use Special Action on herself while in a downed state, Speedy Self-Revive can potentially allow you to revive within Storm if enemies are not thorough in finishing you.
HP SuckerNiche 🔨
HP Sucker allows you to recover in very close storm fights or provide a second wind when downing opponents.
ElectrificationNiche 🔨
Electrification allows for Gamma to consistently hit by keeping enemies in place, but this is not fool-proof as enemies can i-frame through the electrification via roll.
Support Playstyle
These special tunings are geared towards players that enjoy supportive playstyles revolving around using team heals and keeping enemies off teammates.
Twisted FortuneHighly Versatile 🧰
LET'S GO GAMBLING!
Star can stay within storm for an extremely long period of time. With Twisted Fortune, Star can do so while helping her team with a steady stream of heals.
EmbrittlementPersonal-Preference 🛠️
Star can proc Embrittlement relatively easily with air melee's tracking and can combo into it when paired with acceleration. Star's air melee can allow for team combos as it doesn't perform a regular knockdown if it's the first hit.
Divine ProtectionPersonal-Preference 🛠️
Star can easily make plays within storm and being able to open a big box with little to no risks due to special action is a large boon.
Annihilation works well within pre-made teams where you can communicate the whereabouts of enemies and cover entrances. This has variable effectiveness in Solo queue where teams are much more disorganized.
PerceptionNiche 🔨
Perception isn't the worst melee tuning for Star because it benefits her teammates in a chase. However, you will have a hard time catching up with your teammates.
Speedy Civilian RescueNiche 🔨
Speedy Civilian Rescue is a great tuning for a "healbot" playstyle. It lets you start healing your teammates very early in a match.
If you prefer playing aggressive, consider giving some of the team heals to your teammates.
This tuning can be fantastic when paired with Twisted Fortune (Nejire - Fairy).
Recommended Builds & Costumes
Costumes
Costumes are rated based on their overall value for build diversity. For specific builds, go down to the build section.
Below is the key for costumes:
Budget 💵
This costume is for budget builds.
Low flexibility 📉
This costume is best used if you desire a playstyle that only that costume can facilitate, like the color, or have roll tickets/hero souls to spend.
High value 📈
This costume is incredibly flexible for different builds.
Hero Costume
Budget 💵
Support Slot:
Revenge Support/Compression Magic/Twisted Fortune
These builds are great for learning how to play Star.
Recommended for Experienced Players ✨
These builds are more punishing for mistakes and generally have weaknesses that require game fundamentals to overcome.
Recommended for Stacked Teams 👩👦👦
These builds require good team coordination to work properly. These are generally best used for competitive tournament environments where your weaknesses can be mitigated through teamwork or team composition.
Recommended for Fun 🎉
These builds are not consistent, but can be fun to play when they work.
Tank
Playing Cards - Queen (Burning)
Recommended for Beginners 🔰
Instead of Strengthening Star's weaknesses, this build aims to double down upon Star's strengths
using her above average HP and ability to play within storm as a way to survive.
Due to the high amount of damage Star can take, it's recommended to stand and fight while both
revenge tunings are ticking down. By the time both are up, hopefully your team can come and
help.
This build is GREATLY enhanced with teammates that can provide cheap GP recovery such as Support
Nejire and Support Twice. It effectively makes you similar in tankiness to the immortal Shigi
build.
High-Damage Mobility
Playing Cards - Queen
Recommended for Beginners 🔰
This build maximizes Star's Alpha damage and utilizes movement fundamentals to survive. It offers a good balance of survivability via movement and damage.
Wall Runner provides great movement for Star in most maps aside from U.S.J. (Map 1) where it can be very open. If you prefer more defensive mobility, Bunny Hop is also a great alternative for Wall Runner. If you prefer more a more aggressive playstyle, Acceleration is another good alternative for Wall Runner.
With fixer, Star can effectively 3 shot any shield regardless of an enemy's tunings. Versus a team of 3 assault characters, she can 3 shot any shield if the enemy does not have tuning.
Defensive Brawler
Playing Cards - Queen
Recommended for Beginners 🔰
This build is focused brawling to make the most use out of Air Melee and Gamma, while having a plan B against getting rushed down.
Acceleration is easy to proc via Air Melee. Once procced, you can melt an opponent's GP via Alphas, then once they're on HP, go for raw gamma if you're electrified or melee combos when not.
Electrification can allow you to consistently hit Gamma and provides a defensive barrier for you against melee opponents.
High-Damage Snowball
Playing Cards - Queen
Recommended for Experienced Players ✨
This build is made for snowballing off of Star's high damage. If you get early kills, you can quickly get Alpha to level 9 via card duplication and begin overpowering enemies through sheer damage via fixer.
Absolute Storm Rat
Playing Cards - Queen (Horizon)
Recommended for Experienced Players ✨
This build is very flexible and provides survivability for Star to get in and out of fights via Storm camping.
Critical Permeation allows for breathing room incase you get in a bad situation. This tuning can also be great if you have Special Action running already. This can be swapped for High Speed GP Replenishment to have extreme up-time in storm until the middle of Phase 7. Keep in mind if you run both Replenishment tunings they will run out at roughly the same time.
High Speed HP Replenishment is amazing for playing in storm as you will quickly be able to top up from people chasing you inside of storm. This can be swapped for Ability Manifest to make use of Green Cards.
Team Storm Rat
Casual Style (Combat)
Recommended for Experienced Players ✨/ Stacked Teams 👩👦👦
This build is more support oriented. It allows for Star to separate from her team when needed and go inside of storm.
Divine protection allows for Star to get box within poison mist and maintain match momentum.
Warp Heal allows you to help your team while inside of storm.
Any of the Special slots can be swapped for Revenge Support, Regenerating Heal, or Twisted Fortune. Be sure to swap out green small tuning properly if you do.
Team Hunter
Playing Cards - Queen (Twilight)
Recommended for Stacked Teams 👩👦👦
This build is tailored for systematically killing one enemy team member and hunting down the rest of their team.
Quick Reload allows Star to finish off a target quickly or continue the pressure against the enemy team.
Annihilation allows Star and her team to hunt down the remaining enemy team members.
All-out Gamma Damage
Playing Cards - Queen (Lemongrass)
Recommended for Fun 🎉
This build focuses on melee combos and Gamma. Your game plan is to try to break an enemy's GP in order to land Ground Melee 1 and get a guaranteed Gamma.
Fixer's tuning column in this skin allows for 3 Gamma Power+ and a GP Attack+
Embrittlement greatly increases your Gamma damage via Ground Melee Combos.
Izuku Midoriya (Default)
Difficulty Score: 🟡Even🟡
Deku is an all-rounder beamer character. This match-up is purely an aim battle, while baiting out other moves. Deku has more mobility than Star and has good options at close range to stuff out Gamma or Melee, however they have high recover like her moves. In terms of damage, both Star and Deku are essentially equivalent. Deku does slightly more damage per second, but has to hit more shots than Star.
Tips vs Izuku Midoriya (Default):
Since Deku often times wants to Beta or Gamma to create distance or height, a well timed Beta can trap Deku in the air for a free punish.
Be wary of Deku's Beta at close range. At worst, he hits you out of melee or Gamma. At best, you trade.
Keep your movement unpredictable as to not get hit by Deku's Gamma. Should he hit it, he will do devastating damage to you.
Izuku Midoriya (Full Bullet)
Difficulty Score: 🟡Even🟡
Similar to Assault Deku, Full Bullet is also a beamer character, but with different utility. Also like assault Deku, this becomes an aim battle match-up. The only thing Star must worry about is his close-range capabilities and the inability to chase him within corridors. Full Bullet's damage is much greater than hers, but his toolkit is easily countered by Star's toolkit.
Tips vs Izuku Midoriya (Full Bullet):
If you think Deku will Gamma, place Beta above Deku to catch him in the air.
Deku's Gamma leap doesn't have much air control, so the pattern at which he jumps will be consistent meaning it is easier to shoot at him if you remember the trajectory.
Be careful indoors vs Full Bullet, his Gamma and Beta do incredible damage when they land.
Izuku Midoriya OFA
Difficulty Score: 🔴🔴Very Unfavorable🔴🔴
OFA Deku is an all-rounder speedster. He outpaces Star, will lock her down, and will stay on her. Much like her, OFA Deku can roll out of his Alpha to maintain i-frames. His air melee is very difficult to deal with as Star without prep time and he can close the distance on her very quickly.
Tips vs Izuku Midoriya OFA:
If needed, play inside of storm versus OFA Deku, his health pool is very low compared to yours. Make sure you have Special Action running during engagements.
Beta is your saving grace in this match-up. You can prevent Deku from rushing or escaping you by catching him in the air.
Sparingly use Gamma in this match-up as it's very easy to dodge and punish for Deku.
Katsuki Bakugo (Default)
Difficulty Score: 🟡Even🟡
Much like other beamers, Bakugo is an aim match-up, however he has a reaction check with his Gamma and strong burst with Beta grenades. Star must be able to punish Bakugo when he uses Gamma and be able to hit Bakugo in the air.
Tips vs Katsuki Bakugo (Default):
Make use of Beta to catch Bakugo in the air. The best times to use it are after a knockdown or after he's used up all of his Special Actions.
Keep distance from Bakugo to make it awkward to hit his Gamma. React accordingly when he attempts it.
When at close range, be ready at any time for Bakugo to use his Gamma. You can roll after using Alpha to stay mobile and invulnerable.
Weave in rolls and movement to mix up your timings against his Beta and Alpha.
Katsugi Bakugo (Machine Gun)
Difficulty Score: 🔴Unfavorable🔴
Machine Gun is a disruptive aerial character. Due to his sporatic movement, he is incredibly difficult to hit for Star. Star can control Bakugo with Beta to get hits in, but he will escape eventually. Every attack needs to count and you need to make the most out of every knockdown you get.
Tips vs Katsugi Bakugo (Machine Gun):
If Bakugo is moving towards you, then he is very likely going to use Gamma right next to you. You can use an air Beta to catch his Gamma and keep him trapped in the air.
Katsugi Bakugo (Cluster)
Difficulty Score: 🔴Unfavorable🔴
Cluster is the in-between of Machine Gun and default Bakugo. He doesn't excel better than the niches of the other two, but does specific things they do better. He has great damage, good mobility, and strong knockdowns. Bakugo's knockdowns make it difficult for Star to get damage in and he generally moves further away as he does it.
Tips vs Katsugi Bakugo (Cluster):
Bakugo's Gamma is difficult to hit in motion, wait until after the explosion for an easy shot.
Bakugo is generally in the air. Try to use an air Beta to trap Bakugo in a bad situation.
If you have sparks attached to you, try to wait the sparks out or shoot from cover to prevent a knockdown. A knockdown on you will allow Bakugo to leave or set up another Beta.
Ochaco Uraraka (Default)
Difficulty Score: 🔴🔴Very Unfavorable🔴🔴
Ochaco is one of the hardest characters to hit in the air. Due to zero gravity and already strong air control, she can change her trajectory very easily. Because Ochaco will get away eventually, Star must hit her shots and use Beta to keep Ochaco in place.
Tips vs Ochaco Uraraka (Default):
The easiest points to hit Ochaco are when she throws Beta which you can shoot Alpha and immediately roll, and when Ochaco uses her Gamma, where she stands completely still.
Sometimes you cannot kill Ochaco, you must play for long term because as the zone shrinks, Ochaco has less places to go.
If you know Ochaco likes to Alpha immediately after a wake-up, use Beta to trap her in the air and punish her.
Ochaco Uraraka (Zero Satellites)
Difficulty Score: 🟢Favorable🟢
Zero Satellites' moves are very telegraphed which make them easy to dodge. Star does need to be careful as Ochaco can easily match Star's damage. As long as Star doesn't play greedy, she can win easily.
Tips vs Ochaco Uraraka (Zero Satellites):
Star's Beta can pull Ochaco off her Gamma platform if it is high enough level.
Although Ochaco's Beta lasts longer than Star's Beta, it's a good choice to waste duration on Ochaco's Beta.
If Ochaco's Gamma is up, avoid using Gamma to punish as it will likely trade or at worst, get caught before the grab hits.
Play grounded versus Ochaco as everything is reactable and rollable.
Play at distance versus Ochaco since it takes a considerably longer time for anything she throws out to come at you.
Tenya Iida
Difficulty Score: 🔴Unfavorable🔴
Iida can be incredibly difficult to shoot and lockdown due to his high mobility. He can easily lockdown Star with his classic Alpha -> Alpha -> Beta combo. Star must land her shots or fight during iida's down times.
Tips vs Tenya Iida:
Before burning out, iida players like to go in the air to create distance and stall out the burn out period. This is the perfect time to use Air Beta and trap him.
Iida can easily roll out of any level of Star's Beta. Try to time your shots to when he rolls. If you're feeling reckless, you can try to melee him during that time.
When Iida is on the aggressive, Beta can stall for your escape or even trap him in the air.
Shoto Todoroki (Default)
Difficulty Score: 🔴Unfavorable🔴
Todoroki can punish Star heavily at distance or at close range. Due to Star's high recovery on her moves, Todoroki can easily get 2 Alphas on her. If Star uses Beta, Todoroki must simply use Beta to cover that angle. Star must make use of high ground or movement to gain an advantage versus Todoroki.
Tips vs Shoto Todoroki (Default):
Keep outside of Beta distance when fighting Todoroki.
In corporate rolls and sprint jumps as you fight Todoroki at distance, this will make it difficult to hit you with Alpha and Gamma.
Avoid using Gamma when low HP and in open spaces, it's 2 free Alphas for Todoroki if their aim is decent.
Todoroki's Gamma lasts longer than Star's Beta, but he is still stuck within her Beta. Use Alpha as much as possible during that time and avoid using Gamma as you can get frozen from the ice path.
Shoto Todoroki (Ice Fang Wind Flame)
Difficulty Score: 🟢Favorable🟢
Todoroki has very strong area control and a good projectile that can repeatedly knock down Star. However, due to Star's ability to roll her Alphas and dash over his Gamma. She can have a much easier time than most character at dealing with Todoroki.
Tips vs Shoto Todoroki (Ice Fang Wind Flame):
Play within mid-close range versus Shoto. Avoid playing long range to not have your Alphas blocked out by Gamma and aiming at a small enemy. Avoid playing point blank to prevent getting frozen by Todoroki's Alpha.
Todoroki's Gamma will prematurely stop Star's Beta, but not destroy it. You can use this to keep him in place while you move past his Gamma.
Because Star can roll after she uses Alpha, you can play fairly aggressive versus Todoroki. Make sure you are on solid ground and not the icicles as you will lose i-frames when you're in the air.
Tsuyu Asui
Difficulty Score: 🔴Unfavorable🔴
Tsuyu is one of the hardest characters to hit in the air, however she must be within melee range to do considerable damage to Star. Star can easily destroy Tsuyu if she is not careful.
Tips vs Tsuyu Asui:
Play within storm if chased by Tsuyu, but be careful of her burst if she commits. As long as you play safe, you will always outlast Tsuyu due to your health difference.
On a knockdown, use air Beta to trap Tsuyu. Tsuyu will always want to jump into Alpha in order to move away, but this will doom her.
Tsuyu Asui (Froppy Hopper)
Difficulty Score: 🟡Even🟡
Need more data
Tips vs Tsuyu Asui (Froppy Hopper):
Need more data
Eijiro Kirishima (Default)
Difficulty Score: 🟢Favorable🟢
Kirishima is easy to deal with for Star. He has very telegraphed attacks which is easily punished with Alpha or Gamma and is very easy to keep under control via Star's Beta. Don't underestimate his damage though.
Tips vs Eijiro Kirishima (Default):
Stay grounded when close-ranged to be able to roll and keep your distance.
Star's Beta can easily hold Kirishima in place in order to create distance between you and him.
Delay your wake-up to avoid getting hit by his Gamma.
You can easily run away from Kirshima via Gamma, but he can catch up with his Beta. You can use your own Beta to stall.
When Kirshima appraoches you with Alpha, roll towards him as he cannot steer his Alpha too well.
Eijiro Kirishima (Red Drive)
Difficulty Score: 🔴🔴Very Unfavorable🔴🔴
Red Drive is an incredibly difficult character to deal with for Star. His shield lasts a very long time and he can combine it with his movement tech to safely get away. There are very few windows for Star to attack Kirishima.
Tips vs Eijiro Kirishima (Red Drive):
Avoid using Gamma for anything, but a punish.
Kirishima's Gamma has a good amount of recovery which makes it easy to punish via Alpha.
Beta can keep Kirishima in place to either waste duration on his Beta or pull him out of a corner. It can particularly good to keep Kirishima in storm with Beta to put pressure on him, even if he blocks everything with his shield.
Denki Kaminari (Default)
Difficulty Score: 🟢Favorable🟢
Kaminari has great damage and a gimmick that will make that damage very consistent. However, he struggles against a character that can lock him down or play at distance versus him. Star is one such character that can do both.
Tips vs Denki Kaminari (Default):
Play at distance versus Kaminari. If you have to play close ranged, then be wary of his Gamma. One hit will lead to a lot of damage on your end.
Kaminari is very easy to lockdown with Beta as his Gamma is very short ranged when used as an escape and very slow.
Don't approach Kaminari if he's under the effects of his Special Action.
Denki Kaminari (Lightning)
Difficulty Score: 🟢Favorable🟢
Lightning is a character that likes to perch up on high ground in order to rain down projectiles. He is very vulnerable when caught off guard and has a hard time escaping when locked down. Star can lock Kaminari down and poke him with her Alpha from a relatively far distance.
Tips vs Denki Kaminari (Lightning):
Many Lightning players use Space Hop, Spiraling Leap, or Gently Jump. Aim to shoot them at the apex of their jump or on the way down.
Beta can be used to keep Kaminari in place or even trap him in the air.
If Kaminari has a height advantage, avoid playing out in the air or in open space.
Kaminari's mid-range capabilitie are very poor, try to stay outside of this unaimed Alpha range while being close enough to punish his aimed Alphas.
Momo Yaoyorozu
Difficulty Score: 🟢Favorable🟢
Momo is a character that has great close-ranged capabilities and can hold an area extremely well. However, when out in the open, Momo is extremely vulnerable to flying characters. Star can keep in the air relatively well and rain down upon Momo. Star can also pull Momo out of a building or group up her and her teammates via Beta and put down devastating damage.
Tips vs Momo Yaoyorozu:
Keep your distance against Momo if you can, she deceptively good at close range due to her Alpha.
You can keep Momo under control with your Beta to force her to use her own Beta.
Stay in the air via Gamma or Air Melee to avoid Momo's attacks.
Fumikage Tokoyami
Difficulty Score: 🔴Unfavorable🔴
Tokoyami is a versatile character with extremely strong lockdown and great mobility. He can easily lock down Star and stall for his own cooldowns. Star has to breach through his Gamma in order to get to him and be able to hit him in the air while he quickly glides away. Star must use her resources to force Tokoyami to use his own.
Tips vs Fumikage Tokoyami:
Although his Gamma reloads relatively fast, it's good to try to break Tokoyami's Gamma in order to put pressure on him.
After Tokoyami uses Beta, he's much more vulnerable as that is his strongest lockdown tool outside of his Black Ankh form.
Delay your wake-up whenever possible to prevent Tokoyami from hitting you immediately on your wake-up.
Beta is a great way to force Tokoyami to use his resources to get away.
If Tokoyami is drinking in the sky, you can use Alphas to tag him or even use Beta to keep him trapped in the air.
Keep track of how many times Tokoyami leaps and if he is in Black Ankh or not. If he leaps 3 times, then he is out of Black Ankh resources and is extremely vulnerable.
Neito Monoma
Difficulty Score (Base Skills): 🔴🔴Very Unfavorable🔴🔴
Base Monoma has all the tools to slip out of Star's toolkit. Although Monoma cannot get out of Star's Beta, he can simply use Gamma to eat any attack and use it against for any subsequent attacks. His Beta has a relatively easy trajectory to track, but when combined with Gamma to eat an attack or even other stolen quirks, he can easily get outside of Star's Alpha range.
Tips vs Neito Monoma:
Try to waste Monoma's Gamma cooldown with your attacks. He will get your gamma in place, but it has a long recovery period where you can attack him.
Beta can prevent Monoma from leaving leading to easy and free Alphas.
Be very careful getting to close range versus Monoma. His burst damage via Beta -> Beta can easily break your shields.
Itsuka Kendo (Default)
Difficulty Score: 🔴Unfavorable🔴
Kendo is an incredibly strong close range character that does incredible damage, good defense, and has decent mobility. Star break Kendo's shield or fight her when she distracted.
Tips vs Itsuka Kendo (Default):
Keep your distance against Kendo and don't be afraid of using Beta to stall for you.
Make use of your Alpha rolls to avoid Kendo's Gamma.
Play in the air against Kendo to prevent her from getting consistent damage on you. If Kendo has movement tuning, play more grounded and try to avoid what she throws out.
Don't underestimate the speed at which Kendo can close the distance. Her sprint speed is very fast and when combined with her movement tech, she can get close to you within seconds.
Itsuka Kendo (Twin Palm Strike)
Difficulty Score: 🔴Unfavorable🔴
Twin Palm Strike has great damage, strong mobility, and good lockdown. Star can keep Kendo in check with her Beta, but must be careful when Kendo closes the distance and versus Kendo's Charged Alphas.
Tips vs Itsuka Kendo (Twin Palm Strike):
Kendo's Alpha takes a while to charge up. Counter poke with Alpha and roll after throwing it out.
Play grounded versus Kendo in order to roll against her moves.
Beta keeps Kendo in check as she cannot leave Star's Beta with her own Beta or Gamma
When Kendo is in defensive stance, never use Melee or Gamma against her as it will charge up her Beta into an extremely high damage punish.
Although you do give her more damage, sometimes it's better to keep pressure on Kendo by doing damage to her during her Beta. Keep in mind the nuance of you and your teammate's positioning.
Ibara Shiozaki
Difficulty Score: 🟢Favorable🟢
Ibara is high damage character that has good damage at close and long range. However, at mid-range, she can struggle due to her high recovery on every single one of her moves. This paired with base movement makes her easy to target.
Star can exploit these weakness by playing around long and mid-range while shooting Alphas, punishing with Gamma on long recovery moves such as Ibara's Beta, and using Beta to keep Ibara in place.
Tips vs. Ibara Shiozaki:
Stay around long to mid-range vs Ibara as at close-range she can easily turn a fight with her grab.
Always try to punish Ibara after she uses a move. Alpha is the safest punish and is very consistent with good aim. Gamma is the slowest, but has stronger lockdown.
If you know Ibara is looking at her teammate, it can be good to use Gamma prevent her from reviving.
Make use of your ability to roll after Alpha to stay mobile and avoid her Alphas.
Mirio Togata (Default)
Difficulty Score: 🟢Favorable🟢
Mirio can be a difficult character to keep locked down, but when he does get hit he explodes. His Alpha, Beta, and Special Action allow him to ignore Star's Beta. His attacks are very telegraphed and are easy to dodge. Star must deal damage in the few moments that Mirio let's himself be vulnerable.
Tips vs Mirio Togata (Default):
If Mirio's special action is down, he is very vulnerable. Keep track of his usage to gauge whether it's down.
When punishing Mirio's beta, don't commit to a Gamma unless you know his Special Action is down. Mirio can simply permeate and punish you for attempting to do so.
Mirio's uncharged Alpha is very fast, but has a limited range. Keep your distance when fighting Mirio, so you can rule out that option.
You can play within storm versus Mirio as your health pool is much higher than his.
Mirio Togata (Sheer Counter)
Difficulty Score: 🔴🔴Very Unfavorable🔴🔴
On top of being invincible most of the time, Sheer Counter boasts great damage and relatively good mobility without tuning. Star must be very careful when throwing out her Alpha against Mirio and try to wait until he is on cooldown to strike.
Tips vs Mirio Togata (Sheer Counter):
Vary the timings at which you fire your Alpha to keep Mirio guessing on his Gamma. You can make use of being able to hold Alpha to keep it unpredictable.
Be very careful when firing Alpha in a crowd with Mirio as the splash damage can activate his Gamma.
Depending on the timing of Alpha and the Mirio player's ping, your direct hit can do damage to Mirio, but the explosion can be parried, causing a punish on you.
Gamma at times can be very slow to punish Mirio's Gamma, you must do it immediately or just choose to punish with Alpha.
Beta is fairly useless in this match-up as Mirio.
Tamaki Amajiki
Difficulty Score: 🟡Even🟡
Tamaki is a strong self-sufficent beamer character that has great damage combos from his pull. Star must out aim Tamaki while trying to stay safe to avoid Tamaki's pull.
Tips vs Tamaki Amajiki:
Play grounded versus Tamaki in order to avoid his pull and Beta. Make use of Star's ability to roll after throwing out Alpha.
Tamaki's Alpha has a fair amount of recovery, aim to punish a miss with your own Alpha.
Use Beta to keep Tamaki locked down and punish any usage of his Beta or Special Action.
Nejire Hado
Difficulty Score: 🟢Favorable🟢
Nejire is a flying character with slow, but high up-time air mobility and great damage. If Star's aim is decent, she can put a lot of pressure on Nejire and even trap her in the air where she is incredibly vulnerable.
Tips vs Nejire Hado:
Attack Nejire when she is dashing or hovering. Aim slightly forward when she dashes as she reels back during the recovery.
You can use Beta when Nejire charges her Gamma in order to trap her in the air.
Nejire Hado (Fairy)
Difficulty Score: 🟡Even🟡
Fairy has incredibly large projectiles, sporatic movement, and self healing to boot. Star will find herself in an aim war with a character that can hit her much more easily than Star can and can perform stat checks by healing themselves.
Tips vs Nejire Hado (Fairy):
Use Beta when Nejire attempts to approach you with her own Beta. This keeps her much easier to shoot while also preventing her from damaging her.
Nejire's Gamma has an incredibly long recovery period when activated which a single Alpha from Star will instantly break it. You can alternatively use Gamma if you are close enough to lock her down.
Nejire cannot heal within storm and has a hard time chasing enemies. You can take a fight within storm against Nejire, but be careful about Nejire's Alpha as it adds up.
Hitoshi Shinso
Difficulty Score: 🟡Even🟡
Shinso has incredible lockdown and character control. He can be fairly difficult to him when he Beta's. Star will need to be able to hit her Alphas on Shinso and try to lock him down with Beta.
Tips vs Hitoshi Shinso:
Much like other match-ups against a character with a ranged grab, play grounded to be able to avoid their grabs.
Try to predict the direction that Shinso will use Beta and place your own Beta to stop him from escaping.
Be careful going point blank or around corners versus Shinso, he can use Gamma and get a strong punish on you.
All Might (Default)
Difficulty Score: 🔴🔴Very Unfavorable🔴🔴
All Might does what Star does, but much better. All Might's damage surpasses Star's damage due to his 2 round burst on Alpha. His mobility is incredibly good and without high recovery. He can also stall out his cooldowns using Gamma and ignore anything Star throws out if he is trapped within Star's Beta. Star must play incredibly safe versus All Might and try to keep him locked down when he is on cooldown.
Tips vs All Might (Default):
Keep track of All Might's Gamma usage. Once he's used it all, he's much more manageable as he cannot ignore damage from Alpha or Gamma.
Play around cover when fighting All Might and try to take short trades when dealing with him. Do not play outside if possible.
All Might (Gatling)
Difficulty Score: 🟡Even🟡
Gatling is an incredibly mobile character with good damage. Star must be able to hit All Might as he's traversing and try to lock him down. If she can't hit All Might in the air, she will have a hard time dealing with his hit-and-run tactics.
Tips vs All Might (Gatling):
When All Might is throwing out Alphas, try to play around cover and take very short and quick trades to minimize damage taken.
Air Beta is your best friend in this match-up. All Might cannot leave Star's Beta and will be stuck within the air.
Armored All Might
Difficulty Score: 🔴Unfavorable🔴
Armored All Might is an all-rounder character. He has a grab, he has flight, he has combos, he has a grab, he has a freeze, he has a burn, he does everything. He can easily lock down Star via his grab and ice shot and shoot easily with his large fire projectiles. Star must be able to make every shot count and try to waste his Special Action resource.
Tips vs Armored All Might:
Be careful at mid-range versus AAM as his grab will easily lead into a melee combo.
If he is trapped within your Beta, keep mobile as he can negate any action you do with his grab.
It's not the worst idea to meet AAM in sky to fight him, but be aware that you may take damage on the way up.
AAM can escape your Beta when it is at lvl 1. Make sure you have lvl 4 Beta to prevent this.
When done at full meter, AAM's special action will outlast your Beta in duration. Do as much damage as possible if he choose to special action out.
AAM players like to use fly after the are knocked down, try to aim Beta at the apex of their flight to catch their Special Action.
Shota Aizawa
Difficulty Score: 🔴Unfavorable🔴
Aizawa is an incredibly great character at locking down enemies while preventing any counter play with his silence. However, his resources are finite, so he cannot do it forever. Star must bait out Aizawa's options and punish during any down periods where he isn't silencing her.
Tips vs Shota Aizawa:
Be very careful when fighting Aizawa at point blank as his Gamma can easily catch you. You can try to bait him by weaving in and out of his range.
Beta is a great tool at keeping Aizawa in place as he cannot leave.
While silenced, approaching him while rolling can be a good way to put pressure on him to commit to an action.
Shota Aizawa (Flow Runner)
Difficulty Score: 🔴🔴Very Unfavorable🔴🔴
Flow Runner is one of the best 1v1 characters in the game. He boasts incredible mobility and excellent lockdown. He can easily escape Star's Beta with his own Beta. If he doesn't have Beta up while inside of Star's Beta, then he can easily silence Star to prevent her from attacking. Star must play incredibly safe against Aizawa as one mistake will lead to an incredibly long lockdown time.
Tips vs Shota Aizawa (Flow Runner):
Always play grounded versus Aizawa in order to roll against his entire kit.
Aizawa is much less scary after he is out of Alphas or committed to an action. Bait out all of his Alphas and/or roll his Gamma and punish with your own Alpha.
If you wish to use Gamma to punish Aizawa's charged Gamma, you must use it immediately after you roll.
Present Mic
Difficulty Score: 🟡Even🟡
Present Mic is a high damage burst character with strong beaming abilities. It takes one Beta and a Gamma to instantly break someone's GP. However, Present Mic has difficulty escaping when he's in trouble. Star can use Beta to keep Present Mic in place and use Alphas at distance to perform an aim war against Present Mic.
Tips vs Present Mic:
Always kill Present Mic's boombox to prevent extra damage. It takes a single Alpha to destroy.
Present Mics like to use Gamma to run away when low. You can place Beta in the air direction above him to trap him.
When Present Mic is using Beta in the air, he is completely stationary until he stops screaming. You can use that time to place an air beta on him.
If playing at close range, always be ready to dodge at times where you have his attention. He will attempt to do the tried and true combo of Beta -> Gamma. If he whiffs Beta, you will need to dodge again in case he autopilots to Gamma.
Present Mic (D.J. Board)
Difficulty Score: Need more data...
While on his board, D.J. Board is extremely difficult to hit and has great damage while on his board. However, he's very vulnerable while it is on cooldown. Star will have a difficult time shooting Present Mic and must play defensively while he is on his board. The tables turn once it's on cooldowns as his Gamma can easily break and Star can pull Present Mic away from the cover of his Gamma.
Tips vs Present Mic:
Beta can keep Present Mic in place while he's on his board, but is difficult to accurately place in his path. It's better to use Beta as a defensive move.
Cementoss
Difficulty Score: 🔴🔴Very Unfavorable🔴🔴
Cementoss is a structure character that can easily place enemies into disgusting situations by creating terrain around them. If Cementoss gets shot at, he can create terrain around him or simple build up. Star can have a difficult time versus a Cementoss player that is thorough on his structure cover. However, if Cementoss gets sloppy or has few resources, she can easily exploit his vulnerable periods.
Tips vs Cementoss:
You can use Beta to pull Cementoss off of his tower and into the air. Cementoss can in turn cover the center of Star's Beta with Alpha. However, when Cementoss' pillars are breaking, he can be rendered completely helpless.
Gamma isn't the worst movement tool to keep pressure on Cementoss in his tower, but keep in mind, you can be struck by his Gamma due to Star's high recovery on Gamma.
Avoid playing indoors versus Cementoss.
If you know Cementoss will use special action on a teammate, you can use Beta at the top of the mini-pillar to trap them and down them again.
Endeavor (Default)
Difficulty Score: 🟢Favorable🟢
Endeavor is an area control character with a strong projectile and good air mobility. Because Endeavor likes to fly away, Star can have an easier time locking him down via Beta or even shoot him down with Alpha. Don't underestimate the damage Endeavor can dish out.
Tips vs Endeavor (Default):
Don't get too greedy when fighting Endeavor inside. You can find yourself taking more damage than you expect.
Be careful when using Gamma to escape versus Endeavor as his Beta's range is incredibly far.
If Endeavor is performing Gamma, you can use Beta to keep him in the air afterwards and punish him further.
Endeavor (Inferno Fist)
Difficulty Score: 🟢🟢Very Favorable🟢🟢
Endeavor is an incredibly easy character to hit due to the long start-ups on all of his moves. He also wants to be in the air to make use of his mobility. Star can easily trap Endeavor in the air while he performs his Beta and Gamma via her Beta. Star can also use Alpha while rolling Endeavor's attacks.
Tips vs Endeavor (Inferno Fist):
If Endeavor is already in the air, you can use Air Beta to trap him in your sphere.
Endeavor is one of the few characters that can fly on wake-up without it ending i-frames. It's good to waste his Special Action with Beta for this purpose, so that the next interaction he has less options.
Hawks (Default)
Difficulty Score: 🟡Even🟡
Hawks is a highly mobile flight character that likes going in-and-out of combat. He can choose when he wants to engage. Star can have a difficult time beaming him with Alpha while he flies around using his own Alpha. He can also be difficult to fire at while he is in Beta flight.
Tips vs Hawks (Default):
Keep track of Hawks' special action usage. When it's on cooldown or on the reload delay, he is incredibly vulnerable.
Beta is a great option to keep Hawks in place, but can be a poor one when using it on his wake-up.
Hawks (Slicing Wind)
Difficulty Score (Low Level Level): 🟡Even🟡
Difficulty Score (High Level): 🔴Unfavorable🔴
Slicing Wind is a high mobility lockdown character that snowballs his leads with incredible utility at lvl 7 on each of his skills. If Star plays recklessly, she can find herself in over her head as Hawks will loop attacks that will catch her in the air.
Tips vs Hawks (Slicing Wind):
Hawks is less scary at lower levels than other characters. It's not a bad idea to take a fight versus him, but don't waste too much time when fighting him, prioritize getting levels.
Play grounded and at distance versus Hawks. You can reasonably react to his Beta with roll and he cannot start a combo with Gamma at a far distance.
Delay your tech, but be careful holding on to it for too long. Hawks is incredible at catch wake-ups if he forces you in the air.
Beta is great at locking down Hawks after he has committed to a movve.
Mirko
Difficulty Score: 🔴Unfavorable🔴
Mirko is a combo melee character with lots of mobility and projectile to deal with beamers. Star can struggle beaming Mirko with her mobility and Gamma, but can control Mirko with her Beta.
Tips vs Mirko:
Mirko is much more vulnerable when she is out of Gammas.
Mirko's beta has a lot of recovery when it lands on the ground. Make use of this time to land an Alpha or Gamma.
Beta is incredibly good at keeping Mirko in place to fire at her, just be careful about her Gammas.
Star and Stripe
Difficulty Score: Skill Match-up
Mirror match-up based on who can hit their shots and who can punish each other's positioning and mistakes.
Tips vs Star and Stripe:
You can win the match-up by staying grounded and not committing to long recovery options.
Roll in different directions when caught in Star's Beta.
Mt Lady
Difficulty Score (Small Form): 🟢Favorable🟢
Mt Lady is a lockdown character with decent mobility while in small form. Star can easily trap Mt Lady using Beta and keep her distance versus Mt. Lady.
Tips vs Mt Lady (Small Form):
Mt Ladies like to hold around a corner and use Beta. You can pull them out of the corner with Star's Beta or simply bait Beta.
Be careful at close range versus Mt Lady as her Gamma can do tremendous damage.
If you can, trap Mt. Lady inside to prevent her from transforming.
Beta is great at stalling against Mt. Lady and preventing her from escaping.
Difficulty Score (Giant Form): 🔴🔴Very Unfavorable🔴🔴
Mt Lady in Giant Form wins versus anything close-range and can tank a lot of damage. Star cannot grab Mt. Lady, cannot pull Mt. Lady into Beta, and her alphas do miniscule damage versus Mt. Lady's incredible damage reduction.
Tips vs Mt Lady (Giant Form):
Keep your distance against Mt. Lady's Giant form.
It's okay to use Alpha against Mt. Lady's giant form in order to pressure her to untransform.
If Mt. Lady's teammates are near her, you can throw out Alphas in order to get collateral damage.
Tomura Shigaraki (Default)
Difficulty Score: 🟢Favorable🟢
Shigaraki is a grounded area control character that can be particularly scary when fighting inside of storm. Star can easily keep Shigaraki under control and play in the air where it's awkward for Shigaraki to attack her.
Tips vs Tomura Shigaraki (Default):
If fighting within Storm, avoid fighting Shigaraki on the ground. One Gamma from Shigaraki can be devastating on your prolonged Storm survival.
Use Gamma and air melee to keep airborne in order to avoid Shigaraki.
You can use Beta to pull Shigaraki out of buildings or to an angle where you can hit him with Alpha.
If you know Shigaraki will try to use Special Action to escape, you can use Beta to trap him within the air.
Tomura Shigaraki (Catastrophe)
Difficulty Score: 🟢Favorable🟢
Catastrophe is a brawling character that thrives in a grounded chaotic fight while keeping enemies locked down with his high stagger moves. Star can stay in the air to avoid his most damaging combos and make getting hit by Shigaraki's Alpha difficult.
Tips vs Tomura Shigaraki (Catastrophe):
Although his air-to-ground game is good, Shigaraki's air-to-air game is quite difficult. You can choose to fight Shigaraki in the air to make yourself hard to hit and limit his damage potential.n
Alternatively, if Shigaraki is in the air, you can choose to use Air Beta to trap him at the top.
Incorporate sprint jumping in between rolls in your duels against Shigaraki to make yourself awkward to fight.
Keep your distance against Shigaraki to be able to react to his options at range. If he stops, he's likely doing Beta. If he's going towards you, then it's likely Gamma.
Tomura Shigaraki (Thousand-Hand Break)
Difficulty Score: 🟡Even🟡
Like Catastrophe, Thousand-Hand Break is an all-out brawl character that thrives in chaotic fights, but can do so for an exceptionally long period of time. A far cry from what he was before, Shigaraki is quite manageable when controlled and easy to punish.
Tips vs Tomura Shigaraki (Thousand-Hand Break):
Keep your distance against Shigaraki as his Alpha stuns before the punch at close range.
You can use your Beta to keep Shigaraki in place, but keep in mind if Shigaraki uses Beta, you can accidentally pull him towards you and get hit by the shockwave.
Make use of Alpha's ability to roll in order to dodge Shigaraki's Alpha.
All For One (Default)
Difficulty Score (Base Form): 🟡Even🟡
All For One is a strong area control character that steals enemy quirks in order to enhance his own kit or even use another character's kit with higher HP. Star can have a difficult time trying to chase.
Tips vs All For One (Default):
You can bait AFO into using Beta and pull him out of a corner using Star's Beta.
AFO is particularly strong at close range and through terrain. Try to play mid-long range if possible to take minimal damage from him.
Using roll after Alpha is incredibly strong against AFO, as you can easily dodge many of his attacks such as Alpha and Gamma.
All For One (Factor Fusion)
Difficulty Score (Base Form): 🟢Favorable🟢
Factor Fusion is a brawly third-party character that deals explosive damage. Although his moves are telegraphed, don't underestimate AFO's damage. If Star does not play greedy, she can easily defeat AFO.
Tips vs All For One (Factor Fusion):
Always play grounded versus AFO as you need to roll his Gamma. If you are careless, he can do tremendous damage.
AFO can escape a lvl 1 Beta with an Alpha-infused Gamma. Be sure to level up Beta to at least level 4 to prevent this.
AFO's Gamma has considerable recovery after the punch which should equate to a free Alpha.
AFO's Beta also has considerable recovery when he uses it. Make use of this opening to land an Alpha at distance or Gamma at close range.
All For One
Difficulty Score: 🔴🔴Very Unfavorable🔴🔴
Youth Age is an oppressive armored flight character with strong combos, strong area control, and a particularly nasty silence. Out in the open, Star has an incredibly difficult time dealing with YAFO's Gamma. If Star is silenced, then she cannot run into storm to recouperate.
Tips vs All for One :
If you are silenced and low, play extremely safe and make use of any terrain you can to cut line of sight. Once you do, use Beta to stall for you.
Avoid playing out in the open versus YAFO, he has an incredible advantage when doing so. Have a plan for some form of cover if you do plan on fighting him out there.
Dabi (Default)
Difficulty Score: 🟢🟢Very Favorable🟢🟢
Dabi is a defensive-trap character that relies on setting up to reliably protect himself and teammates. Due to Alpha's piercing property, Star has an incredibly easy time dealing with Dabi and can often brute force her way into his domain of fire traps.
Tips vs Dabi (Default):
Star's Alpha will pierce through Dabi's Beta effectively making it worthless.
Although your Beta will stop pre-maturely at Dabi's Gamma, you can use it to pull him at an unfavorable position at the end of his Gamma duration.
Don't use Gamma unless you know Dabi has no more Betas.
Dabi (Crazy Torch)
Difficulty Score: 🟢Favorable🟢
Crazy Torch is striker type character that likes to get in and create chaos. Star has to play safe versus Dabi and near cover in order to avoid Dabi's most damaging abilities.
Tips vs Dabi (Crazy Torch):
Delay your tech when fighting against Dabi to prevent getting grabbed.
Keep tabs on how long Dabi has been in Gamma to gauge when he is going to explode.
Himiko Toga (Default)
Difficulty Score (Base Form): 🟢Favorable🟢
Toga is an agent of chaos while having a great projectile for beaming. She typically goes in and out of fights and choosing when she wishes to engage. Star can have an easy time locking down Toga with Beta, but if Toga's aim is good, Star can find herself in over her head.
Tips vs Himiko Toga (Default):
Avoid letting Toga get your blood in order to prevent her from cooldown resetting or using your own abilities against you.
You can use Beta to trap Toga in the air or potentially waste another charge of her Beta to make chasing her much easier.
When fighting Toga, take quick trades instead of long ones to minimize the time that she can shoot you.
Himiko Toga (Sting Dance)
Difficulty Score (Base Form): 🟢🟢Very Favorable🟢🟢
Sting Dance is a decently mobile combo character that like default toga, goes in and out of fights. Star can have an incredibly easy time punishing Toga if she tries to escape and keeping Toga locked down in the air.
Tips vs Himiko Toga (Sting Dance):
Play grounded versus Toga in order to avoid her Beta. If Toga hits beta, she can easily guard break you and reset her cooldowns. Once she's used both her betas, she is much less threatening because she has a much harder time getting blood.
Toga has a lot of recovery on her Gamma when she uses it, you can use that time to punish her with Alpha.
Beta is a very good at keeping Toga in the air to punish her.
Twice
Difficulty Score: 🟢🟢Very Favorable🟢🟢
Twice is a disruptive character with decent beaming ability. Twice's clones are very flimsy and he can have a hard time escaping situations. Star can easily exploit many of Twice's weaknesses with her entire toolkit.
Tips vs. Twice:
Alpha's splash damage will instantly kill Twice's clone if it's close enough. You can alternatively hit Twice's clone to splash on to the real twice.
Star's Beta can hold Twice in place when he uses Gamma.
Make sure you kill Twice's clone first before committing to Gamma as it does a lot of damage.
Twice (Sad Man's Parade)
Difficulty Score: 🔴🔴Very Unfavorable🔴🔴
Sad Man's Parade is an all-rounder character that can do whatever he wishes and support his team. Star can have a difficult time trying to figure out which target to choose and will have difficulties locking down Twice due to his generous amount of charges on his Gamma.
Tips vs. (Sad Man's Parade):
Alpha destroys Twice's Beta very quickly, especially if there's a clone or person that can double hit via a pierce.
Beta can group up Twice and his clone in order to get double pierced.
Always kill Twice's clone because if the clone heals, then you need to fire another Alpha.
Mr. Compress
Difficulty Score: 🔴🔴Very Unfavorable🔴🔴
Compress has all the tools to deal with Star and escape her. Star must use her resources to waste Compress' own resources and close the distance to put pressure on him.
Tips vs. Mr. Compress:
You can use your Beta to waste a charge of Compress' Gamma forcing him to use another one. If you are confident on knowing his timing, you can Gamma to punish the cast time on the 2nd Gamma.
When fighting Compress, try to close the distance so that you can put him in an awkward situation where he cannot use Beta due to a Gamma or Melee coming.
You can play in the sky to avoid his trucks and fight him, but you must be above him to make yourself harder to hit.
Kurogiri
Difficulty Score: 🟡Even🟡
Kurogiri is a kidnapping character with decent damage and very high mobility. He enjoys sending opponents into storm with him and letting the storm damage take care of his dirty work. Star can deal with Kurogiri's shennanigans early in the match, but as the phase gets higher.
Tips vs. Kurogiri:
If the phase number is low, it's not a bad idea to follow Kurogiri in storm as you have Special Action to negate storm damage.
If you know where Kurogiri is and your teammates are finishing his teammates, it can be a good idea to wait until he uses special action. You can then place Beta on top of him in order to potentially kill him and his teammate.
Always destory his Gamma whenever you can to prevent a kidnap on you or your teammates.
If your teammate is kidnapped, you can use Special Action to stall out storm damage or allow them to win the storm fight.
Lady Nagant
Difficulty Score: 🟡Even🟡
Lady Nagant is a beamer character with a strong snipe and good mobility. If Star cannot hit Lady Nagant while she is moving around, then she will have a difficult time dealing with Nagant. That being said, Star can easily lockdown Nagant once she has her knocked down.
Tips vs Lady Nagant:
Beta is very useful for trapping Nagant because she has only 1 Gamma, so she has only one way of getting out.
If Nagant is using double jumps a lot, it can be a good idea to hold on to your Alpha and wait until she has used her other jump.
Nagant is incredibly vulnerable once she uses her Beta, so you can use Alpha to punish her as she does it.
Gentle Criminal
Difficulty Score: 🔴Unfavorable🔴
Gentle Criminal is a beamer character with a strong reflecting shield and amazing, but awkward mobility that can turn into nasty damage. Star has a particularly hard time versus Gentle due to his shield reflecting her Alpha's splash damage. This means Star must play around his shield in order to deal damage and pressure Gentle.
Tips vs Gentle Criminal:
When you throw out Alpha, immediately roll when the projectile comes out to avoid his Beta reflect.
Always keep tabs on whether Gentle is in a fight or not to confirm if you need to roll out of Alpha.
Though there are some angles where you will get hit out of, Gamma consistently can go through Gentle's shield.
Beta can prevent Gentle from getting away with Gamma, but if he bounces during it, then his dash duration greatly increases.
Overhaul
Difficulty Score: 🟢Favorable🟢
Overhaul is a grounded character that has very high damage AoEs that can cover himself. Star has a relatively easy time keeping Overhaul in check because of his lack of mobility and ability to effectively deal with fliers.
Tips vs Overhaul:
Play grounded or in the air vs Overhaul in order to roll or avoid his Gamma.
Always play at distance versus Overhaul so that you have enough time to react to his Gamma. Keep in mind that the further you are, the more you have to delay your roll.
Overhaul's Gamma can hit around corners if positioned correctly, don't assume it won't hit you.
Overhaul must be grounded to use his Special Action. If possible, you can use air Beta to prevent him from healing.
If you get him to waste his special action counter, it means he cannot avoid the next interaction because he needs to save it for self-healing. If he uses it despite that, then you can easily kill him on the next interaction.
Overhaul (Blighted Precipice)
Difficulty Score: 🟡Even🟡
Blighted Precipice is a self-sufficent brawler that creates chaos while going in and out of fights. Star can have a difficult time fighting Overhaul, though not mainly due to his pillar movement but also the screen pollution of his Alpha obscuring her vision.
Tips vs Overhaul (Blighted Precipice):
It can be very obvious when Overhaul uses Beta, try to aim at the trajectory at which he will fling himself.
Alternatively, you can place Beta high above the air in order to catch Overhaul as he's leaping out.
If Overhaul is perched on a pillar, you can use Beta to pull him off a ledge and into the air.
Here you can see the latest changes made to the guide. Guides try to update regularly or semi-regularly to be kept relevant. For maximum accuracy feel free to join the guide's discord server at https://discord.gg/z5JqqtfuDK


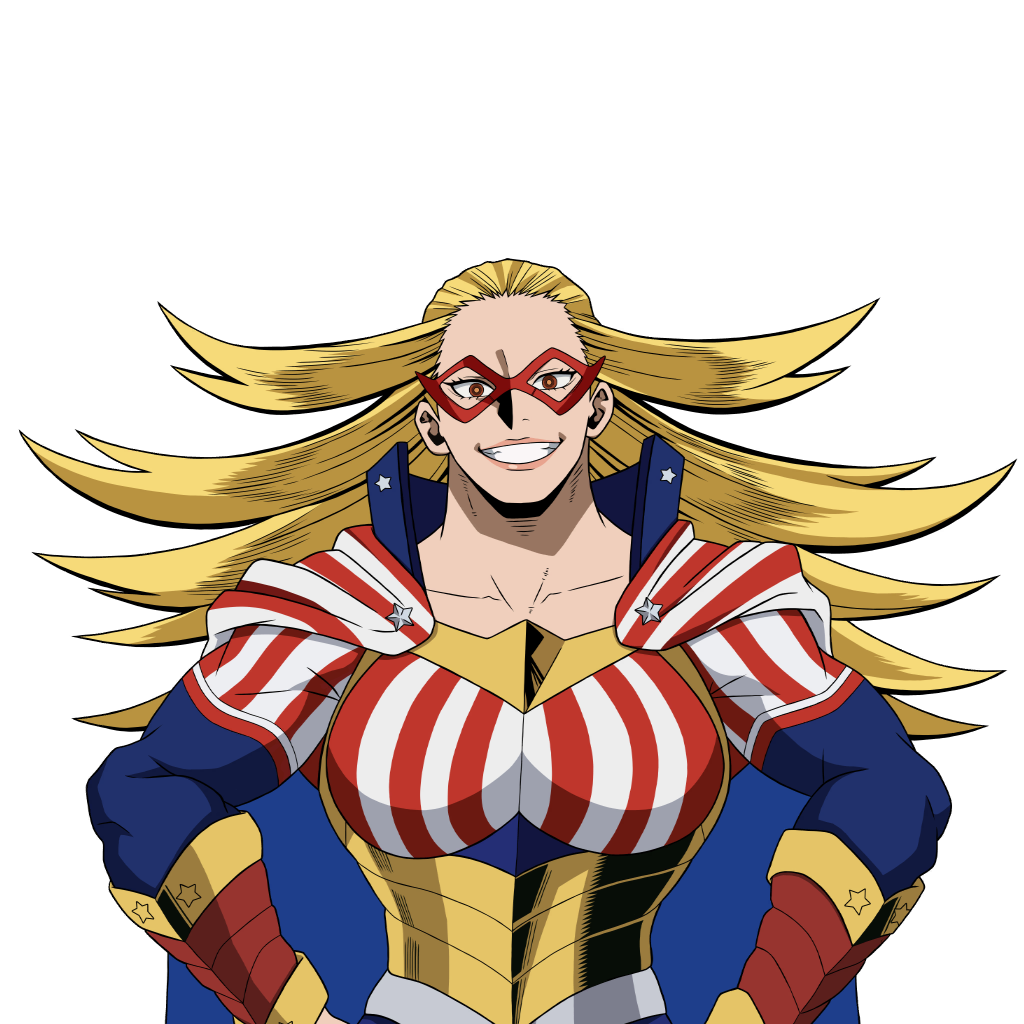


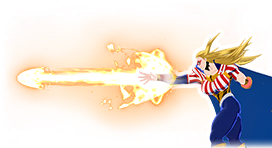
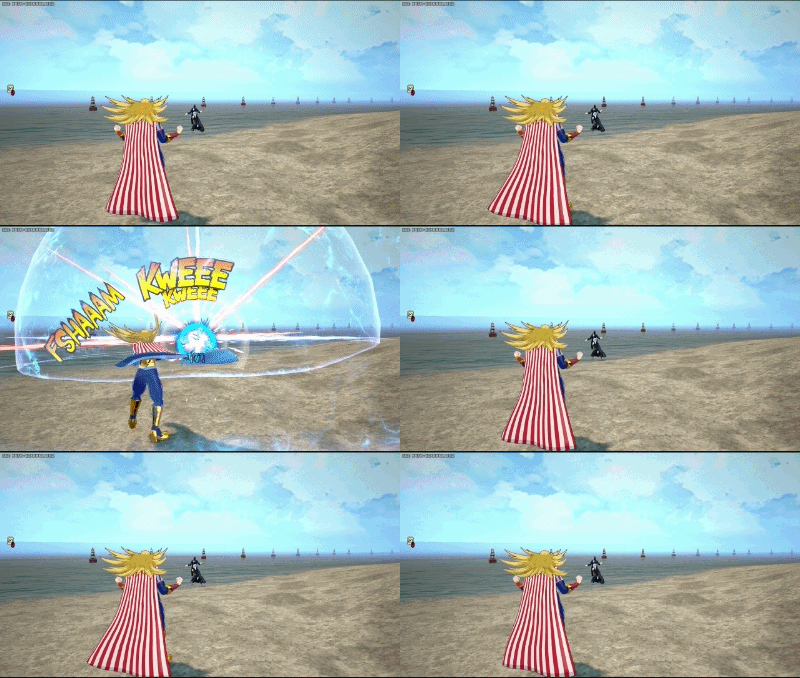 "Line of justice!"
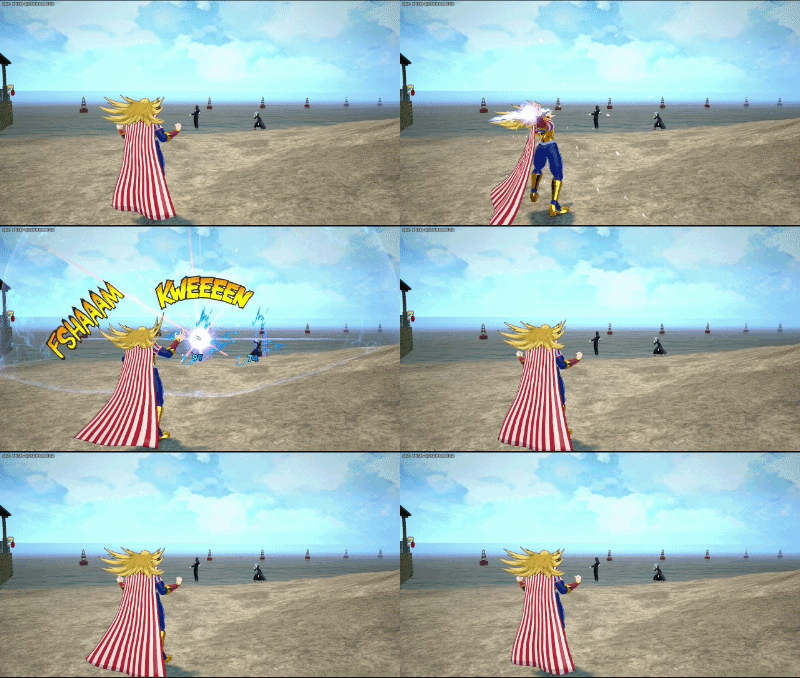 "Laser blast!"
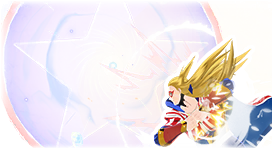








































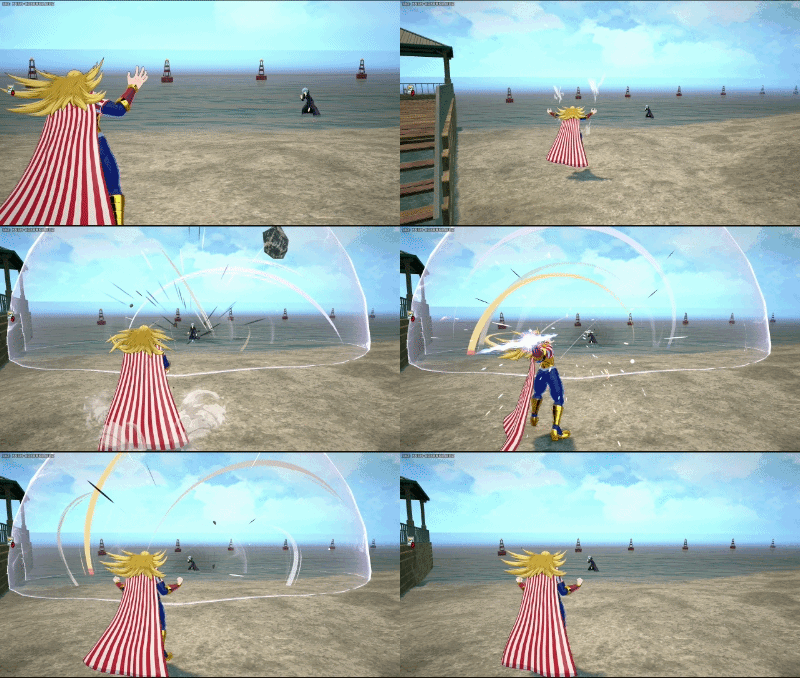 "Expansion!"
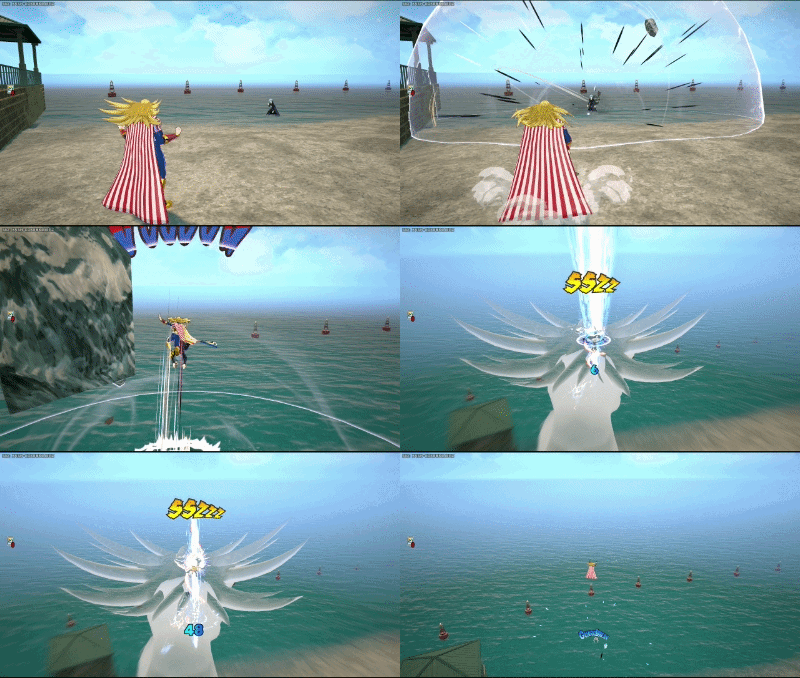 "Can you handle this!?"
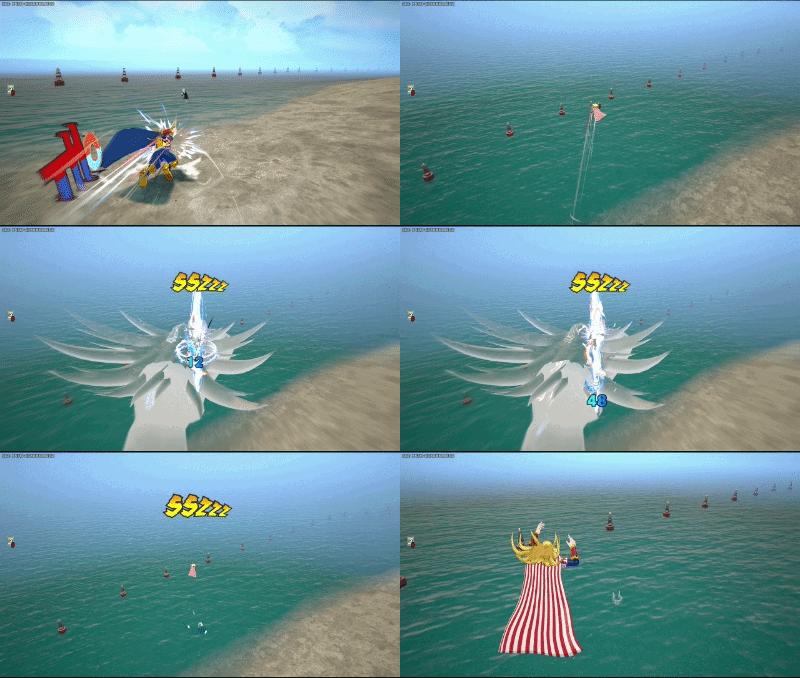 "Beautiful right?"
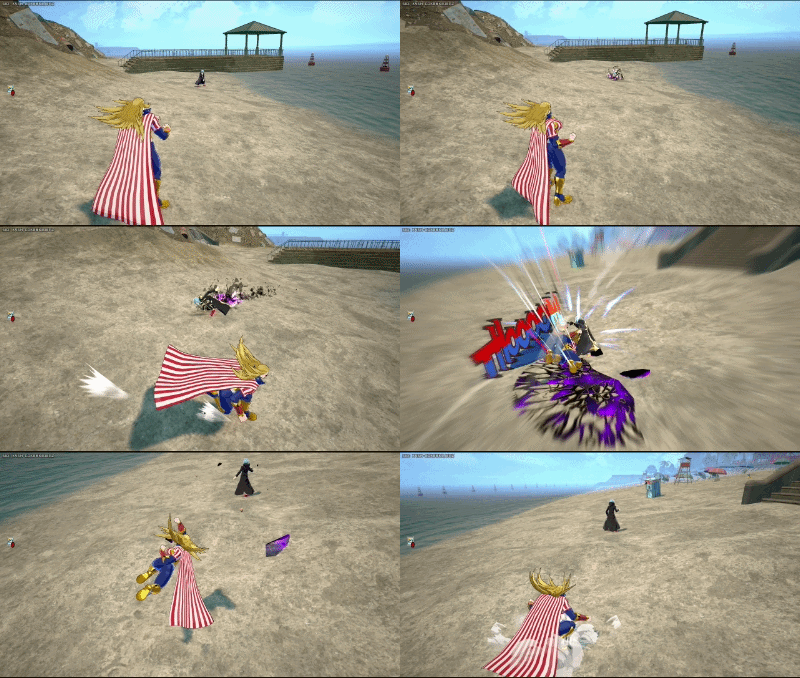 "Inconsistent right?" - Some Star and Stripe Player









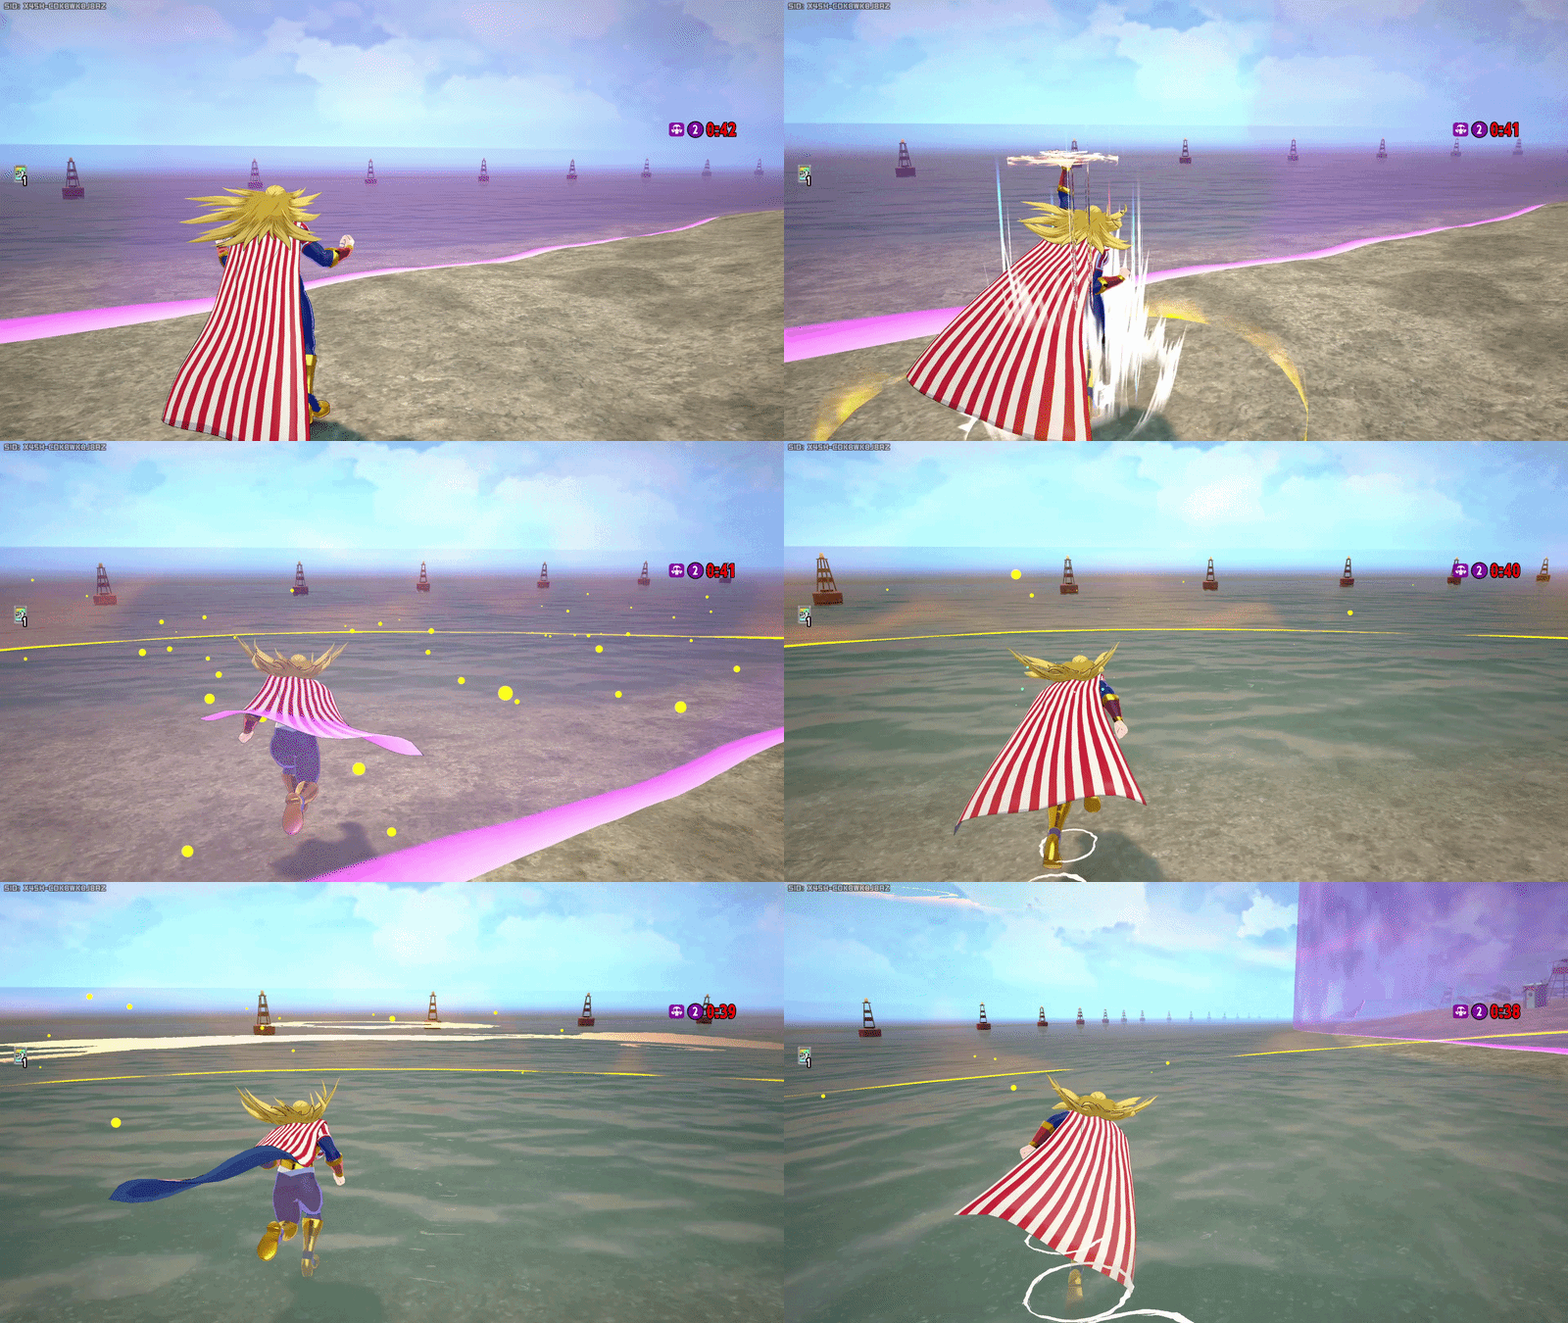 "I'll rewrite the rules!"
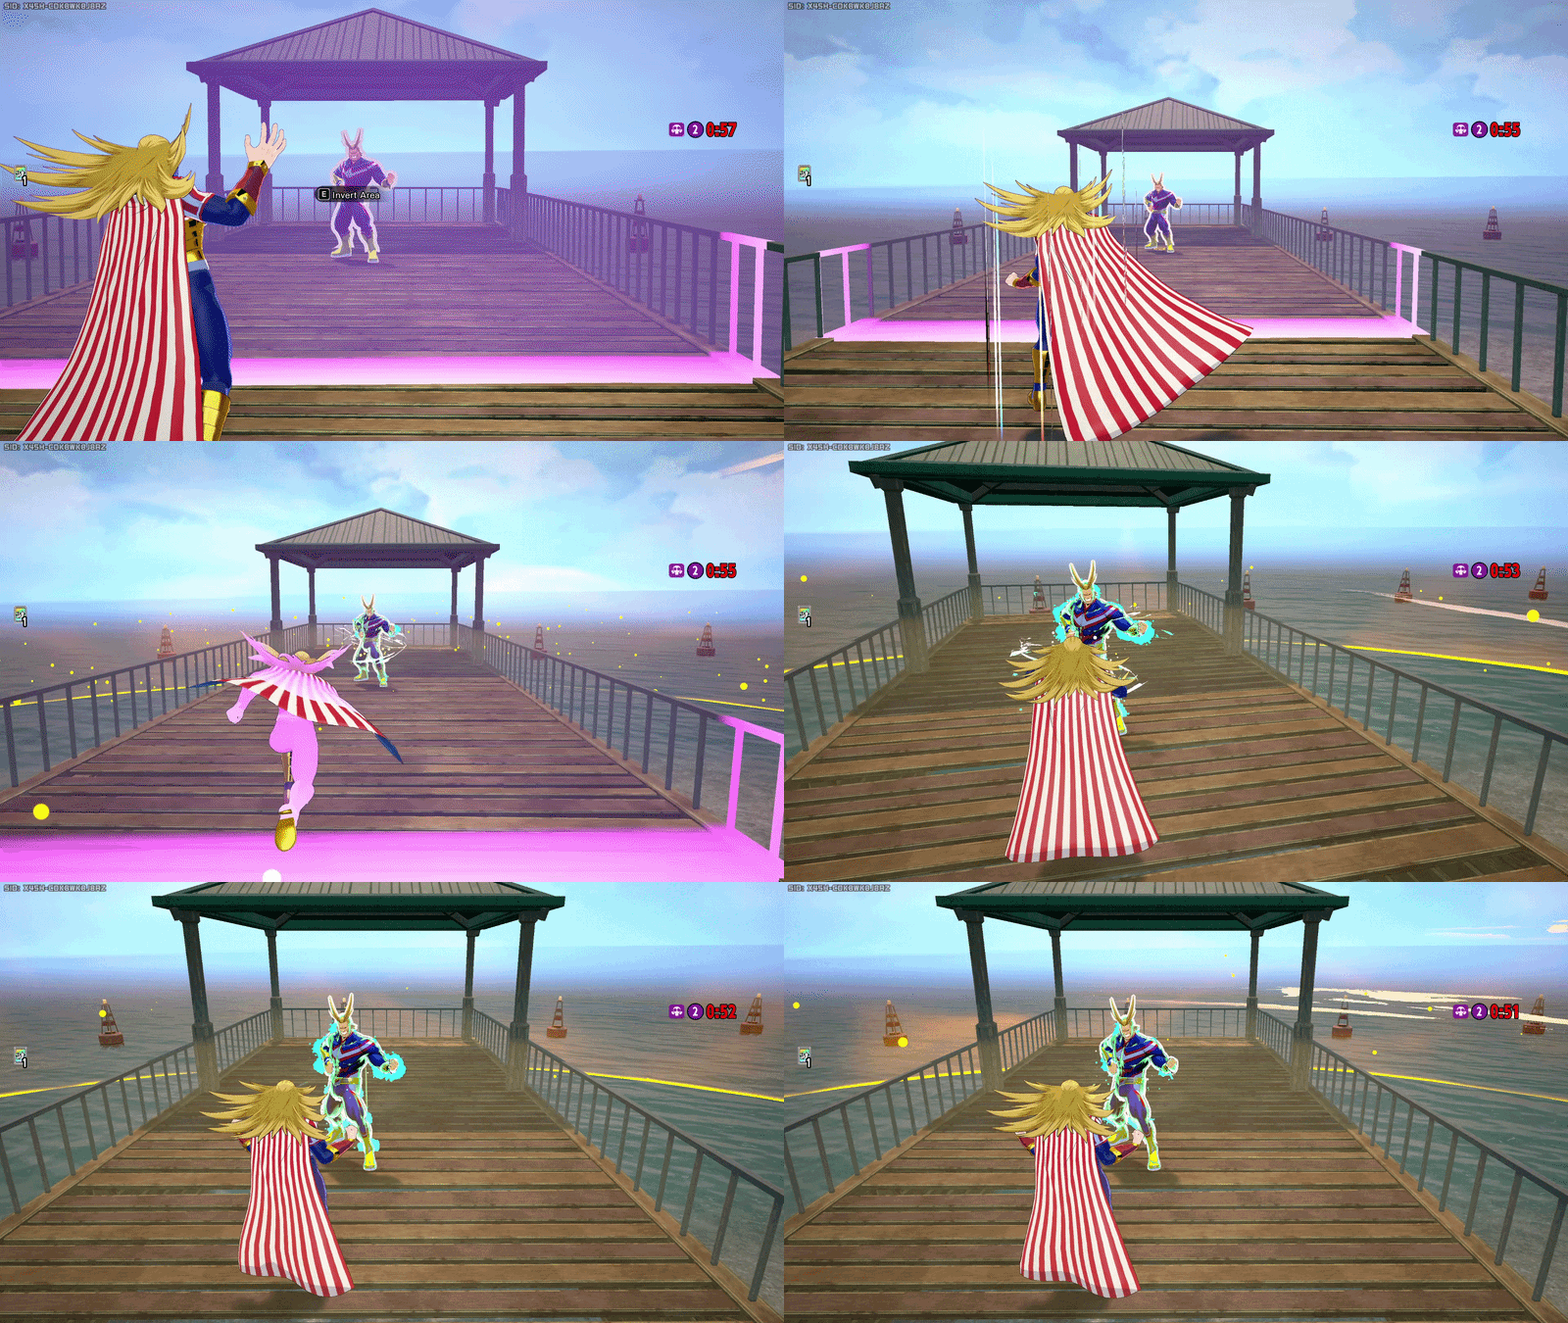 You can do this on teammates?!
 Get it together!
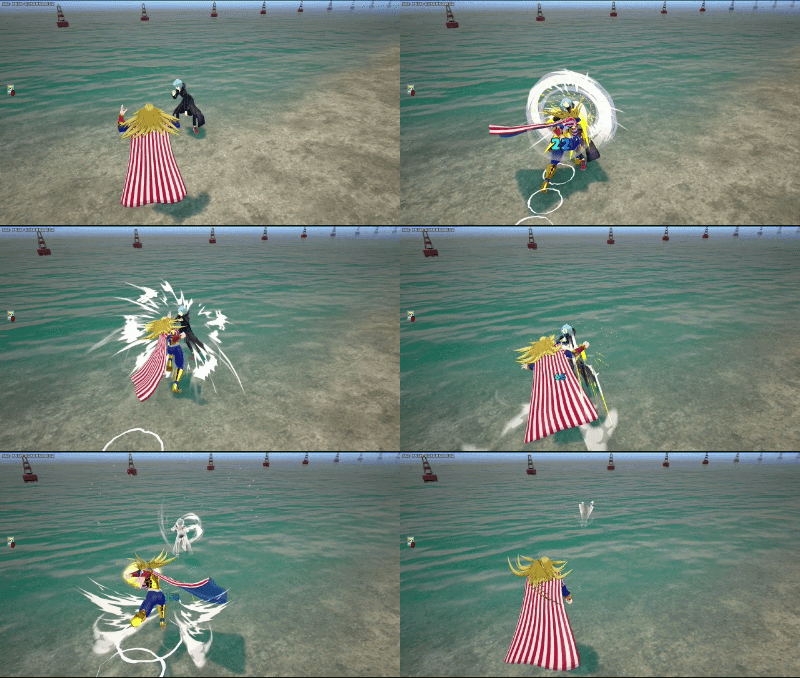
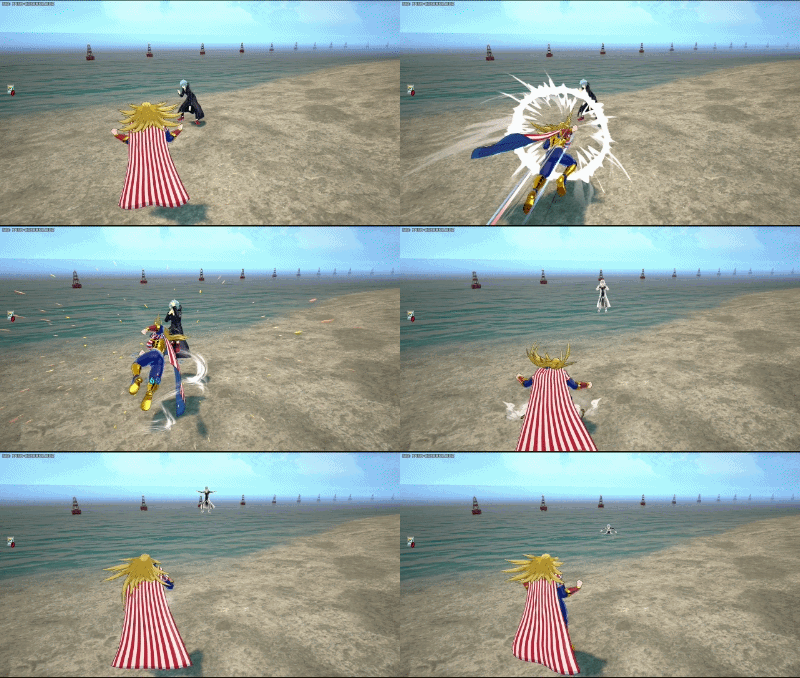








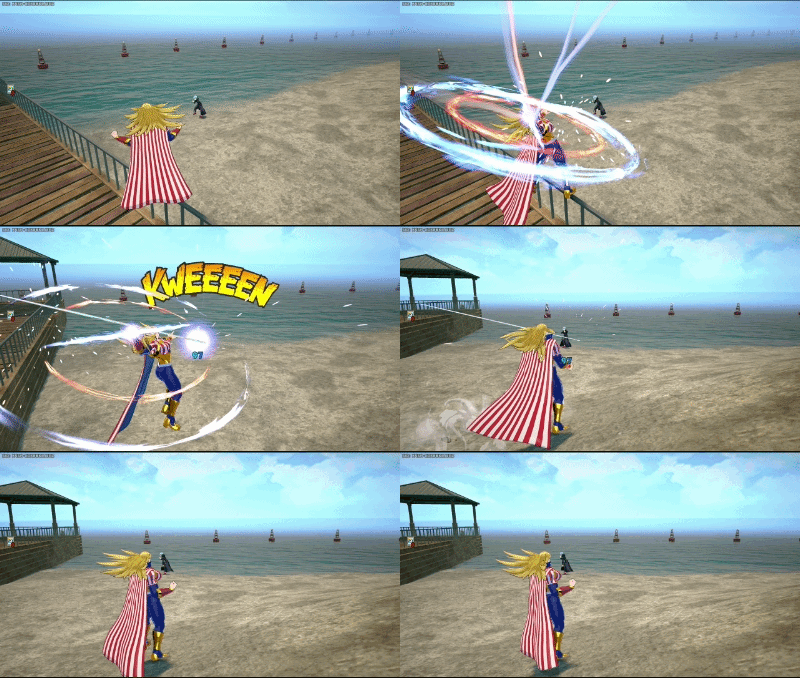
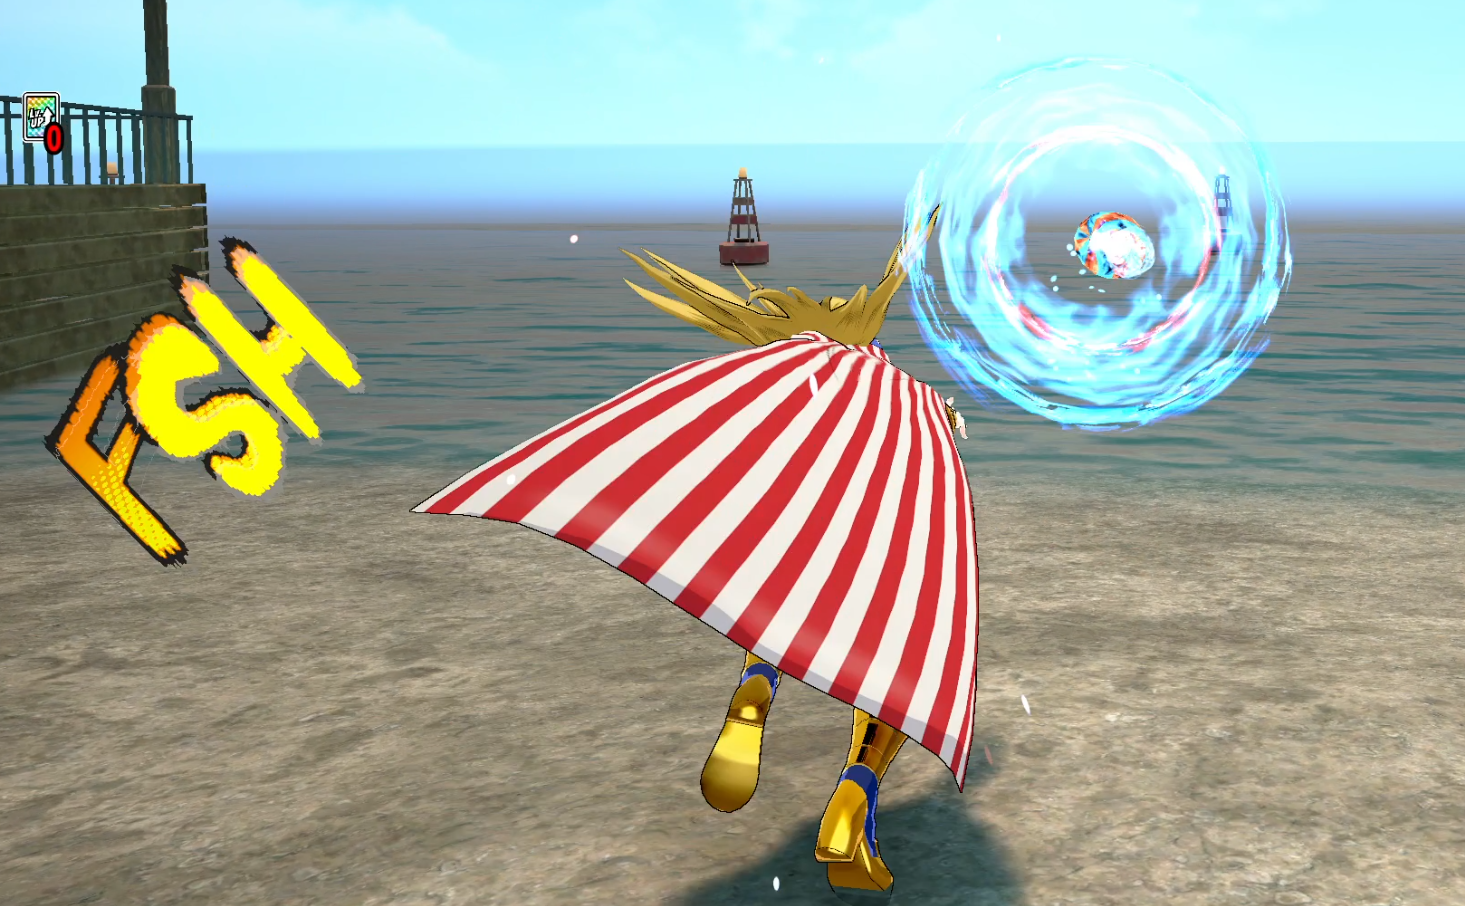
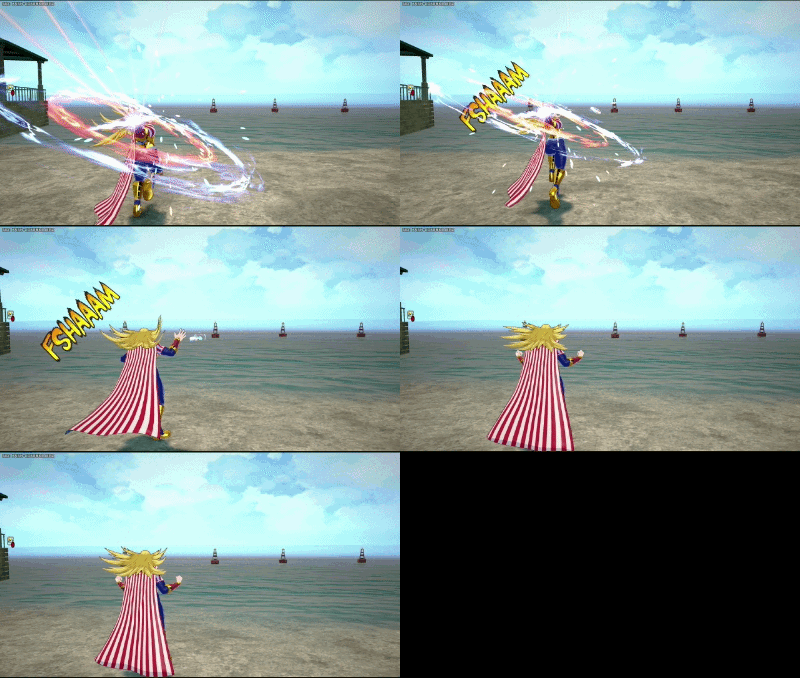 With good timing, Alpha rolls can be chained together. This can be done until Star runs out of ammo.
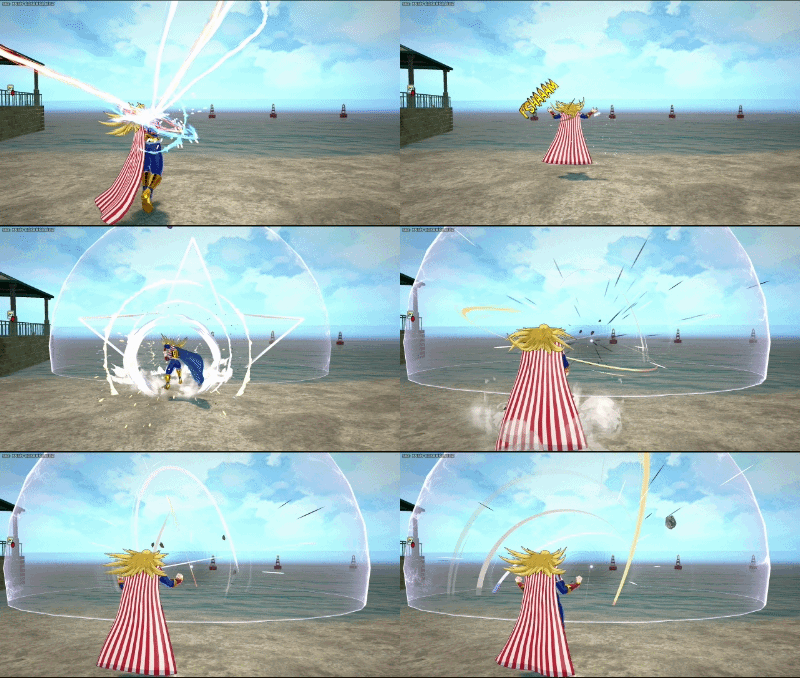 Good for keeping an enemy in place or setting up a death zone on a downed enemy
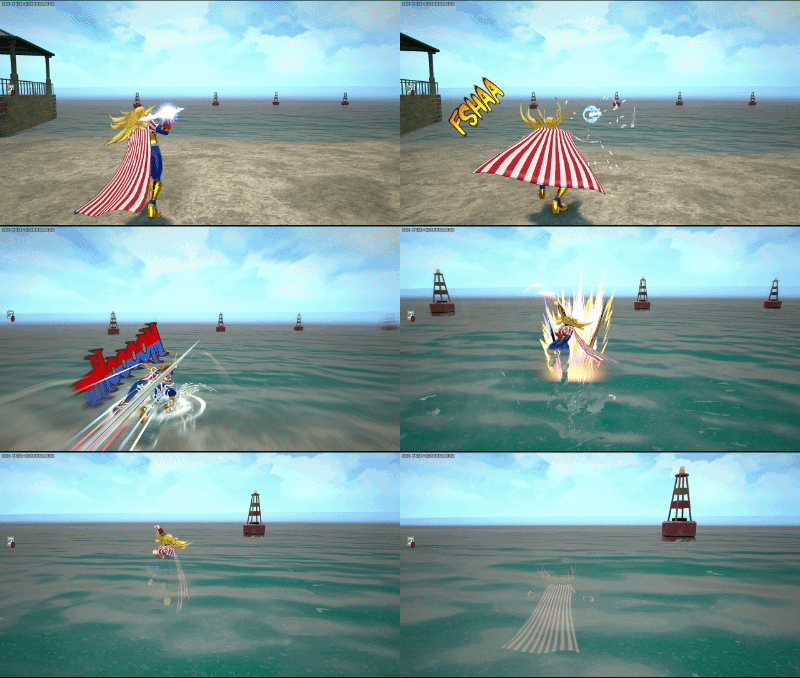 Good for catching an enemy off guard
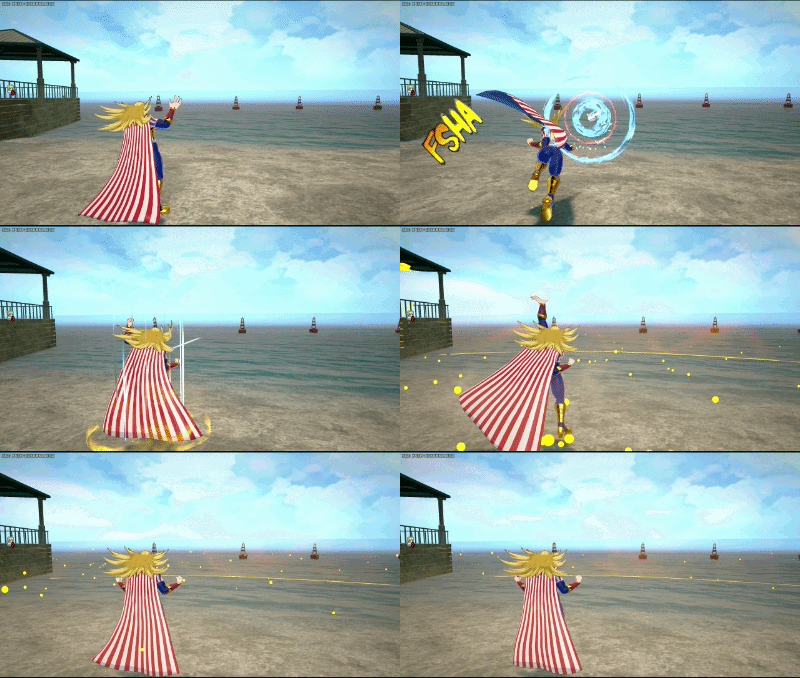 Good for activating or deactivating Special during combat
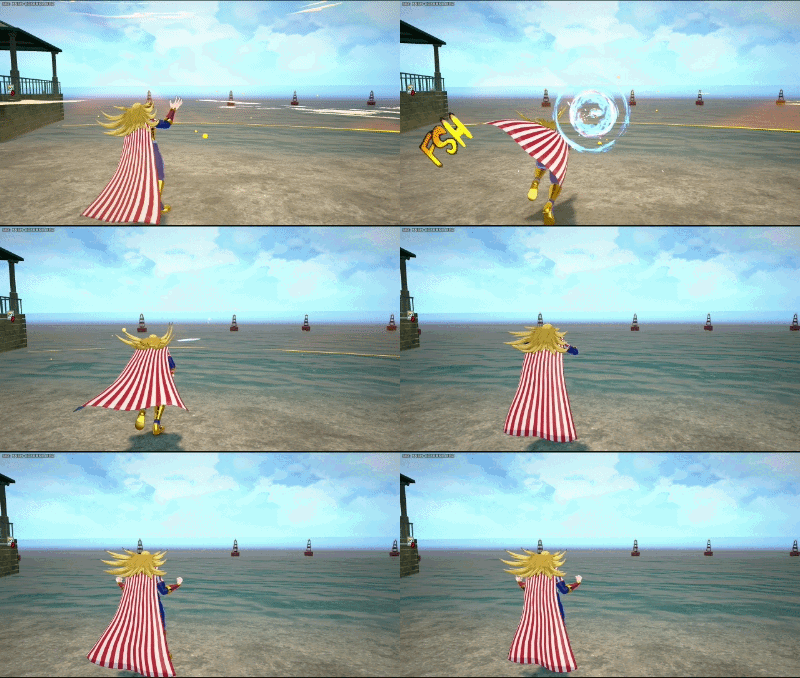 Good for deactivating Special Action while keeping DPS uptime.
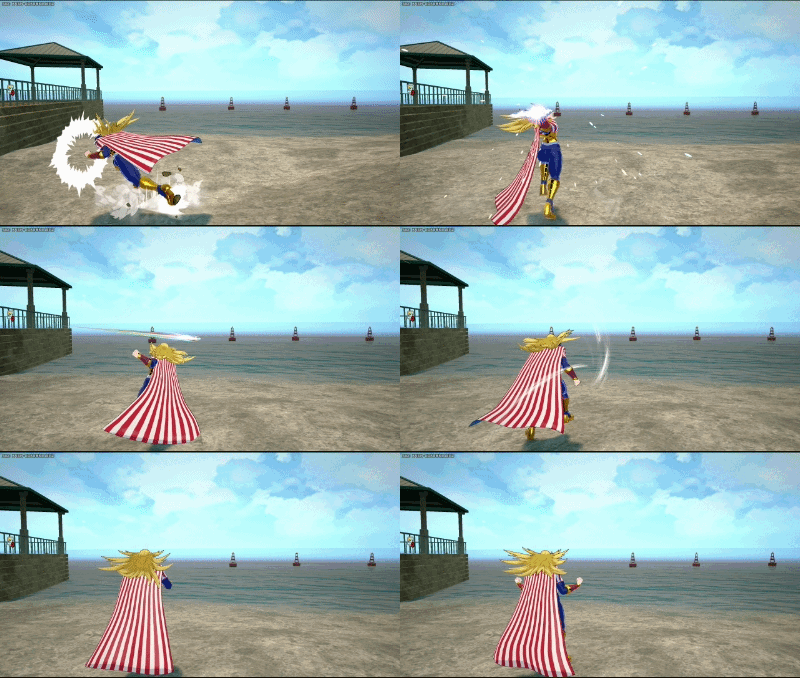 Great for starting combos
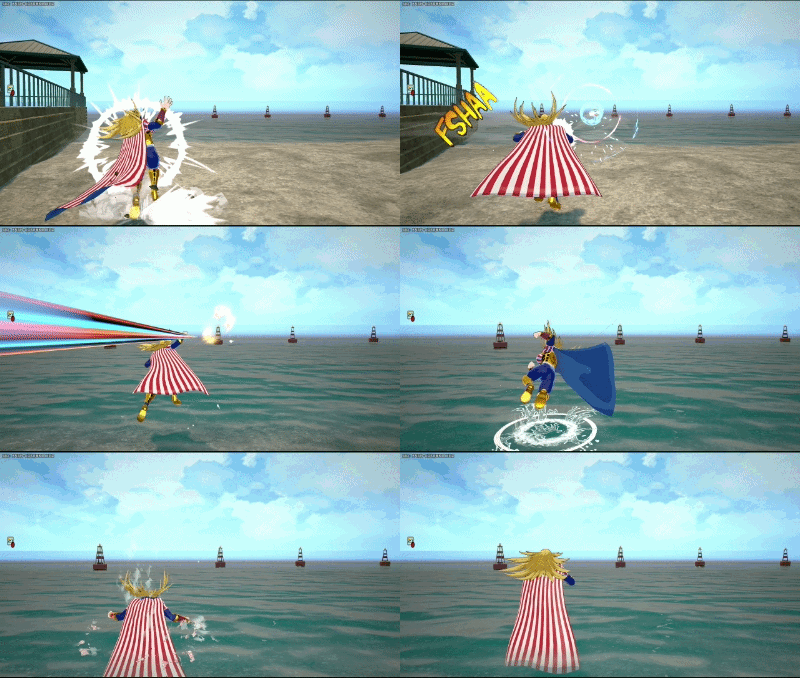 Good for quick burst damage
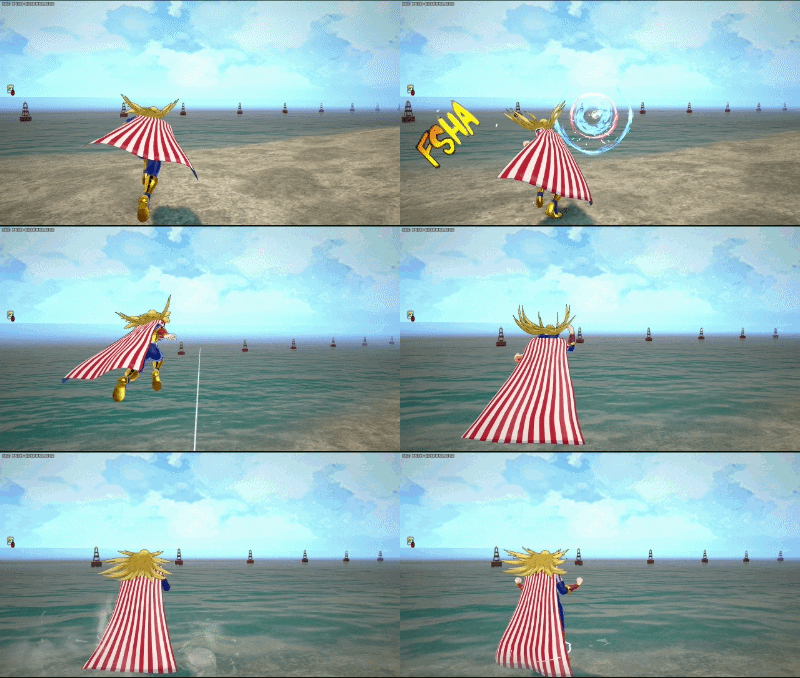 Alpha can be jumped out of to stay mobile.
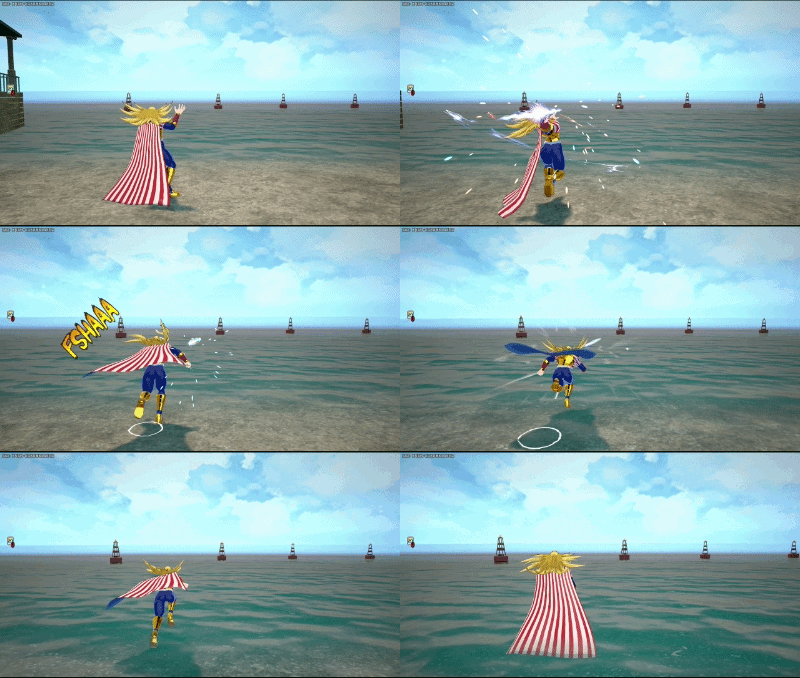 Good for keeping mobile during a duel
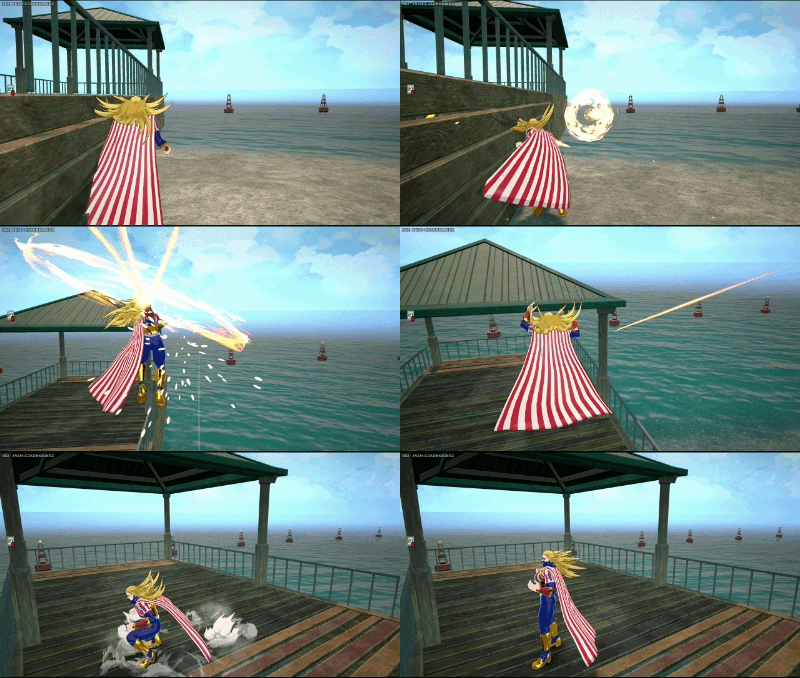 Most practical use of Running out of an Alpha Roll
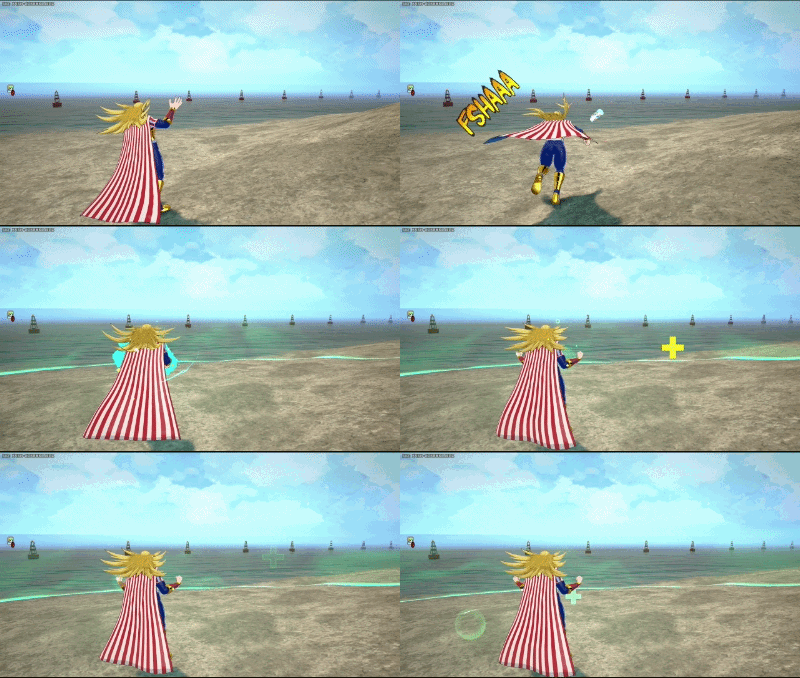
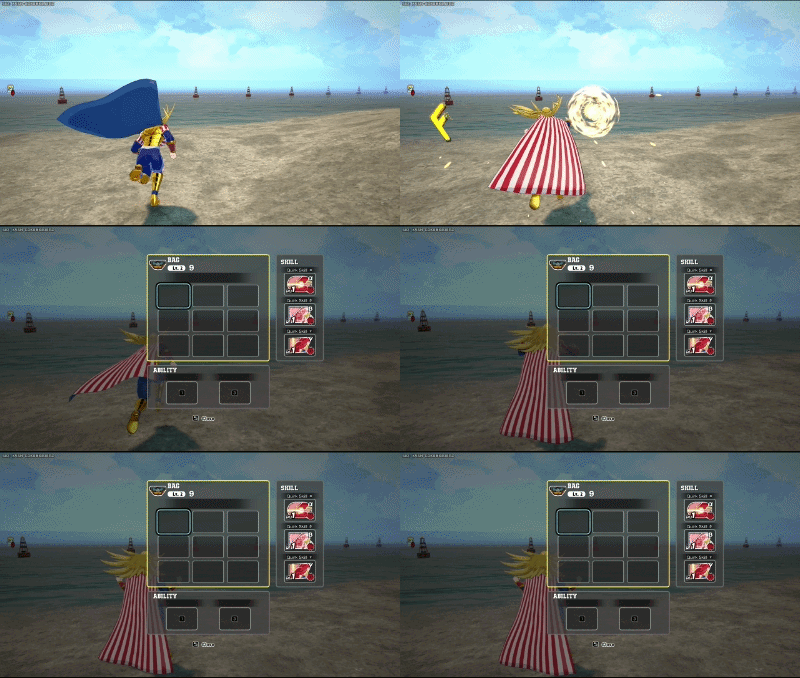
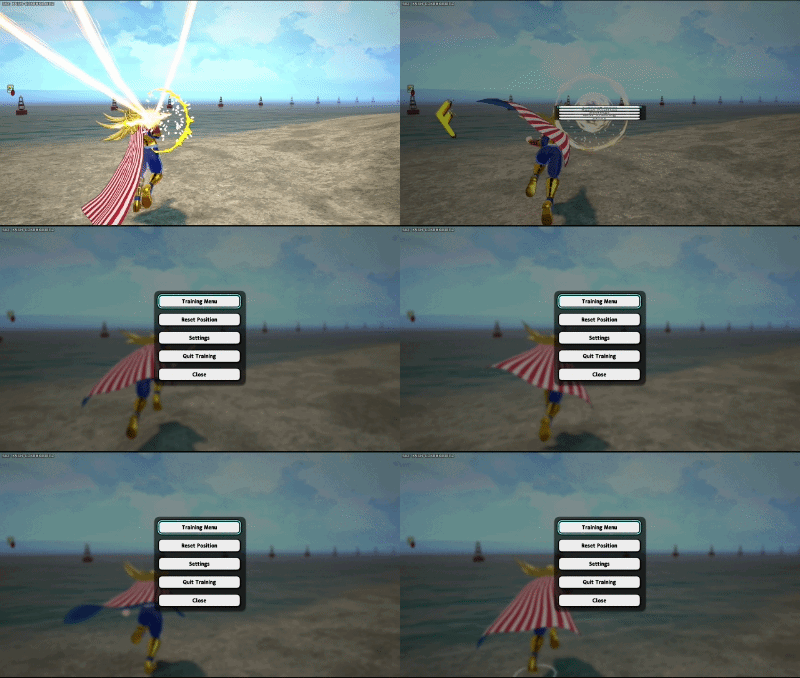

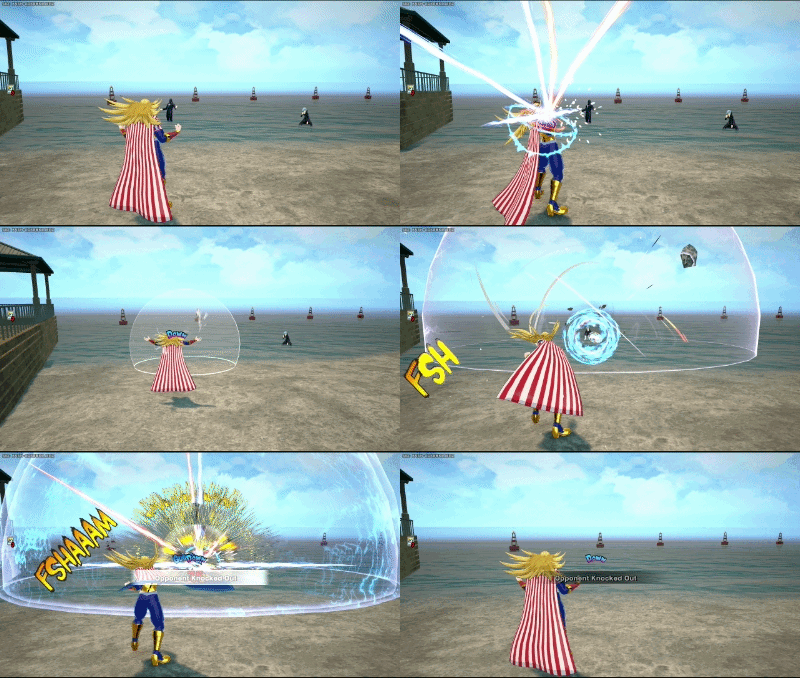
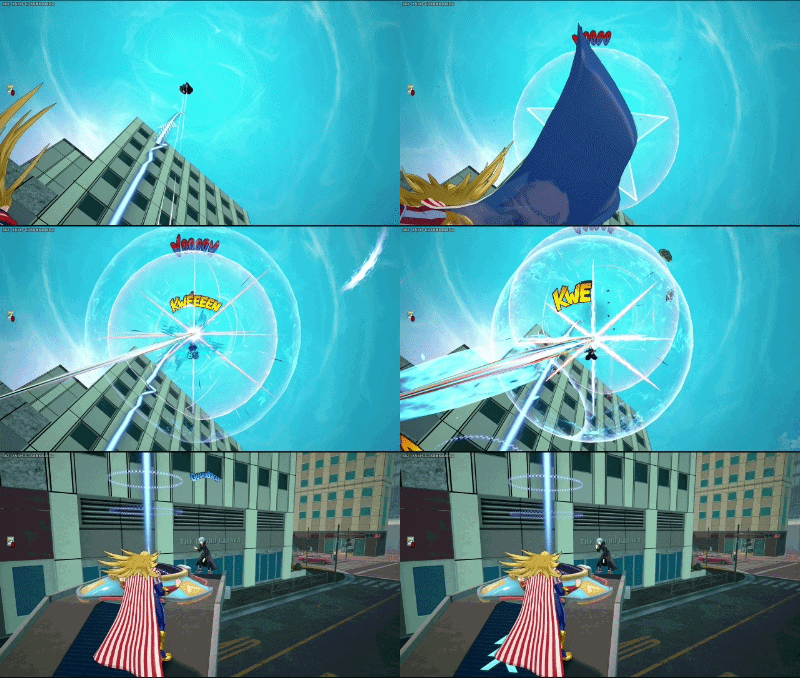
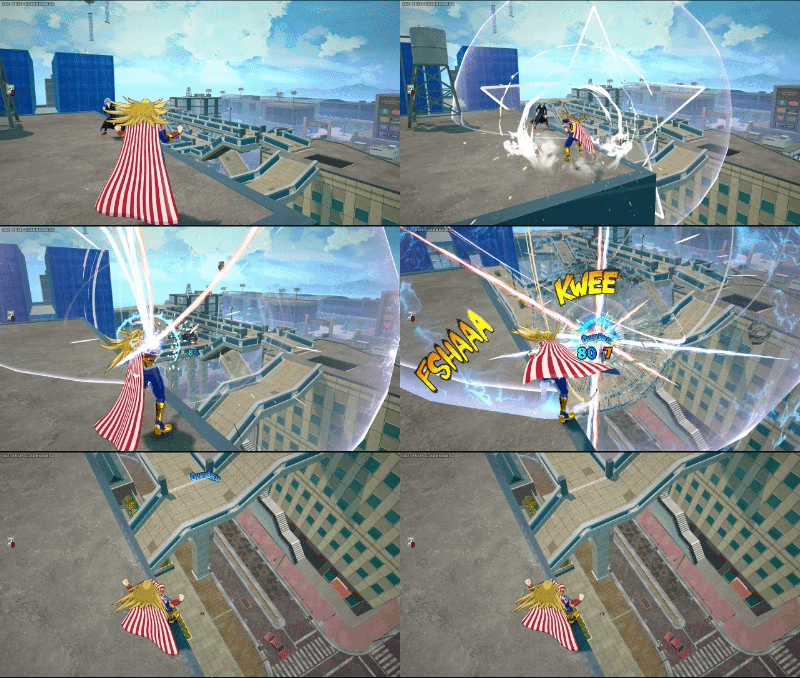 Yoink!