
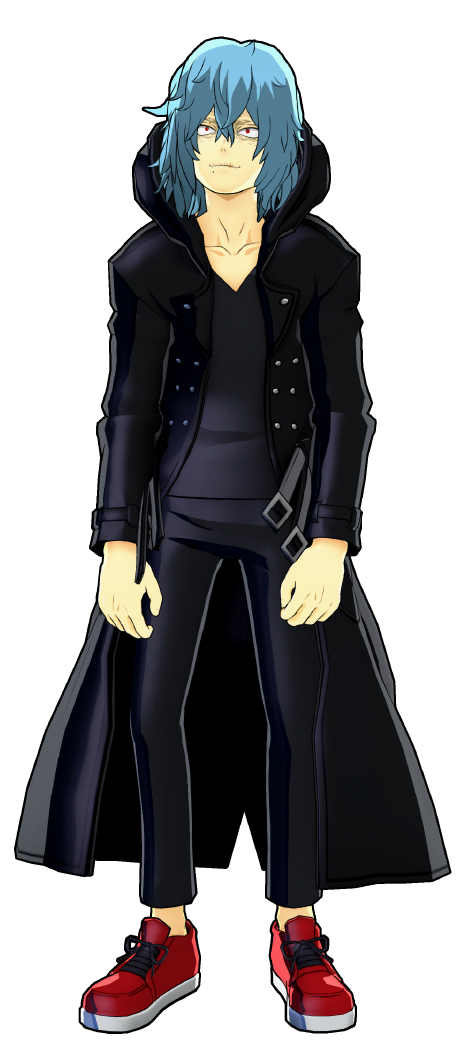


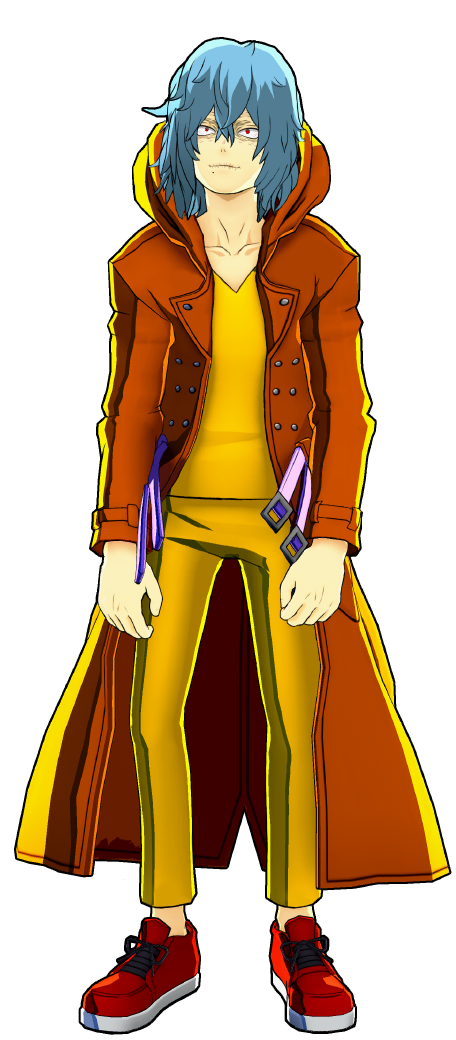
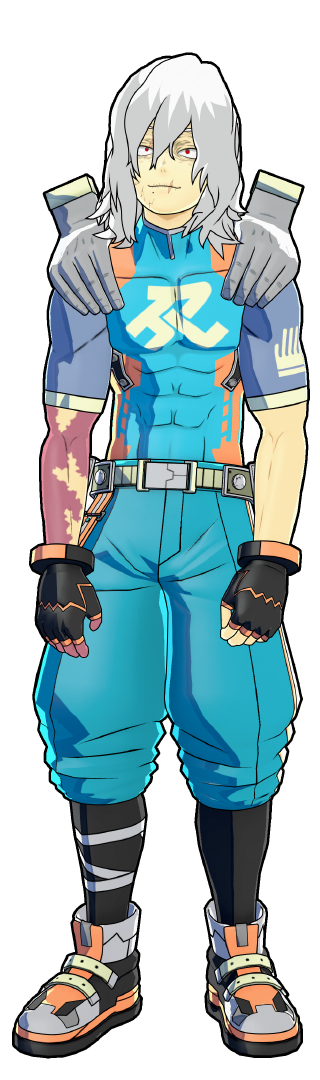
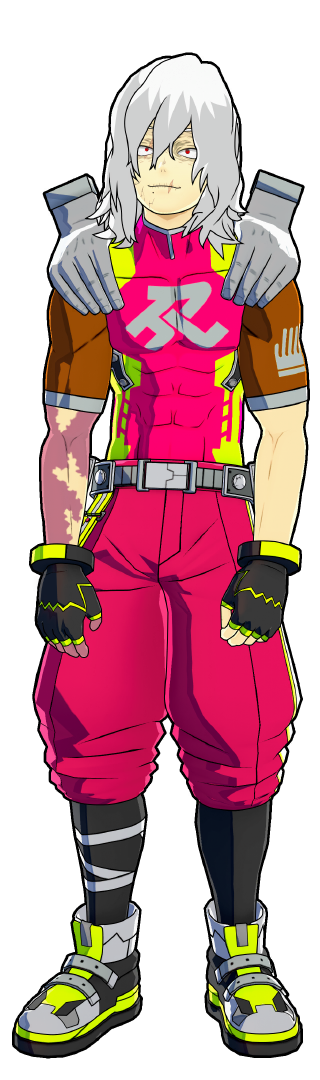
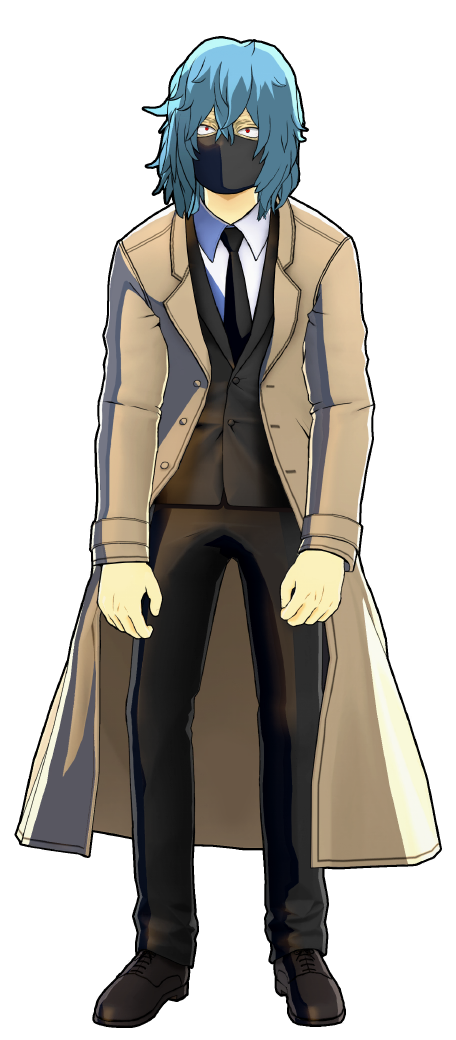
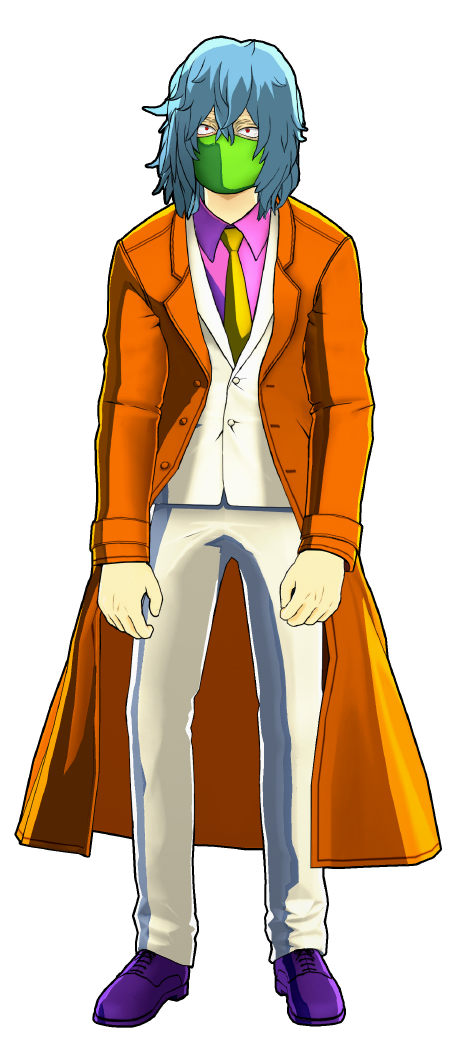
Villain Costume
This outfit is suitable for a budget build because it has access to both Support and Assault, meaning it can run Revenge Support and Revenge Assault, which already makes it strong.

Last Update: -
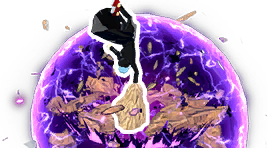
An arrogant master of destruction that eradicates anything in his path, Thousand-Hand Break Shigaraki is a high damage output monster with incredible utility through Search and Super Regeneration. He excels at controlling space with wall-piercing pressure and large hitboxes, while outlasting opponents in extended fights through his regeneration and movement. His range, high damage, control, movement, and survivability make him a character who is difficult to bring down or escape from.


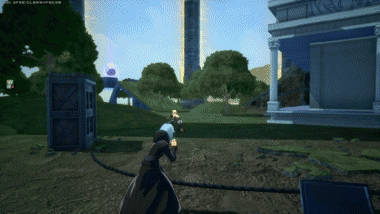
After a short startup, Shigaraki launches a wave of fingers in a straight line that pierces through walls and opponents, dealing high damage. At the beginning of the move, a small activation hitbox appears around Shigaraki that briefly stuns nearby enemies. This activation hitbox is a key mechanic to most of his combos and is covered in more detail in the Advanced Gameplay section.
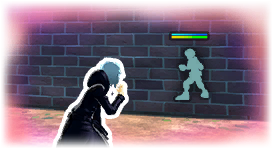
While aiming with spare Alpha ammo, Search consumes one Alpha charge to reveal opponents through walls and display their HP and GP on your screen. (You CANNOT use search without alpha ammo to consume). This information helps prioritize targets and plan engagements. A helpful detail is that any opponent visible through Search is guaranteed to be within Thousand-Hand Break's range.

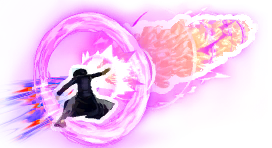
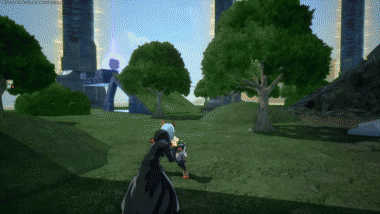
Shigaraki’s Beta skill is what makes him a dangerous presence on the battlefield. Using Beta, he leaps forward while summoning a massive fist that trails behind him. Upon landing, he releases two shockwaves: a smaller, initial one that does some damage and stuns the opponents, followed by a larger, more damaging, high-down-power shockwave that can devastate enemies caught in it.
The distance traveled is tied to camera direction, so aiming diagonally upward until the ground is out of view gives you maximum range when used on the ground. The move can be canceled mid-animation to chain into another Beta, allowing Shigaraki to travel farther or adjust his trajectory. The pre-leap can also be canceled by rolling, letting him reposition without fully committing.
At any point during the jump, Shigaraki has an active collision hitbox on himself that deals the full Beta damage and down power to anyone he touches during the jump, making him a threat even before landing and the shockwaves. This beta body hitbox, combined with the canceling of the beta, allows him to hit opponents in the air more easily.

Shigaraki’s Gamma skill provides passive healing for both GP and HP, lasting seven seconds at level one and increasing by a second with each level, reaching a maximum of fifteen seconds at level nine. While active, Gamma applies a Decay DoT effect to opponents hit by Shigaraki’s Alpha or Beta skills, as well as any enemies nearby. This effect can spread between opponents, dealing approximately 30 HP per application (3 HP per second for 10 seconds), though it will not reduce a target below 1 HP. The Decay can be reapplied if an enemy stays too close to Shigaraki or another affected opponent, or if his Alpha or Beta strikes them while his Gamma is active.
The duration of Gamma can also be extended through combat. Striking opponents with Alpha restores a portion of the Gamma meter, with each hit providing 25% and a full Alpha contributing 75% (though the “upon activation” close-range hitbox offers an extra 50%). Beta’s body collision hitbox restores 50% of the meter, and the two shockwaves each restore 25%, totaling 50% if both connect. Hitting multiple targets increases the amount gained, and receiving damage from opponents adds 5%. You can still gain gamma percent on downed people.
Healing per second increases with skill level, starting at 4 GP and HP per second at level 1, rising to 5 at level 4, and reaching 6 at level 9. Gamma allows Shigaraki to maintain his presence in battle while continuously applying Decay, making him a persistent threat and difficult to pressure in prolonged fights.
Collapse Hand deals 80 damage to opponents while applying a -20% Defense debuff, making it a strong tool for punishing wake-ups. Its tracking is similar to Melee 3, allowing you to call out opponents who try to get up or use an escape tool, and the debuff makes combos even scarier while amplifying team damage on a single target.
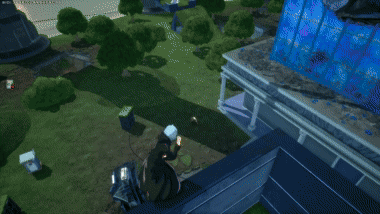
The Jump version of Collapse Hand is effective for catching airborne opponents, and as of Season 13, Collapse Hand received a small but impactful adjustment. Its aerial movement speed was increased, and the skill now begins reloading only after Shigaraki lands on the ground. When no target is in range, it generally travels toward your camera at 60 FPS, allowing you to use it as small mobility when beta is on cooldown or when trying to move up a narrow place where beta would randomly hit one of the walls.
Collapse Hand also destroys constructs on contact, including Cementoss pillars and environmental obstacles like buildings in USJ’s Collapse Zone. It can be used twice in quick succession midair, providing extra mobility and versatility in both offense and repositioning.
As of recently, Collapse Hand sometimes sends you the wrong direction if you just landed or touched a wall (or under certain unique conditions).
Shigaraki’s ground melee is a three-hit combo that deals roughly 120 damage. The third hit has notably strong forward lunge and tracking, making it reliable at close range. Despite this, ground melee is generally outclassed by other options in his kit, which offer better damage, utility, or combo routing in most situations.

Shigaraki’s air melee functions as a serviceable aerial callout, but his aerial Special Action vastly overshadows it. Collapse Hand offers superior tracking, higher damage, and a defense-debuffing effect, making it a much stronger choice for contesting airborne opponents. Air melee can still help start Alpha-based combo routes, which are covered in advanced gameplay, but its high downpower of 250 often ends pressure prematurely. As a result, it is usually a secondary option rather than a core part of Shigaraki’s neutral or combo game.

This path is for players who want access to everything Shigaraki offers without overcommitting to a single strength. Gamma level 4 provides meaningful sustain that really helps, especially with the extra healing per second and increased time. Alpha level 4 is also prioritized early, for the extra ammo often matters more than Beta’s level 4 upgrades. Fully upgrading Gamma to level 9 is a significant spike thanks to the increased healing and duration, making midgame fights far more forgiving. Alpha benefits greatly from additional ammo and damage at higher levels, while Beta, although strong with reduced cooldowns and increased area at level 9, already performs well at lower investment. Sometimes it may not even be worth leveling beta till alpha and gamma are maxxed.
![]()
![]()
![]()
![]()
![]()
![]()
![]()
![]()
![]()
![]()
![]()
This route favors a more aggressive, damage-focused playstyle and is commonly used when not running Revenge-based tunings. While Gamma’s healing remains valuable, it is less critical when you are actively pressuring opponents and ending fights quickly. Alpha is prioritized after the initial level 4 spread to maximize damage output and ammo economy. Gamma is still brought to level 4, as it is hard to gain value at lower levels, followed by Beta 4, and then maxing either Beta or Alpha for stronger engagement and area control. Gamma is completed last, providing sustain once damage options are complete.
![]()
![]()
![]()
![]()
![]()
![]()
![]()
![]()
![]()
![]()
![]()
This path shines when paired with Revenge tunings, particularly Revenge Assault or Revenge Support, and emphasizes survivability above all else. Fully upgrading Gamma as early as possible gives Shigaraki immense sustain, making him extremely difficult to kill in the early stages of a match. Although rushing Gamma to level 9 can feel awkward if progress is slow, the payoff is significant once achieved, and makes you very hard to kill at the start of the match. If Gamma upgrades are taking too long to secure, pivoting briefly to Alpha level 4 for the extra ammo is a practical adjustment. Once Gamma is complete, Alpha and Beta are leveled to round out damage and ammo.
![]()
![]()
![]()
![]()
![]()
Alpha has an activation hitbox that appears slightly after the skill is pressed. This hitbox is surprisingly large, roughly three times Shigaraki’s size, and lingers for nearly a full second even if the Alpha itself is canceled before the arms extend. At all levels, this activation hitbox deals approximately 25 damage and 50 down power, and in most situations, it hits twice, resulting in 50 damage and 100 down power total.
This property can be abused by activating Alpha and immediately rolling out before the arms fully extend. By allowing the activation hitbox to connect and then canceling the move, Shigaraki can repeatedly stagger opponents without committing to the full Alpha animation. Repeating this sequence keeps enemies locked in hitstun, making it a powerful, pressure-based control tool good for combos or catching wakeups.
This activation hitbox forms the foundation of many of Shigaraki’s combo routes. Because Alpha can be safely canceled and refunded, it allows for constant re-engagement without overcommitting. Combined with the size and persistence of the activation hitbox, this strongly incentivizes using Alpha from the ground, where you can roll and have a better shot at hitting opponents. However, aerial Alpha use remains viable as you can still catch people with this activation hitbox in the air (but you are forced to continue with the full Alpha instead). It is important to note that for some combos, Alpha will bring the opponents closer to the front of where Tech Shigaraki is facing (though only slightly; it helps with some of the more complex combos).
One important limitation of Alpha is its poor performance against shields. If the activation hitbox or the extended arms connect with a shield, even through multiple walls, the attack will deal no damage, and Shigaraki will be briefly knocked back and staggered. This makes careless Alpha usage risky in matchups against characters with shields, as it can interrupt pressure and leave you momentarily vulnerable. Though some shields only partially block alpha damage.
That all said, his Alpha can effectively function as a temporary shield or wall, blocking both enemy and ally projectiles from passing through its hands, similar to how Aizawa’s Gamma behaves. The moment the prediction for the alpha skill appears (doesn’t even have to be the attack), shots will be blocked almost like they are hitting a wall. Certain moves that stick to surfaces (yellow shigaraki alpha, Younga afo alpha) will get stuck or stop in that position. This works best with low framerate such as 60 FPS.
In addition, Alpha has a bug where, after passing through walls, it can become slightly pushed or tilted off its typical trajectory. This altered angle can make the attack much harder for opponents to read and dodge, unintentionally increasing its effectiveness in certain situations.
Additionally, the Search function tied to Alpha has notable restrictions. While it allows Shigaraki to see enemies through walls, it lets them know he can see them. (By highlighting them in blue and showing a green arrow on their screen pointing to your location). It also does not reveal the health, GP, or position of invisible characters (Froppy Gamma, Froppy Tuning, Tamaki Beta). As a result, certain matchups can become significantly harder depending on the opponent’s tools, requiring more cautious positioning and reliance on prediction rather than information.
Furthermore, since aiming in will always consume alpha ammo if you have any to spare, you need to be more careful and use it more sparingly compared to other characters (especially if you use alpha to make looking in specific directions easier). Furthermore, searching sometimes (usually at the start of a match) takes about half a second longer to display enemy positions.
Alpha has surprisingly low down power for a move of its type. While his Alpha deals high damage and typically hits around three times when it connects directly from the front, excluding the activation hitbox and Gamma-related interactions discussed later, each of these hits only carries about 10 down power. This is usually not an issue, as by the time Shigaraki recovers from his Alpha’s recoil, opponents often enter wake-up frames.
However, this low downpower can be deliberately exploited in coordinated play. When working closely with teammates, having them apply additional stun immediately after Alpha connects prevents opponents from entering invincibility frames because they are still being attacked. Similarly, effects such as Electrification, which are covered in the T.U.N.I.N.G. and Combo sections, can keep enemies locked in hitstun. By denying wake-up opportunities in this way, Shigaraki can repeatedly land multiple Alphas in succession, abusing the move’s low-down power to deal very high damage before opponents can escape.
Alpha has a bug when interacting with Gamma. When Gamma is active, the opponent has GP, and Alpha is used in the open, the damage dealt to opponents becomes extremely inconsistent. In many cases, Alpha will fail to register most of its hits and may connect only once. Opponents also appear to enter wake-up frames more quickly when they have GP and are hit by Alpha while Gamma is active, which seems to be what's reducing Alpha’s effective damage.
When Alpha is used with Gamma active against opponents with HP, it deals full damage, but it now forces the opponent downward into the ground rather than behaving normally (the opponent won't take knockback). However, when Alpha pierces through a wall, it will still deal full damage even while Gamma is active, regardless of whether the target has HP or GP. This bug is most likely caused by the Decay effect applied by Alpha while Gamma is active.
When using Beta for movement, canceling it right before landing by activating the skill again can be extremely useful for repositioning or avoiding the end lag. This allows Shigaraki to preserve momentum and disengage or adjust positioning without committing to the whole animation.
However, after canceling Beta in this way, you must either roll (usually the preferred option) or eventually use the Beta charge that was consumed to perform the cancel.
The beta's prediction line isn't always accurate and will sometimes stop prematurely if something blocks Shigaraki's path or if he is too close to a surface.
Once Beta reaches higher levels, usually around level 9, it becomes a powerful tool for quickly downing opponents. Because Beta has a body collision hitbox in addition to its two shockwaves, a downed opponent can be hit by all three of them if the angle and placement are correct (try to do it when you are nearby them). Since downed players do not receive down power, every hit deals full damage, and they do not gain invincibility frames.
At level 9 with no tuning, placing Beta directly on top of a downed target while standing very close allows the body hit to deal 200 damage, followed by shockwaves dealing 80 and 120 damage. Combined, this is enough to eliminate most opponents with a single move when executed properly. Some tuning setups allow this interaction to work as early as levels 7 or 8, and with Gamma active, it may be possible at even lower levels. Additionally, using Collapse Hand before landing all three Beta hits can instantly finish a downed opponent at any level.
Shigaraki’s Gamma holds him in place when he presses the button to activate it. Because he is defenseless during this time, it is generally recommended to activate Gamma in locations where he is at least a bit unlikely to be interrupted. That said, Gamma can be canceled freely, which allows it to function as flexibly as a healing ability.
Furthermore, Gamma continues to heal Shigaraki even while he has invincibility frames. When Shigaraki is knocked down, he typically gains around five seconds of i-frames, during which Gamma remains active and provides free healing. Because of this, playing Technical Shigaraki often involves intentionally stalling out knockdown i-frames whenever possible to maximize this “free” Gamma regeneration. When paired with tunings like Critical Permeation or Revenge Support, this effect becomes especially strong, allowing Shigaraki to recover a significant amount of HP and GP without taking any risk. This interaction is a major part of why Gamma-centric setups are so effective, and it will be covered in more detail in the tuning section.
Gamma does not heal HP while Shigaraki is inside the storm, so it is important not to rely on Gamma sustain during storm fights. While it will still function normally outside, entering the storm significantly reduces Technical Shigaraki’s survivability. Because of this, you should avoid extended engagements in the storm whenever possible and prioritize repositioning to safe zones where Gamma healing can actually take effect. That said, since it still heals your GP in storm, you will have an advantage when fighting in storm.
It is generally recommended to avoid letting Gamma fully deplete to zero. While Gamma does reload faster when empty, maintaining at least some charge gives you the option to manually activate it at will, allowing controlled healing and meter management. Keeping Gamma available provides more flexibility and defensive options in most situations.
Gamma becomes significantly stronger when paired with tuning. Because Gamma continuously restores GP, opponents fighting Technical Shigaraki will frequently break his shield, which repeatedly triggers Revenge-based tuning effects that activate on guard break. While this can also enable opponent tuning effects that activate when Shigaraki is guardbroken, such as Electrification or Quirk Factor Release, the defensive benefits far outweigh this drawback (mainly because the ones where the opponent is guardbroken usually have cooldowns anyway). Gamma-centric tuning setups are exceptionally powerful, and their full impact on Shigaraki’s kit will be covered in detail in the tuning section below.
This section covers the different ways Shigaraki can combine and chain his skills to deal high damage while managing the 500 DP (Down Power) knockdown threshold. Because many of Shigaraki’s strongest tools apply relatively high DP per hit, or are hard to combo with, understanding how each part of his kit contributes to Down Power is key to maximizing damage before a forced knockdown occurs. After his release, Tech Shigaraki received a change that removed his ability to cancel Alpha to avoid ammo consumption without committing to the move. Combos that rely on Alpha’s startup hitbox are still possible, but they now require additional ammo investment to perform.
Alpha Skill: 25 DP (startup, often hits twice though), 10 DP (Full alpha arms, often hits three times when gamma isn’t active)
Beta Skill: 500 DP (Body shot), 10 + 500 DP (Beta shockwaves)
Gamma Skill: 0 DP (however, causes alpha not to be as consistent)
Ground Melee 1-2-3: 100 DP (Individually), 300 DP (Whole Chain)
Air Melee: 250 DP
Special Action: 200 DP
Unique: Since Tech Shigaraki has very low DP on his alpha, he would be able to combo into another alpha if the endlag on the alpha wasn’t so high. Using Electrification, though, you can combo two alphas together if you manage to guardbreak the opponent with the first one, which makes Electrification quite strong.
The text of the combos below will be colored by how true they are. In this case, we will define "True" combos as those that, without 3rd-party or tuning interference, can only be escaped/interrupted by Overhaul and/or Mirio, as they are special cases.
White Text means that part of the combo is True on both GP and HP.
Green Text means that part of the combo is True if the target is on HP only.
Blue Text means that part of the combo is True if the target is on GP only (Guardbreak hits are considered GP hits).
Purple Text means that part of the combo is only true when Electrification is activated.
Red Text means that part of the combo is Untrue, and therefore the enemy can escape it.
Pink Text means the combo is still true, but may not fully work or may be inconsistent with gamma active due to the alpha bug (as discussed earlier).
Multi-colored options mean both colored statements are included.
The DMG of the following combos at max level and accounting for the character's Strike role is classified under the following tags:
Basic DMG (100-149 DMG), Basic+ DMG (150-199)
Light DMG (200-249 DMG), Light+ DMG (250-299)
Medium DMG (300-349 DMG), Medium+ DMG (350-399)
High DMG (400-449 DMG), High+ DMG (450-499)
Heavy DMG (500-549 DMG), Heavy+ DMG (550-599)
Deadly DMG (600-649 DMG), Deadly+ DMG (650-699)
Alpha startup will be a base for most of his combos, but you can remove some of them for shorter combos, less down power, and less damage, depending on the situation. Also, full alpha is only true when you connect the alpha startup, so those two together are just pressing the alpha key.


Melee combos are not optimal; however, they can activate tuning and, in some niche cases, can help.


It is hard, but not impossible, to combo off the special action on HP, though very consistent on GP. In some cases, when you have the high ground, it is easier to hit, but even if you don't hit the combo, the damage debuff from the special action will help you out.
Beta has slightly too long a windup to be entirely true; however, opponents will often get hit by at least a shockwave. This makes it a good move when your gamma is active or if you really want to squeeze out extra damage. Replacing all the full alpha combos above with a beta lowers the chance of you hitting it, but raises the overall damage and makes you less reliant on not having gamma for combos.
Combos that incorporate Electrification are powerful. Electrification has a cooldown and requires the opening portion of the combo to deal enough damage to guardbreak, but because Full Alpha has relatively low Down Power, if you are close enough to the opponent, you can easily follow up after triggering Electrification with additional Alpha hits or other combos. It's recommended to aim beta to the opponent's feet, so that if they roll the body shot you can hit the shockwaves.
Note: These Electrification combos can fail if the opponent is guardbroken at an unintended time. To make them consistent, we’ll sort combos by the amount of GP the opponent needs for the combo to work. If you’re using builds that increase damage for certain moves (like Alpha attack power), you may need to adjust these combos accordingly.
Opponents hit with Electrification after decay activate will remove the decay effect.
You can combine so many possibilities into Electrification without these setups. We're giving some areas of GP where these setups allow the user to get more consistent, high damage combos. (for example: you can do full alpha, Electrification, full alpha, but it would usually only work in ranges of 125 GP - 200ish GP)


This one is mostly consistent if the opponent has at least about 176 GP (or about 186ish if you start with melee 2 which is only 10 damage more).
This one is hard and sometimes inconsistent to do. However, if it is pulled off, it's essentially entirely true.
Tech Shigaraki’s highest damaging combo. Note: gamma active is optional as it makes it way harder to land the alpha at the start; however, with it on, you get about 30ish extra decay dot damage if you are really pushing damage numbers (I don’t recommend it):
These next few combos are less consistent because the opponent needs to have less than 150 GP (which you can roughly estimate with Search). The advantage is that they don’t rely on Full Alpha, so you can reliably execute them even with Gamma active. They are also quite good against Tech Shiggy, as you can easily pull these off at lower GP’s.
The idea is to Alpha Startup your opponent until you guardbreak them. Note that you cannot do more than three Alpha Startups before Electrification, or the guardbreak will down them and prevent further combos.
The (x) is a placeholder for how many Alpha Startups it takes to guard break the opponent. These damage for these combos will be calculated using the max number of Alpha Startups possible.
This one is a similar concept. You Special Action them, and you can do one optional alpha startup roll (if they don’t have less than 80 gp), which will lead to a guardbreak and a beta. This is about as niche as I'll get because even though it's good for when you have gamma active, some other combos are better, especially considering how hard it is to land Special Action.
This one is just for melee tuning setups, and gamma is active.

Strike Slots: Beta/Alpha DMG -> HP DMG -> GP DMG -> Gamma DMG
Assault Slots: Endeavor-> All Might -> Kirishima -> Else -> Melee Defense
Rapid Slots: Izuku (OFA) -> Mirio -> Twice -> Toga -> Else
Support Slots: Ibara -> Overhaul -> Kurogiri -> Momo -> Else
Technical Slots: Denki -> All For One -> Todoroki -> Mirio -> Else
Optimal normal tuning for Technical Shigaraki differs little from his base options. HP damage is slightly more valuable than usual because his kit deals high damage through mostly multi-hit attacks, letting him benefit consistently from the bonus damage when opponents are already on HP. That said, raw Alpha and Beta damage tuning are generally stronger overall and will provide more consistent value across most situations.
One important thing to keep in mind is that Gamma attack power tuning should usually be avoided unless it also comes with a secondary benefit (because your gamma doesn’t do direct damage, it doesn’t affect its damage value). Overhaul tuning, however, is perfectly fine to run, mainly because of the additional HP it provides. Extra HP synergizes well with Shigaraki’s natural regeneration, especially when combined with Revenge Support.
| Mainly ordered based on how strong each matchup is against Technical Shigaraki, though placements may change as strategies, tuning options, and player optimization evolve. | ||
|---|---|---|
  |
Revenge Support/Revenge Assault These are currently Technical Shigaraki’s strongest special tunings. When run together, they push Tech Shigaraki’s durability to extreme levels, to the point where a large portion of the cast struggles to deal meaningful damage. The combination massively amplifies both sustain and damage reduction, often making him functionally unkillable without coordinated team combos. To illustrate this, consider a level 9 Full Bullet Alpha, which is commonly used as a high-DPS benchmark. A single shot deals roughly 100 damage. With Revenge Assault active, incoming damage is reduced by 20%, lowering this to 80 damage per shot. Shigaraki is typically knocked down after two hits, for a total of 160 damage. After being knocked down, Shigaraki gains roughly five seconds of invincibility. During this time, Gamma restores 6 HP and 6 GP per tick, while Revenge Support restores an additional 7 HP per tick. Over five ticks, this adds up to roughly 100 total HP and GP restored before he even stands up. As a result, Full Bullet’s effective sustained damage is reduced to around 60, and this does not account for healing gained during active combat or any missed shots. This calculation also ignores base defense tuning and the ability to run support cards in the lower slots to increase healing further when needed. When all of this is combined, Shigaraki becomes nearly impossible to kill unless he is eliminated in a single, highly optimized team combo, with rare exceptions such as Nagant and, in some cases, Technical Mirio. |
|
 |
Electrification As shown in the combo section, Electrification dramatically enhances Shigaraki’s combo potential. Since Shigaraki can see enemy GP and HP values, he can precisely determine when to force a guardbreak and capitalize on it. This tuning allows him to abuse Alpha’s low-down power, safely incorporate Beta despite its startup, and access high-damage routes that are otherwise impossible for combos. |
|
 |
Critical Permeation Because Technical Shigaraki frequently gets guardbroken during fights due to Gamma’s passive GP restoration, Critical Permeation is a powerful option. While it has a 30-second cooldown, it activates more often on Tech Shigaraki than on much of the cast. When it triggers, Shigaraki becomes invincible for roughly seven seconds. During this time, Gamma restores 6 HP and 6 GP per second at level 9, and Revenge Support adds 7 HP per second. Over the duration, this results in 42 GP and 91 HP restored from those effects alone. This window also allows Shigaraki to safely use healing items or shields, making the tuning extremely reliable. While not as overwhelmingly strong as the Revenge Support and Revenge Assault pairing, Critical Permeation excels at protecting Shigaraki from high burst damage that could otherwise kill him quickly, such as a Nagant headshot followed by Alpha. |
|
 |
Revenge Technical As mentioned earlier, Technical Shigaraki gets guardbroken frequently due to Gamma’s constant GP regeneration. This makes Revenge-based tunings especially valuable, as they remain active for a large portion of each fight. Revenge Technical grants a 1.5x reload speed bonus, which is incredibly impactful despite Shigaraki already having short cooldowns. At max level and without cooldown penalties, Beta’s cooldown drops from 4.5 seconds to 3 seconds, while Alpha’s cooldown drops from 2 seconds to roughly 1.5 seconds. |
|
 |
Quirk Factor Release Quirk Factor Release has a cooldown and activates less frequently than Revenge Technical, but its effect is significantly more substantial. On activation, it provides a 2x reload speed bonus after guardbreaking an enemy, which happens often with Technical Shigaraki. With this active, Alpha’s cooldown drops to around 1 second, while Beta drops to roughly 2.25 seconds, allowing Shigaraki to rapidly reposition and maintain offensive pressure. |
|
 |
Space Hop Space Hop is a strong mobility option for Technical Shigaraki. The increased jump height allows him to reach more positions with Collapse Hand, set up better Beta angles, or pressure opponents from above with Alpha (though that one is not always recommended). The extra height also synergizes well with Gamma, enabling safer activation or an easier air-stalling setup. However, this tuning makes Shigaraki more vulnerable to characters that punish airborne opponents, so it should be used deliberately rather than spammed. |
|
 |
Wall Runner Wall Runner provides strong mobility and unpredictability. Compared to the Beta movement, wall running is harder for opponents to read, allowing Shigaraki to outmaneuver enemies more effectively. There is also tech that allows Shigaraki to hold Beta while wall running, but the primary value of this tuning lies in the added movement options and evasiveness it provides. |
|
 |
Revenge Rapid Revenge Rapid remains a viable option due to its frequent activation, but its impact is noticeably weaker than other Revenge tunings. Alpha and Beta gain very little (if any) benefit from the attack speed increase, and the main advantages come from slightly faster movement and access to wall running. |
|
 |
Ability Manifest Because Gamma already provides strong sustain and defensive value, Ability Manifest further amplifies Shigaraki’s ability to remain in prolonged fights. The 1.6x boost to ability cards synergizes well with his playstyle, giving him additional tools during extended engagements. |
|
   |
Kota Finder/Divine Protection/Card Duplication These tunings help Technical Shigaraki level up faster. Thanks to his strong mobility, he can reach Kota spawns and supply boxes earlier than many characters. Card Duplication in particular accelerates early leveling, which significantly improves his survivability and damage output in the early game. |
|
 |
Fixer On optimized builds, Fixer can provide a meaningful damage increase. Since Shigaraki’s attacks hit multiple times, the added damage scales well across his kit. Some builds that leverage this tuning are outlined later. |
|
   |
Crushing PU Charge/Symbol of Peace/Extra Wind These tunings help Shigaraki reach Plus Chaos faster. While not essential, Plus Chaos synergizes well with Gamma, allowing him to stay in fights longer and further amplify his already strong sustain. |
|
 |
Willpower Willpower is a solid defensive option that helps prevent sudden deaths from high burst damage. However, it requires careful disengagement once it activates, as poor positioning afterward can still result in being punished. |
|
 |
PU Power Intensified This tuning significantly increases Shigaraki’s damage output. When combined with Gamma during Plus Chaos, Shigaraki gains max shield, shield regeneration, HP regeneration, and a substantial damage boost at the same time. The main downside is that the Plus Chaos duration is reduced by roughly five seconds, making timing and decision-making more critical. |
|
 |
Quick Reload This tuning sounds strong on paper, but in practice, it is not optimal. With builds that use Revenge Technical or Quirk Factor Release, Technical Shigaraki already has sufficiently fast Alpha reloads and improved cooldowns across his kit to safely maintain pressure. Alpha’s endlag is already relatively low, so further investment into its reload speed provides diminishing returns. Because of this, dedicating an entire special tuning slot to the effect is inefficient for Tech Shigaraki, especially when its activation condition requires downing an opponent, making it far less consistent than alternatives that provide value throughout the entire fight. |
Builds that aren't PUR and are cheaper with some decent effects if you want to test out tuning or not spend too much on PUR outfits.
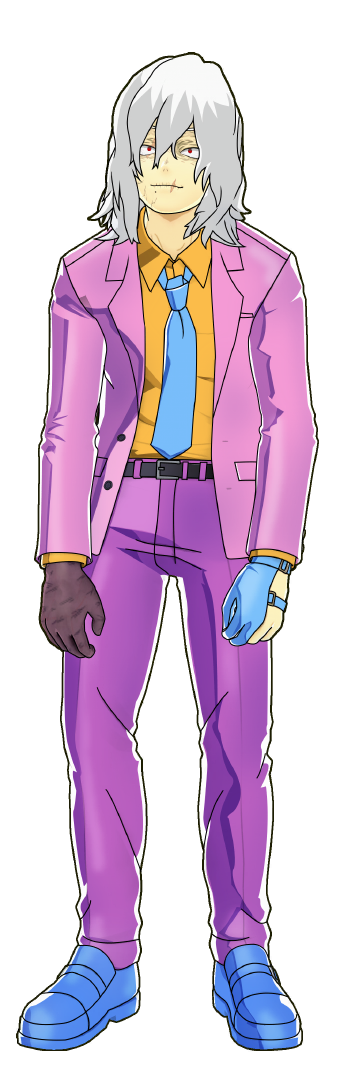
This outfit is suitable for a budget build because it has access to both Support and Assault, meaning it can run Revenge Support and Revenge Assault, which already makes it strong.

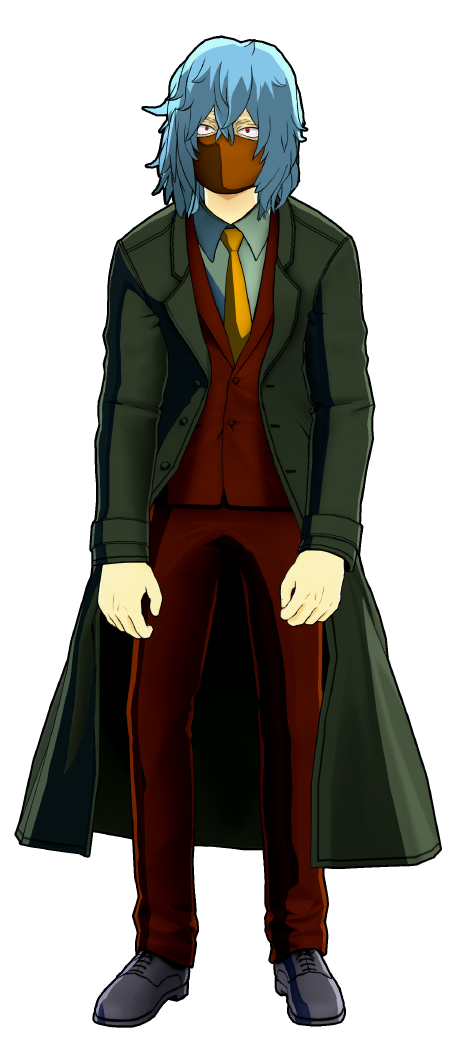
This outfit is good because it gives you Tech + Rapid. Running Revenge Technical (or maybe Critical Permeation) alongside something like Revenge Rapid makes you harder to pin down while keeping your abilities flowing.


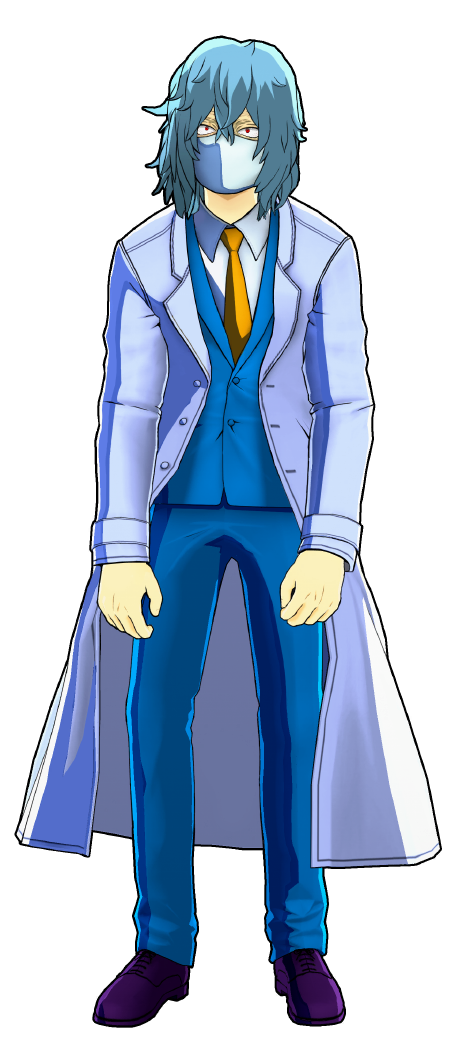
This outfit is solid because it gives you Support access, meaning it can use Revenge Support, which is already huge for Tech Shiggy. You can also run something like Ability Manifest or Crushing PU Charge to test out those builds.
An alternative to the previous outfit. The same things mentioned for the previous outfit apply here as well.
This one lets you run Revenge Support and Revenge Rapid, which is not too bad for a budget build.

This is the strongest overall In Plain Sight variant because it has both Assault and Support, letting you use Revenge Support and Revenge Assault together.
These are complete builds with good special tuning slots (with some regard to normal tuning as well). He has a lot of good builds, but I'm mainly going to focus on ones around his top 10 good special tunings while trying to have some for each PUR set.

Lets you run a Rapid special tuning like Revenge Rapid/Wall Runner, and an Assault special tuning like Revenge Assault/Space Hop for special tunes. The normal slots aren’t that bad either, so it's good for improving survivability.


Similar to the previous outfit, but lets you run Quirk Factor Release instead of having the option for a villain Rapid special tune.

Alternative to the previous outfit so the things mentioned there apply here as well.
An excellent build to run Revenge Support + a tech tuning (which ⅗ of the best tunings for him are Tech hero ones). This is a wonderful build to run Electrification or Crit Perm especially on.

Solid outfit that can run Ability Manifest, PU charging tunes, Lady Nagant's Quick Reload, or the other solid Strike ones + Revenge Assault/Space Hop. The normal tuning for these two also gives a good amount of survivability to Shigaraki.
Alternative to the previous outfit so the things mentioned there apply here as well.

This is a good build for Revenge Technical, Electrification, and Crit Perm for the Tech slot and Revenge Assault for the Assault slot, but it doesn't have the best normal tunings. This outfit could also perform well with Fixer.
Alternative to the previous outfit so same things mentioned there apply here as well minus the Fixer mention.

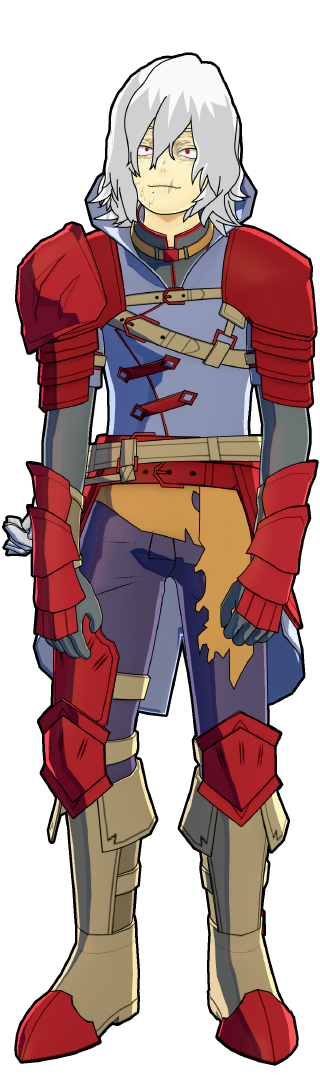
Instantly one of his top 3 outfits just because of the Revenge Assault and Revenge Support. Furthermore, it has nice normal tuinings too, with a good amount of defensive ones. This is one of the best builds.

This build is fine if you really want to use Nagant’s tuning at level 11, but that’s basically the only reason to run this. This outfit is more just a vehicle for Nagant's tuning plus another decent Strike special, rather than a complete build on its own. It also doesn't have the best normal tuning layout, which makes it feel a bit weaker overall compared to other PUR options unless you’re specifically committed to making Nagant’s tuning work.
Alternative to the previous outfit so the things mentioned there apply here as well.

An excellent build for reload management. You can run both Revenge Technical, Electrification, or Crit Perm and Quirk Factor Release for insane reload speeds. It has relatively good normal tunes and is a more aggressive build to play.
One of Shigaraki's best skins for Fixer since it has a max-level Fixer slot. With the tuning layout, you can get Endeavor, Tech Denki, a hero red of your preference, Tech AFO, and an Overhaul in the Fixer column for 17 extra HP from the skin and higher damage output. The blue slot lets you pair this with Wall Runner/Revenge Rapid for more survivability, or Card Duplication for more levels.
One of Shigaraki’s only builds that can run Divine Protection and Revenge Support which is not too bad for getting levels faster.
Similar to Awakened base, this is a solid outfit that can run Ability Manifest, any PU charging tune, Kota Finder, Willpower, or even PU Power Intensified, but this one can run Revenge Support instead of Revenge Assault. These make the outfit have more healing, which is good with Ability Manifest and Support/Assault ability cards.
Alternative to the previous outfit so the things mentioned there apply here as well.
Alternative to the previous two outfits so the things mentioned there apply here as well with the addition of having better regular tunes than the previous two outfits.
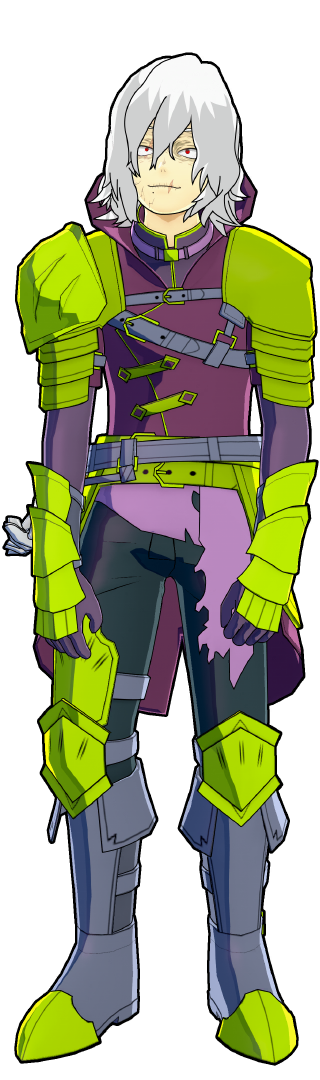
This is his other Revenge Support and Revenge Assault build that is also instantly a top 3 outfit for Tech Shigaraki. This one is slightly different from Awakened (Fancy) because it's giving you two extra seconds of Revenge Assault on the right rather than one extra second from Revenge Support being on the right. This outfit also has slightly less good normal tunes than Awakened (Fancy).
Good outfit to run a Tech special tuning + a Strike hero special tuning. Both of those tunings are versatile and offer many good options, so this is a solid build you can mix and match with. This outfit’s normal tunes have a good amount of Tech slots on it, which is not that bad.
Alternative to the previous outfit so the things mentioned there apply here as well.

An alternative way of rating matchups will be used. Because characters differ greatly in survivability, mobility, range, damage output, and control tools, matchup ratings should always be read with overall kit strength and design in mind. These definitions assume a primarily 1v1 scenario in which both players are of similar skill level, have reasonable resources, and face no consistent third-party interference. Team dynamics, builds, map layout, and tuning choices can shift matchups, but this system is intended to serve as a general baseline.
🔴🔴🔴Extremely Unfavorable🔴🔴🔴 - This matchup is overwhelmingly in the opponent's favor. The opponent controls when and how interactions happen, while most of your options either fail outright or cost far more time and resources than they are worth. Even when you play correctly, you are often forced to disengage, stall, or abandon the fight entirely, as pressing an advantage usually leads to losing position or taking heavy damage.
🔴🔴Very Unfavorable🔴🔴 - Your available options are limited and often require a high level of commitment. Victories usually come from landing specific high-impact plays or punishing clear mistakes, while the opponent has multiple ways to deny or punish your usual approaches.
🔴Unfavorable🔴 - The matchup is playable but tilted against you. You generally need cleaner execution, stronger positioning, or better resource management to create openings, and mistakes are punished more heavily on your side.
🟡Even🟡 - Both sides have viable win conditions and meaningful counterplay. Success typically comes down to matchup knowledge, consistency, and tempo control rather than any single interaction or combo.
🟢Favorable🟢 - You tend to control the pace of the matchup. Your tools reliably create openings, you are not overly dependent on high-risk plays to win, and the opponent has limited ways to shut down your game plan consistently. That said, you must still be wary of your opponents and try to avoid careless mistakes.
🟢🟢Very Favorable🟢🟢 - The opponent has few reliable answers to your strongest options. You can apply pressure, control space, or secure advantages with relatively low risk, and mistakes on your end are less punishing.
🟢🟢🟢Extremely Favorable🟢🟢🟢 - The matchup is overwhelmingly in your favor. The opponent struggles to contest your win conditions meaningfully, so you can win consistently without taking significant risks or relying on rare situations.
🟣Unknown🟣 - The outcome of this matchup heavily depends on the opponent’s current resources, cards, or temporary power spikes at the time of the fight. Because of this, the matchup can swing in multiple directions and lacks a consistent baseline outcome. This label can be paired with another rating to provide a general sense of difficulty, acknowledging that situational factors can significantly alter the result of the fight.

Difficulty Score: 🟢🟢Very Favorable🟢🟢
Default Deku doesn’t really have the tools to consistently pressure you. His Beta is easy to play around with most of the time; Alpha alone isn’t enough to threaten you through Gamma sustain and movement. As long as you keep good spacing or stay airborne, you can slowly outpace him and win without needing to force anything. You need to be careful with his gamma grab, though, as it sometimes may lead you into high-damaging combos that might make it hard to recover from. Other than that, you can freely control the pace of the fight, apply pressure when you want, and disengage without much risk, making this matchup heavily skewed in your favor.

Difficulty Score: 🟢🟢Very Favorable🟢🟢
Full Bullet hits much harder, but the matchup still heavily favors you if you play it right. His Alpha is scary, but it’s basically the only thing he has when you’re in the air, and his Beta is extremely inconsistent against aerial targets. You can’t mindlessly beam him, but by controlling height, baiting Beta or Gamma, and punishing cleanly, you stay in control of the fight. It is awful for him that his alpha has high down power and gives Tech Shigaraki more time to heal with gamma if it's active.

Difficulty Score: 🟢Favorable🟢
OFA Deku is much more threatening due to his speed and ability to snowball off close-range pressure. Mistakes are punished harder here, and letting him get momentum can quickly swing the fight. That said, you still hold the advantage overall through better control of engagements and spacing, and you don’t need perfect execution to win as long as you play patiently and deny his opportunities to stick to you. A lot of OFA deku’s attacks rely on him coming to you, predicting this, and punishing with alpha startups really hurts his damage potential. If you aren’t paying attention, he can get the upper hand.

Difficulty Score: 🟢🟢Very Favorable🟢🟢
Default Bakugo sounds good on paper, but struggles against you in practice. His Beta barely works on aerial targets or fast-moving targets, and while Gamma is something you still need to be aware of, it’s a huge commitment that’s easy to bait and punish hard. As long as you don’t let him sneak up on you early or miss your moves and get caught by Alpha beams, you can play this matchup comfortably without needing to force big combos. On top of that, his Gamma can be completely shut down by using Alpha right before it connects. The one thing to keep in mind is that his Alpha does go through your Alpha hitbox, unlike most other projectiles, so careless trades can still cost you.

Difficulty Score: 🟢Favorable🟢
Machine Gun Bakugo is notably more threatening due to his speed and evasiveness, but he still struggles to consistently break through your defensive layers. His mobility makes him annoying to lock down, but his low durability means any clean stagger or combo swings the fight in your favor. His biggest threat comes from his combo damage, since taking too much too fast can quickly put you in a losing position. You generally control the pace of the matchup, but sloppy pressure or missed punishes can give him the chance to escape and fully reset.

Difficulty Score: 🟡Even🟡
Default Ochaco is dangerous because of how quickly she can end a fight if she lands Gamma, especially if you’re grounded. Her high mobility makes her annoying to pin down, and she can force scrambles you don’t really want to take. That said, her Beta and Gamma both have clear end lag, and if she misses either, you can try to punish. Staying airborne, avoiding Gamma, and punishing her for her commitments are usually enough to keep this matchup manageable.

Difficulty Score: 🟢Favorable🟢
Zero Satellites is much easier to deal with once you control spacing. Her charged Alpha hits hard, but it’s slow and very predictable, making it easy to play around. Tap Gamma is the real threat here since it stuns and can lead to a bad combo or a lot of chip damage if you’re careless. Outside of that, she struggles to force you into bad positions. Her charged Gamma also doesn’t protect her nearly as well anymore, since you can break it with Special Action or hit through it with Alpha. As long as you don’t walk into tap Gamma or eat too many Alphas for free, this matchup generally plays out in your favor.

Difficulty Score: 🟢🟢Very Favorable🟢🟢
Iida struggles to force meaningful pressure because he must get close to do his damage, and that can be predicted and exploited. His movement is fast but very linear, and if he commits too hard with Recipro, you can get strong punishes on both the startup and endlag. While keeping up with a fast Iida can be tricky, staying near him and forcing him to come to you (or waiting till the zone is small) actually works in your favor in the end, as it's easy for him to run, but harder to do damage when you know it's coming. Alpha's startup and Beta’s body hitbox make punishing his approaches much easier, and once you catch him, it’s easy to put him into your own combos. Overall, this matchup heavily favors you and usually plays out on your terms.

Difficulty Score: 🟡Even🟡
Default Shoto is dangerous primarily when he’s allowed to control the ground. His Beta does a lot of damage, and Gamma can stun you into taking even more, while also giving him strong movement that can make him hard to catch. Both Beta and Gamma can punish you for bad positioning, but they can give you windows if you stay patient. As long as you don’t force fights in tight spaces or let him freely set up, you can poke him down and play around his cooldowns, keeping the matchup fairly even. It’s also worth noting that your Alpha goes through his Beta, which changes how Shoto has to approach certain situations.

Difficulty Score: 🟢🟢Very Favorable🟢🟢
Tech Todoroki struggles much more against you than his Default version. His pressure is easier to read, and while his area control can look threatening, it doesn’t line up well against your ability to poke, disengage, and punish his moves. As long as you don’t chase him into bad terrain or get clipped by his effects, you can shut down his game plan and control the fight without needing to take unnecessary risks.

Difficulty Score: 🟢Favorable🟢
Tsuyu’s mobility can make her annoying to deal with, and she can catch you with bad wakeups or chase you down and knock you out of moves if you’re careless. However, her pressure does leave her open if she misses shots. Her Gamma also makes it impossible to track her with Search, which makes her one of the better characters at running away from you. That said, like most Rapids, she still needs to get close to deal damage, and those approaches can be punished. If you stay calm and don’t let her sneak hits in, you can consistently punish her movement patterns and keep the matchup in your favor.

Difficulty Score: 🟢🟢Very Favorable🟢🟢
Default Kirishima has a hard time doing anything meaningful unless you let him walk straight into you. Most of his damage comes from being right on top of you, and if you avoid that by heavily out-movin' him, he is essentially forced to go for options that are easier to see coming. However, once Hardening is active, you do need to be more careful, since punishing his moves becomes much harder as Tech Shiggy. When Hardening is down, you can poke him out and punish the gaps in his pressure fairly easily. As long as you don’t stand your ground unnecessarily and keep an eye on his Hardening, this matchup heavily favors you.

Difficulty Score: 🔴Unfavorable🔴
Red Drive significantly shifts the matchup compared to Default Kirishima. His damage comes out fast, covers a lot of space, and punishes mistakes hard, often before you have time to reset. His Beta acts as a powerful shield that blocks your attacks and does not break like some other shields. His Gamma can hit from awkward angles or snipe you during recovery/from far away, and his Alpha gives him strong movement and multiple escape routes or combo starters. He’s difficult to interrupt, hard to keep away once he starts moving, and has access to high-damage combos, which become even more threatening when Hardening is active. When he’s hardened, punishing him directly is extremely difficult, so your best option is to rely on Beta’s body hitbox or the second shockwave to knock him down. This matchup is playable, but you generally want to avoid extended head-on fights and look to disengage or stall when possible.

Difficulty Score: 🟢Favorable🟢
Momo struggles to deal with you once the fight stops being slow and controlled. A lot of her strength comes from setting things up ahead of time, and if she’s forced to react instead, she loses momentum quickly. She can still be dangerous in tight spaces if cannons (that do good burst damage) or her shield (which blocks your alpha very well when she is using it) are already out, but she has a hard time stopping you from disengaging or poking her down. As long as you don’t rush mindlessly into her setups, this matchup generally plays out in your favor.

Difficulty Score: 🟢Favorable🟢
Base Denki can be scary if you get careless, but he struggles to force damage without landing stuns or starting combos. His individual hits aren’t too threatening on their own, but getting caught by Alpha, Gamma, or Special Action can lead to a lot of damage very quickly, and close-range scrambles can go bad if you mistime a dodge. Outside of that, most of his pressure is easy to read. As long as you’re aware of his stun tools and don’t give him free combo confirms, you can poke him down, disengage, outrange him, and play around his cooldowns without much trouble. The matchup stays in your favor as long as you remain patient.

Difficulty Score: 🟢Favorable🟢
Lightning Denki is still concerning, but for different reasons than Base Denki. He has far fewer stuns, but his Beta is something you always need to pay attention to, and you can’t stay too close because of his Special Action and un-aimed Alpha. Those options are easier to avoid, but his aimed Alpha hits from very far away and make it harder to avoid taking unwanted poke damage. Mistakes aren’t punished as hard as against Base Denki, but there’s more room to make those mistakes and to lose ground through smaller chunks of damage. The matchup plays out differently overall, but it still favors you if you try to play from midrange (close enough to threaten beta and alpha, far enough not to get hit by his moves besides aimed in alpha).

Difficulty Score: 🟡Even🟡/ 🟣Unknown🟣
This matchup can swing heavily depending on what Monoma has copied. If he’s lucky with his copies, he can have access to multiple advantages at once, and the fact that he has a second set of quirks he can swap into makes him very unpredictable. That said, copied quirks deal less damage than their originals and Monoma might not have as much hp as the original holder. Those downsides stop the matchup from being outright unfavorable, but the amount of variance keeps it from being consistently favorable either. Something else to keep in mind is that if Monoma copies your Gamma, he gains access to a powerful stalling tool. He can Beta into the air with his base kit and then Gamma stall, which is something you can’t replicate because you can’t Gamma after using your Beta to get into the air (which is your main way to get in the air). This makes him extremely hard to hit during that window, giving him time to heal and effectively reset 1v1 fights. This interaction is just one example of why the matchup can swing so hard depending on what he copies. Overall, how this fight plays out depends heavily on his loadout and how well you adapt to it.

Difficulty Score: 🟢Favorable🟢
Default Kendo has a hard time forcing damage unless you play directly into her space and gameplan. Her shield is very aggressive against your playstyle and can block pressure, but it doesn’t actually let her take control of the fight unless you overcommit. Since she needs to be close to deal meaningful damage, most of her approaches are easy to read and punish. Try to just poke from midrange or a distance, your alpha will break her shield eventually (or your special instantly destroys it). As long as you stay patient and don’t tunnel into her shield or space, this matchup generally stays in your favor.

Difficulty Score: 🟡Even🟡
Twin Palm Strike is noticeably more dangerous thanks to her mobility and combo potential. In exchange for some of the defensive power from her base kit’s shield, her shield no longer blocks all damage, but it can still stun you after taking hits and lead into a heavy counterattack. She can keep up with you much better and punishes mistakes harder, especially at close range. Her movement is strong and can keep up with you if she plays well, and her combos can lead to devastating amounts of damage. Her charged Alpha has a solid range and can knock you out of many of your moves. That said, she still needs to be relatively close to deal damage outside of charged Alpha, and those moments give you windows to disengage and look for safer ways to poke or reset. This matchup usually comes down to spacing, catching move endlags, cooldown management, and who forces the other into a bad interaction first.

Difficulty Score: 🟢Favorable🟢
Ibara can deal a lot of damage if she catches you with Gamma (which is actual damage that hurts you) or repeated Alpha hits. Still, she struggles heavily with mobility and repositioning. As long as you don’t get hit with Gamma and go behind walls or some off angles, you can poke her down and disengage whenever needed. She doesn’t have good ways to chase or reset fights, which makes it hard for her to maintain pressure. If you stay patient and don’t force interactions, this matchup generally plays out in your favor.

Difficulty Score: 🟢Favorable🟢
Default Mirio relies heavily on surprise and whiff punishes to get anything started. Most of his stronger options have noticeable startup, and if he misses, he’s very vulnerable. While his quick options can still clip you if you’re careless, he struggles to force consistent pressure without taking risks. His gamma also counts as a shield that gives him and anyone in it complete immunity to your attacks and makes you stagger when you hit it. His special (like Tech Mirio) is an easy “get out of jail free card” that he can use to go to his teammates or break some of your combos or damage. His high movement, invincibility, and ability to also hit through walls make him noteworthy and really hard to catch, but as long as you stay aware of his movement and don’t get jumped, he struggles to do significant damage to you, and has low health, you can abuse. This all makes you control the pace and punish his openings reliably.

Difficulty Score: 🔴🔴Very Unfavorable🔴🔴
Sheer Counter is one of the few matchups that genuinely shuts down large parts of your kit. His counter and extended invulnerability windows make it extremely risky to pressure him, even when you’re playing correctly. He can reactively punish many of your safest options, break out of situations where most characters would be stuck, and turn small interactions into massive swings. His gamma can counter alpha even if you're through walls. It also counters the startups of the alpha; the cooldown on it gets reset if he hits you, and the damage on it is massive. The amount of invulnerability, damage, control, and movement makes it very hard to fight a good player. This matchup often forces you to disengage, stall, waste his cooldowns, or rely on team pressure, as trying to take clean 1v1s is rarely worth it.

Difficulty Score: 🟡Even🟡
Tamaki can be very dangerous if he lands Alpha grabs or starts his combos, and can easily just repeat and stop your advancements. His grab pressure is intense, but manageable with good spacing and awareness. Once he starts missing grabs and is forced to poke, his pressure drops significantly. His movement is reasonably good; he can become invisible to search with his beta, and his cannon is a move that can punish you very harshly if he knows where you are (making it harder to do poke). That said, your beta is an excellent fighting tool in this matchup that can heavily shut down his attempts to bring you in (when you run) or his attempts to run. This matchup usually comes down to who makes the first mistake or whoever can hurt the opponent more before they die, making it fairly even overall.

Difficulty Score: 🟢Favorable🟢
Nejire can stay airborne for a long time and make it harder for you to hit, but she struggles to convert that into meaningful pressure against you. Her projectiles are slow and predictable, and she doesn’t have great ways to punish you hard for minor mistakes. Even though her movement isn’t too bad, and she can chip you down if ignored, she has a hard time forcing you into bad situations. As long as you don’t let her deal damage for free, this matchup generally favors you.

Difficulty Score: 🟢Favorable🟢
Shinso can be annoying to deal with due to his stuns and combo potential, but the damage he gets off those interactions usually isn’t overwhelming. You can afford to take a few hits without immediately losing the fight, and disengaging is a very real option as long as you don’t get caught repeatedly. His special will leave you vulnerable for several seconds, but so long as something else doesn’t hit you, or you're not on low hp, Shinso can’t do anything too big against you. His pressure becomes much less threatening once you stop panicking and focus on spacing and timing. As long as you stay aware of his grab timings and don’t let him load damage on you, this matchup stays in your favor.

Difficulty Score: 🟢🟢🟢Extremely Favorable🟢🟢🟢
Default All Might struggles heavily against you. Most of his moves have noticeable endlag you can exploit, and although his damage is semi-high, it's slow and easy to avoid. His beta has super armor, so it can go through your alpha startup, and his gamma has a shield. He has a hard time keeping up with your damage, movement, and survivability, and once you recognize his patterns, punishing him becomes very consistent. This matchup gives you a lot of freedom to play safely and methodically, making it one of your easiest fights.

Difficulty Score: 🔴Unfavorable🔴
Gatling All Might is much more dangerous due to his serious damage output, strong movement, and access to grabs. He can close gaps quickly and punish mistakes hard, making it risky to take extended scrambles. His pressure is much harder to disengage from compared to Default All Might, and careless positioning can lead to considerable damage very fast. His alpha charges you gamma up quickly, but the damage it deals and its range make it a problem for you. His gamma is a grab (or if he grabs someone else, a wide AOE) that does enormous burst damage and keeps you in place for a bit, which are two things you want to avoid. Furthermore, since his movement is so fast, at most points in the fight, he can run and outpace you. While the matchup is still playable, you need to be much more careful about spacing and timing.
Difficulty Score: 🔴🔴Very Unfavorable🔴🔴
Armored All Might is one of the most challenging matchups for you. His burn damage directly counters your healing, he can float out of your effective range and still deal damage to you, and his movement makes him hard to pin down. On top of that, he has strong stuns, good combos, and very high damage, meaning even short interactions can swing heavily against you. He controls the pace of the fight far more than most characters, and trying to force engagements usually backfires. Try to do cheeky damage on him and hit through walls or some surprise shots. This matchup often comes down to avoiding him, relying on team pressure, or doing cheeky damage, rather than taking clean 1v1s.

Difficulty Score: 🔴Unfavorable🔴
Aizawa is a significant threat because he can shut down your kit very consistently. His grabs that can be done from a distance lead into high-damage combos, his movement makes him hard to lock down, and his Special Action turns off your Gamma, removing a core part of your sustain and control. This matchup is especially rough for revenge-based builds, since you don’t have a comfortable way to set Gamma up without getting grabbed or having the activation canceled. Because he can deny your game plan so well, fighting Aizawa head-on is usually not worth it unless you catch him heavily out of position.

Difficulty Score: 🟢Favorable🟢
Despite his high damage, range, and control, Present Mic lacks much else. His pressure can be annoying and makes engaging awkward at times, but he’s mostly a stationary threat with severe damage around him, and once you land a clean enough combo, he goes down quickly. As long as you don’t charge in recklessly, you can hit him first, stop his setups, and pick your moments to engage or disengage. He’s more threatening than some other favorable matchups, but still very manageable.

Difficulty Score: 🟢🟢🟢Extremely Favorable🟢🟢🟢
Cementoss is usually very good at blocking and controlling space, but he struggles heavily against Tech Shigaraki. Your Alpha goes straight through all of his structures, and your Special Action can instantly destroy them, completely invalidating his main defensive tools. By staying out of his line of sight and constantly poking with Alpha, you can pressure him safely and force him to move. If he tries to retreat too far, you can chase him down easily. As long as you play patiently, don’t take too much damage, and don’t overextend, it’s hard to lose this matchup.

Difficulty Score: 🟢Favorable🟢
Default Endeavor does have tools you need to be slightly wary of, such as intense ranged pressure (with beta), some stuns (beta), and air control through his Special Action. That said, he doesn’t fully control your options and lacks the movement needed to keep up with you consistently. He can add chaos and pressure to you if you're not careful, and can force you into bad situations or to take a lot of damage if you overextend. Playing it patiently while not letting him freely set up and attack where you have the advantage allows you to keep this matchup in your favor.

Difficulty Score: 🟢Favorable🟢
Inferno Fist follows the same logic as Default Endeavor, but with slightly different strengths. His control is higher, especially in the air, but his pressure is a bit worse overall, and many of his attacks interrupt his own movement, allowing you to counterattack. If you stay aware of his positioning, try to avoid his big AOEs, and apply a lot of pressure on him, this matchup favors you.

Difficulty Score: 🟢🟢Very Favorable🟢🟢
Default Hawks mainly relies on his movement and, sometimes, his range. His damage output isn’t high enough to be a significant concern, and he doesn’t have strong control tools to lock you down. Perception can be annoying, but Hawks is squishy enough that a clean interaction or combo often decides the fight. As long as you don’t endlessly chase him or soak unnecessary chip damage, you can win this matchup a majority of the time.

Difficulty Score: 🟡Even🟡
Slicing Wind Hawks is much more concerning than its Default version. His Beta armor, especially at level 7 and above (makes your alpha chargeup no longer stun), along with upgrades to his other skills, makes him harder to challenge directly. He relies more on combos that can deal severe damage, and his movement is significantly better. That said, if you force him to come to you instead of chasing him (or being chased in the open), his combo routes become easier to deal with, and you can get easier poke damage with your alpha. This matchup ends up even because, at lower levels, he struggles to break through your defenses, while at higher levels, he becomes a real threat you need to respect and focus on.

Difficulty Score: 🟢🟢🟢Extremely Favorable🟢🟢🟢
Mt. Lady struggles heavily against you. Her damage output isn’t very threatening, her movement is limited, and she lacks clear win conditions in most situations. Even in her Giant form, although she does more damage, she is still mostly easy to deal with since you can simply play around terrain, stand behind walls, and poke her safely with your Alpha. You consistently outdamage her, and she has a hard time forcing meaningful pressure. Her best chance comes from catching you while you’re already low or landing a few Giant-form shots before you are able to disengage, but outside of that, it’s tough for her to win this matchup.

Difficulty Score: 🟢🟢🟢Extremely Favorable🟢🟢🟢
Base Shigaraki has very few ways to threaten you meaningfully. Your Alpha, Beta, and Gamma can all be used to avoid or beat his options, usually just by staying off the ground, which every part of your kit enables after a jump. Nearly all of his damage is grounded and very easy to avoid if you don’t overcommit. Gamma can still be an issue if it lands since it’s a true damage grab, and his Special Action applies a 20% debuff and can hit you in the air as it's his best movement and air option, but those are his only fundamental tools. His best chance is to create chaos or hit you while you’re distracted; otherwise, this matchup is tough for him to win.

Difficulty Score: 🟢Favorable🟢
Catastrophe Shigaraki is much more dangerous due to his insane combo potential and burst damage. However, he still needs to get close to do anything meaningful. If you control spacing and don’t let him freely start pressure, you can shut him down before his damage ever comes into play. Mistakes are punished way harder here than against Base Shigaraki, but the matchup still favors you overall.

Difficulty Score: 🟡Even🟡
Mirror matchup. It usually comes down to who has better tuning, who does better/more combos, and who does a better job catching wakeups and endlag. If one of the Shigaraki’s misses an alpha, the other one in the matchup has a lot of time to punish with their own alpha at the point the other shot there’s .

Difficulty Score: 🔴Unfavorable🔴 / 🟣Unknown🟣
Unlike Monoma, when All For One steals quirks, he can fully use them as his own, just without the Special Action. This means that if he takes quirks from characters that don’t rely heavily on their Special Action, such as Red Kendo or Strike Todoroki, he effectively becomes a tankier version of them thanks to his 400 HP. Even without the stolen quirks, his Gamma is a massive AOE grab (always try to alpha this when you can) that can put you into devastating combos or interrupt whatever you’re doing by pushing you away. His Beta also deals very high damage and can hit through walls. Even if he steals a quirk from someone who is usually favorable for Tech Shiggy, the ability to swap between his strong base kit and a potentially powerful second kit makes this matchup unfavorable in many cases. Your best move is to stay about midrange (out of beta’s range) and beam him with alpha, or sometimes go in with beta shots. This matchup can swing depending on what quirks he has stolen.

Difficulty Score: 🟢Favorable🟢
Young All For One is annoying, but much more manageable than base All For One. His Gamma and Special Action can disrupt your flow, temporarily shutting off parts of your kit or making it harder for you to deal damage. Still, he lacks the consistency and control to capitalize on those moments on his own fully. If you avoid getting looped by Gamma and don’t go running into his attacks (poke with alpha when he does his charged beta), he struggles to convert pressure into a real threat. His flight and overall floatiness make him more annoying, but, with patient play, you can poke him down and control the pace of the fight, keeping the matchup in your favor.

Difficulty Score: 🟢🟢🟢Extremely Favorable🟢🟢🟢
Tech Dabi struggles heavily against you. Spamming Alpha and rolling through his Alphas is usually enough to shut him down, especially since his projectiles don’t deal enough damage to matter. None of his blocking tools actually stop your Alpha, and he doesn’t have the movement to outrun or reposition against you. His Beta and Gamma can be annoying if you’re not paying attention, and sometimes Beta forces you to burn a full Alpha to avoid it, but outside of that, he has very few win conditions.

Difficulty Score: 🟢🟢Very Favorable🟢🟢
Crazy Torch is more threatening than Tech Dabi, but still manageable. His Gamma shuts down combos and blocks some of your pressure, and his Beta can deal massive damage if it connects. Outside of those two tools, though, he struggles heavily. If you poke him from a distance and only go in after Gamma ends, he has a tough time defending himself. He’s also fairly squishy due to Gamma draining his HP, which makes punishing mistakes very rewarding.

Difficulty Score: 🟢Favorable🟢
Default Toga can be unpredictable because of stolen blood and her ability to reset cooldowns with Gamma. Her Beta gives her good movement and close-range damage, and her Alpha can deal a lot of damage if you miss or get caught in endlag. That said, she still relies heavily on getting close to do meaningful damage. If you keep knocking her down, stall out her Beta, and force her to spend resources, you can manage her pressure consistently and keep the matchup in your favor.

Difficulty Score: 🟢🟢Very Favorable🟢🟢
Rapid Toga doesn’t deal nearly enough damage to threaten you consistently. Her movement is decent but not overwhelming, and she doesn’t have much hp. Her Beta can be annoying since it stuns and can chain into another Beta or Gamma if it hits, and stolen blood always adds some unpredictability. Still, if you bait her options and play aggressively, she struggles to get anything going and has very few ways to turn the fight around.

Difficulty Score: 🟢🟢Very Favorable🟢🟢
Twice doesn’t have many reliable ways to deal with you. His best tool is using Beta to spawn a clone and then spamming Alpha to stack damage when you miss a move and get stuck in endlag. Outside of that scenario, his pressure is minimal. His mobility isn’t excellent, his damage is inconsistent, and once you start pressuring him directly, he struggles to escape or reset. As long as you don’t give him free openings after whiffs, this matchup heavily favors you.

Difficulty Score: 🟢🟢🟢Extremely Favorable🟢🟢🟢
Compress lacks the tools needed to threaten Tech Shiggy seriously. His primary source of damage against you is Alpha, which is predictable and manageable to play around with. His Beta does nothing against you, and while his Gamma provides strong movement, it can be easily interrupted by Alpha startup or even Beta. His best option is usually to run and try to poke with Alpha, but he doesn’t have the damage or control to force anything meaningful. As long as you stay patient, this matchup is tough for Compress to win.

Difficulty Score: 🟢🟢Very Favorable🟢🟢
Overhaul performs slightly better than Base Shigaraki due to having a ranged Alpha, but the matchup still heavily favors you. His Beta can deal surprising damage if it catches you in endlag, and Gamma is a ranged grab that hurts if it lands. His heal also lets him survive longer than expected. Outside of those tools, though, his movement and damage aren’t nearly strong enough to keep up with you. As long as you stay aware of Gamma and don’t give him free hits during recovery, this matchup is tough for Overhaul to win.

Difficulty Score:🟢🟢Very Favorable🟢🟢
Kurogiri has some small combos that deal some damage, and his portals can make him annoying to track at times. However, outside of that, he doesn’t have much going for him. His damage output isn’t too high to seriously threaten you, and while he can stall or escape, he struggles to force meaningful pressure. In late circles, especially, it becomes tough for Kurogiri to perform against Tech Shiggy, making this matchup heavily favor you.

Difficulty Score: 🔴🔴Very Unfavorable🔴🔴
Nagant is one of the most dangerous matchups for Tech Shiggy. Her long-range pressure, extremely high burst damage, and ability to punish even small mistakes make it very hard to play comfortably. She can delete large chunks of your HP before you ever get close, and once she has positioning, forcing an approach becomes very risky, especially because a lot of your moves make you stand still after them (which can lead to a devastating headshot). At the same time, you can still win if you catch her off guard or break the line of sight. This matchup often costs you a lot of time, resources, and positioning. Unless she’s distracted or heavily pressured by your team, taking a clean 1v1 against Nagant is rarely worth it.