


Unbreakable (Combat)
Great for Beta damage since you can slot Fixer on all the red slots. Second special tuning is your choice: more mobility or more defense.

Last Update Date: -
Last Update Content: -
Eijiro Kirishima is a close-range unit who excels at punishing enemy wake-ups. With his high damage output and high durability, he can dominate both defensively and offensively. However, as a pure melee fighter, he struggles against ranged opponents, especially skilled beamers who can maintain their distance.


Kirishima dashes forward while armored, delivering a series of rapid chops that move both him and the opponent in the direction you're aiming. The attack can deal massive damage if all hits connect, but it's quite inconsistent and difficult to land every single chop unless your opponent is trapped in a corner or pushed against a wall. It's recommended to lower your sensitivity slightly to make aiming easier when your target isn't close to a wall. The move finishes with a powerful slash that knocks the enemy back, dealing higher damage. This finishing slash has some good tracking, making it especially effective for catching opponents on wake-up if you activate it slightly before they recover. Also it can serve as a solid escape tool, especially since the ability comes with 3 charges and gains extra travel distance at level 9.
Keep in mind that you don't have to commit to the full Alpha chain. Releasing your finger as soon as you connect confirms that you'll hit the last chop, which deals the most damage.


Additionally, if you use the skill while falling from a building, the momentum allows you to cover even more aerial distance. Another useful aspect of this ability is its utility in controlling a downed enemy positioning. You can push downed opponents away from their insta-res teammates by following up an air melee with this skill. It's also great for pushing downed enemies into the Poison Mist, forcing their teammates to risk going out of zone to get their revive token.


Kirishima’s Beta allows him to lunge forward while armored and deliver a powerful punch that deals solid damage and can hit multiple enemies at once if they’re close together. Since this move lunges you forward, it can also be used for mobility, but be careful, as it slows you down in the air and leaves you vulnerable to ranged attacks from beamers.
Overall, this move is excels at catching opponents wake-ups and quickly closing the distance. However, it’s quite easy to dodge, and missing it can leave you wide open to punishment.


Kirishima’s Gamma allows him to slam his fists down into the ground while armored, unleashing a shockwave that deals a large amount of damage. The move excels at catching opponents on wake-up thanks to its wide AoE and the shockwaves Kirishima releases. This move has two versions. When used on the ground, it releases an instant shockwave. However, if activated in midair, Kirishima leaps upward before diving down, allowing you to slightly control where you land. This version is especially strong against shield users or melee characters, since you can dive over their defenses or attacks and punish them.


Kirishima's hardens his skin and temporarily prevents flinching when taking damage, as well as gaining a 40% Defense Boost. Can be deactivated and activated again any time you want. Like armored moves, Kirishima's hardened state protects him from being frozen. It's really recommended using this before engaging in any fights or when healing when the circle is small so you don't get your healing interrupted. This can also be used to make it harder for enemies to interrupt when attempting to revive teammates with a revive card.


Ground Melee
Kirishima’s melee consists of a decently fast three hit combo. With the first hit Kirishima deliver a quick, forward punch that slightly lunges him toward the target that can be used to extend a lot of combos. The second hit is just a follow-up punch that pushes the opponent back a bit, and finally the third hit which is an upper cut that lifts opponents off the ground, also good to initiate a lot combos.

Air Melee
Kirishima delivers an uppercut similar to his third ground melee that also lifts the opponents off the ground. It can also be used to catch people's wake-ups (not recommended to do so) and initiate combos with it.


This path is perfect for players who like to take the initiative in fights. Leveling up Beta first increases your dash range allowing you to engage and pressure opponents quickly. It’s the most recommended path for aggressive playstyles focused on fast initiations and continuous offense.
![]()
![]()
![]()
![]()
![]()
This path focuses on staying alive longer during fights. Upgrading Alpha early gives you more mobility, while maxing Gamma boosts its damage, reload speed, and its AoE, perfect for pushing enemies away and punishing anyone who keeps chasing you. It’s ideal for defensive or sustain-heavy playstyles.
![]()
![]()
![]()
![]()
![]()
![]()
![]()
This path focuses on surprise attacks. By maxing Gamma first, you can drop on enemies unexpectedly and deal a lot of damage. It’s especially effective if you have the right tuning build.
![]()
![]()
![]()
![]()
![]()
![]()
![]()
A well rounded path for players who want a mix of offense, defense, and utility. This setup gives steady growth across all abilities before focusing on maxing them out for balanced performance in any situation.
![]()
![]()
![]()
![]()
![]()
![]()
![]()
![]()
![]()
![]()
![]()
![]()
![]()
![]()
![]()
The different ways you can combine and chain various skills for higher damage within 500 DP (Downpower). The downpower of Eijiro Kirishima's abilities are as follows:
Alpha Skill: 1 DP (Small Chops), 125 DP (Final Slash Lvl 1-3), 150 DP (Final Slash Lvl 4-9)
Beta Skill: 250 DP (Level 1-3), 200 DP (Level 4-8), 150 DP (Level 9)
Gamma Skill: 250 DP (Level 1-3), 200 DP (Level 4-8), 150 DP (Level 9)
Ground Melee: 100 DP (Melee 1, Melee 2), 200 DP (Melee 3), 400 DP (Full Melee String)
Air Melee: 250 DP
The text of the combos below will be colored by how true they are, in this case, we will define as "True" combos that, without 3rd party or tuning interference, can only be escaped/interrupted by Overhaul and/or Mirio, as those are special cases.
White Text means that part of the combo is True on both GP and HP.
Green Text means that part of the combo is True if the target is on HP only or the hit Guardbreaks.
Blue Text means that part of the combo is True if the target is on GP only, or the hit Guardbreaks if it's an Electrification combo.
Red Text means that part of the combo is Untrue, and therefore the enemy can escape it.
Purple Text is used for the Electrification tune.
The DMG of the following combos at max level and accounting for the character's strike role is classified under the following tags:
Basic DMG (100-149 DMG), Basic+ DMG (150-199)
Light DMG (200-249 DMG), Light+ DMG (250-299)
Medium DMG (300-349 DMG), Medium+ DMG (350-399)
High DMG (400-449 DMG), High+ DMG (450-499)
Heavy DMG (500-549 DMG), Heavy+ DMG (550-599)
Deadly DMG (600-649 DMG), Deadly+ DMG (650-699)
Kirishima’s combos are mostly situational or tuning-dependent (these combos work only on HP), except for some melee chains. His combos can hit extremely hard since his skills don’t apply much downpower.
A basic combo.


Another basic combo.


A higher damage variation of the above.

A situational combo you can land if the oppening is falling down stairs after hitting gamma, or if the opponent is not touching the ground when gamma hits them.


You can achieve this if the opponent is falling off an edge after getting hit by the last Alpha chop.


These are the Electrification combos, where the first skill happens before the guardbreak, and the second skill is what you follow up with after they get electrified (only exception is the last one).
Gamma is the recommended ending for this combo. The variation with alpha as combo ending is true against a wall.


The variation with alpha as combo ending is true against a wall.


The variation with alpha as combo ending is true against a wall.


A very situational combo that if landed can deal massive damage.


Kirishima is all about catching people off-guard and making them pay for their mistakes. The more you stay in their face, the more they panic and mess up. He’s also great at catching opponents wake-ups.
The downside is that his moves are slow and easy to dodge, which leaves you wide open for your opponent to combo you. You have to pop your Special Action before you jump into any fight. It’s basically a must, it keeps you from getting staggered and stuck in someone else's combo.
Keep in mind that Kirishima will lose to basically every character that uses Space Hop.
Kirishima struggle to land anything against someone using that tunning.


Strike Slots if you rely on Beta: Beta DMG > Gamma DMG > GP DMG > HP DMG > Else
Strike Slots if you rely on Gamma: Gamma DMG > Beta DMG > HP DMG > GP DMG > Else
Assault Slots: Endeavor > All Might > Shigaraki > Else
Rapid Slots: Bakugo > All Might > Twice > Else
Support Slots: Overhaul > Nejire > Ibara > Else
Technical Slots: Denki Kaminari > Mirio > All For One/Monoma > Else
| The list of recommended special tunes (not ordered): | ||
|---|---|---|
 |
Electrification S-tier for Kirishima; makes his combos consistent. |
|
 |
Fixer Recommended for costumes with many Strike slots (prioritize Beta damage). If the Fixer line includes Rapid, Support, Assault, and Strike, focus on Gamma damage instead. |
|
 |
Wall Runner Gives vertical mobility; lets you predict enemy wake ups and land aerial Gamma. |
|
 |
Acceleration Increases Alpha damage and speeds up your attacks. |
|
 |
Quirk Factor Release Rewards aggressive playstyles, allowing you to have your Gamma ready to use again every 3 seconds when the tuning is activated. |
|
 |
Critical Permeation Great option for more survivability. |
|
 |
Space Hop Useful for catching wake ups with Gamma. |
|
 |
Card Duplication Good if you struggle with levels. |
|
 |
Divine Protection Another strong pick if you’re level dependent and rarely get kills at low levels. |
|
 |
Revenge Assault Highly recommended in 2v1 or 1v3 situations. Pair it with Special Action to become a real tank. |
|
 |
Revenge Support Good for final circles in open areas where Kirishima struggles. Lets you heal in storm and return to battle safely. |
|
 |
Revenge Strike Solid damage option if your costume lacks DMG boost slots. |
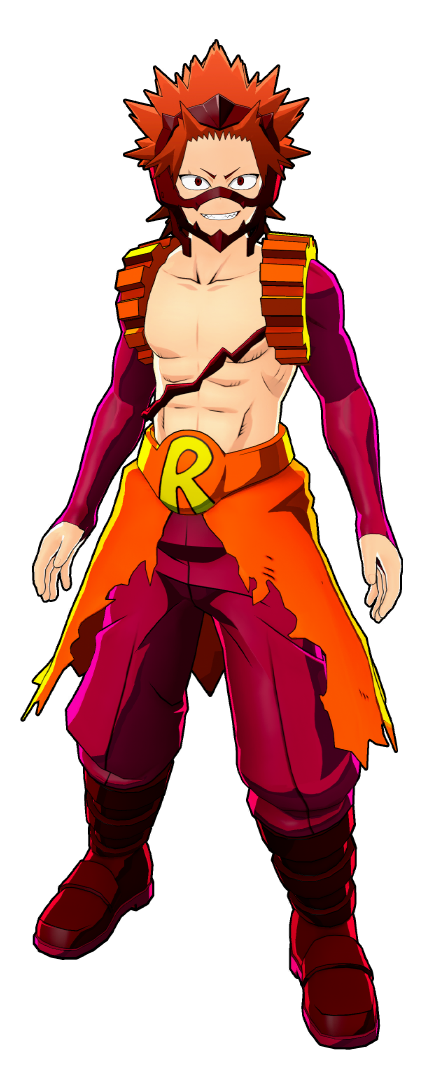
Great for Beta damage since you can slot Fixer on all the red slots. Second special tuning is your choice: more mobility or more defense.


The best costume overall. Perfect options for Beta, Alpha, and especially Gamma damage, with a special slot that gives everything Kirishima needs for mobility and combo confirms.

Great if you struggle with leveling. Pair it with Wall Runner for extra mobility to reach boxes faster.
Focuses on higher damage and defense after your guardbreaks. Paired with Special Action, you become truly unbreakable.
Perfect for boosting Alpha, Beta, and Gamma damage, plus have a good mobility option.
Budget costume. Good amount of Strike slots. Mainly used with Electrification to confirm combos.
Another excellent budget build. Helps with leveling, confirming combos, and dealing solid damage.

Matchups are categorized based on Kirishima’s performance in Indoor vs. Outdoor environments.
🔴🔴Very Unfavorable🔴🔴: There is little to no reliable way to win. The opponent is a direct counter to Kirishima. Your best bet is to rely on positioning or the element of surprise.
🔴Unfavorable🔴: While they don’t completely shut you down, the opponent limits your options and makes it difficult to maintain an aggressive playstyle.
🟡Even🟡: A pure skill match-up. Both characters have the tools to win; the outcome is decided by decision-making and capitalizing on the opponent's mistakes.
🟢Favorable🟢: The opponent has limited tools to keep you away, allowing you to apply constant pressure and dictate the pace of the fight.
🟢🟢Very Favorable🟢🟢: You are virtually unstoppable. Kirishima dominates this match-up with ease, YOU’RE UNBREAKABLE!

Outdoors Difficulty Score: 🔴Unfavorable🔴
Deku is a beamer, a skilled Assault Deku will use his superior mobility to keep his distance and delete your Health before you can ever get in range. Without cover, approaching him is a massive risk.
Indoors Difficulty Score: 🟡Even🟡
The tables turn inside buildings where you finally are able to get to him. However, don't get overconfident, while you have the damage advantage Deku possesses an armored kick and a grab that can cancel out your moves and punish you hard for it.

Outdoors Difficulty Score: 🔴🔴Very Unfavorable🔴🔴
Full Bullet's Alpha has high Downpower, knocking you down before you can get within striking distance. To make matters worse, he can easily vertical-loop away from your attacks using his Gamma jump and punish you by slamming down.
Indoors Difficulty Score: 🟢Favorable🟢
In a confined space, Full Bullet loses his primary advantage. The walls limit his mobility, allowing you to close the gap quickly. Since almost all of your moves have Hyper Armor, you can effectively trade hits and break through. Pro Tip: Your Beta can actually punch right through his Gamma rocks. Use this to surprise him when he thinks he's safe behind his cover!

Outdoors Difficulty Score: 🔴Unfavorable🔴
OFA Deku is dangerous at a distance. His Alpha has high downpower and armor, allowing him to stop your approach before you can get close. Your best bet is to wait for him to commit to a melee combo or his Gear 5 Gamma attack, then punish him during the animation.
Indoors Difficulty Score: 🟢Favorable🟢
In tight spaces, you have the upper hand. You can punish his Alpha because it takes time to charge up the projectile. If he tries a melee combo, you can beat it out with your Gamma. Be careful of his Gear 5 slam (Beta) since the AoE is large, but you can usually avoid it by jumping with your own Gamma. Pro Tip: If he tracks you with his Gear 5 Gamma, you can break out by using any of your skills (Alpha, Beta, or Gamma) since they all have armor. Also, popping your Special Action is the best way to shut down his melee strings and show him how manly you are.

Outdoors Difficulty Score: 🔴Unfavorable🔴
Bakugo is a beamer with great mobility. He can stay in the air and blast you. Since Kirishima’s moves are straightforward and easy to dodge in open spaces, a good Bakugo will bait your attacks and punish you with his gamma.
Indoors Difficulty Score: 🟡Even🟡
You have a much better chance here, but it's still a fight. While you can close the gap, his grenades can knock you down easily. However he will eventually be on reload and you can get closer to him without being punished, and don't be so scared of his gamma since it doesn't have armor you can stop it with any move or by popping your Special Action.

Outdoors Difficulty Score: 🔴🔴Very Unfavorable🔴🔴
Honestly? Just run. This isn't a fight you’re meant to win. His mobility is way too high, Your only real opening is when he uses his Gamma. If you time your own Gamma perfectly, you can either trade damage or knock him out of the air before his attack connects.
Indoors Difficulty Score: 🔴Unfavorable🔴
It's incredibly hard to land a hit. Just like the outdoor strategy, wait for him to commit to his Gamma and try to time your own move to trade. Pro Tip: Most Rapid Bakugos are impatient, they will try to hit or run away the moment they wake up, ignoring their i-frames. use this to your advantage, time your Beta right as they get up to catch them.

Outdoors Difficulty Score: 🔴🔴Very Unfavorable🔴🔴
She has way too much mobility for you to keep up with in the open. There isn't much you can do if she decides to stay away. However, keep an eye on her after you land a hit, many Ochaco players will panic and try to zip away immediately, ignoring their i-frames. This is your best chance to strike.
Indoors Difficulty Score: 🟢🟢Very Favorable🟢🟢
Indoors, she loses her ability to escape, and you can corner her easily. All of your armored moves can go through her Beta, and if she tries to use her Gamma you can punish her hard while she’s stuck in the animation.

Outdoors Difficulty Score: 🟡Even🟡
You can definitely win if you focus on dodging her Gamma. Since she’s stuck in a long animation while using it, you have a perfect window to punish her. If she tries to push you with her Beta, use your Gamma to armor through it and hit her back.
Indoors Difficulty Score: 🟡Even🟡
The strategy remains the same as outdoors. Because spaces are tighter, it's easier to land your hits but also easier for her to catch you in her AoE attacks. Wait for her to commit to a move and then punish her.
Pro Tip: Be careful of her baiting you. A common trick is for her to act vulnerable to lure you in, only to drop her Gamma right on top of you, don't rush in blindly.

Outdoors Difficulty Score: 🟢Favorable🟢
Iida is forced to get close to you to deal any damage which plays right into your hands. You can easily punish him. While his superior mobility means he can usually run away when the fight turns south, he can't actually beat you in a fair trade of blows.
Indoors Difficulty Score: 🟢🟢Very Favorable🟢🟢
In a building Iida loses his one advantage: his ability to run. You have the massive advantage here.

Outdoors Difficulty Score: 🔴🔴Very Unfavorable🔴🔴
Todoroki is a top tier beamer if you try to close the gap he can punish you with his Gamma Beta combo that deals a lot of damage, since he has multiple ways to keep you at bay getting close enough to land a hit is a massive challenge in open areas.
Indoors Difficulty Score: 🔴Unfavorable🔴
Even in closed spaces where you can finally reach him, his moves just deals way too much damage that you actually lose the trade. If you have to fight him inside, you must use your Special Action.

Outdoors Difficulty Score: 🟡Even🟡
His Alpha has high downpower, which can be annoying when you’re trying to close the distance. He’ll try to keep you away but you can eventually break through. Time your dodges carefully or pop your Special Action to ignore the stagger and force your way in
Indoors Difficulty Score: 🟡Even🟡
Both of you excel in Indoors, making this a very Interesting match-up. You need to time your dodges perfectly to avoid his Beta explosion. Activating your Special Action here gives you a massive advantage
Pro tip: you can jump over his Tornado Flames using jump Gamma.

Outdoors Difficulty Score: 🔴Unfavorable🔴
A skilled Froppy is incredibly annoying in the open. She will use her Alpha into you and retreat before you can even swing back. Her goal is to chip away at your health while staying out of reach. Be careful, she will often try to bait out your Gamma, wait for the animation to end and then punish you.
Indoors Difficulty Score: 🟢🟢Very Favorable🟢🟢
She loses her ability to grapple away effectively, she’s forced to use her Beta and she simply cannot win against you.
Pro Tip: Don't get impatient If she’s playing the hit and run game, wait for her to actually commit before doing anything.

JUST SHOW THEM WHO'S HARDER

Outdoors Difficulty Score: 🔴🔴Very Unfavorable🔴🔴
Strike Kirishima has superior mobility and high damage combos and an UNBREAKABLE shield.
This is not your fight.
Indoors Difficulty Score: 🟡Even🟡
Time your dodges and punish him back, don't let him bait you to hit his shield or else he will punish you hard.
Pro Tip: You can jump over his shield with your Gamma.

Outdoors Difficulty Score: 🟡Even🟡
While Denki is a "beamer," his Alpha doesn't have too much range, however he can dodge your attacks and stun you with his Gamma so having your Special Action active is very useful.
Indoors Difficulty Score: 🟢🟢Very Favorable🟢🟢
Your only real threat is his stun, just be aggressive.

Outdoors Difficulty Score: 🟢Favorable🟢
If he's not sitting on top of a roof sniping you down you'll be fine. His Beta stun would not stop you because of your armored moves, just be aggressive.
Indoors Difficulty Score: 🟢🟢Very Favorable🟢🟢
This time it's guaranteed that he's not on top of a roof, SHOW HIM HOW MANLY YOU ARE.

Outdoors Difficulty Score: 🟢🟢Very Favorable🟢🟢
You have every advantage on her. She can't stop you with her alpha, you can jump over her shield with your gamma, be careful from her cannons tho.
Indoors Difficulty Score: 🟢Favorable🟢
Both excel indoors, just keep on pressuring her and be careful from her cannons.

Outdoors Difficulty Score: 🟡Even🟡
A good Tokoyami would know how to work with the Special Action to keep his distance from you. If they are out of the Special Action, don't be afraid to engage.
Indoors Difficulty Score: 🟢🟢Very Favorable🟢🟢
Tokoyami cannot stop you indoors. If he ever uses his shield, you can easily jump over it using an aerial Gamma.

Difficulty Score: 🟣Unknown🟣
Monoma's match-up is unknown as depending on which set of quirks he's holding, it might be painful or easy to deal with him.

Outdoors/Indoors Difficulty Score: 🟡Even🟡
This is a pure "wait and see" match up, the winner is whoever baits the other person more, rushing in blindly will get you punished.
Pro tip: you can jump over her shield with you gamma.

Outdoors Difficulty Score: 🔴🔴Very Unfavorable🔴🔴
Her charged Alpha knocks you down instantly, she has a shield that deals so much damage if you hit it. Since she can easily bait you to hit it the best thing to do is not fight her at all.
Indoors Difficulty Score: 🔴Unfavorable🔴
Even though she can’t use her Alpha as easily, her shield is still a huge problem.

Outdoors Difficulty Score: 🟡Even🟡
Her Alpha has long range but they're are easy to dodge. You can slowly close the gap by dodging. Both of you are looking to bait the other so don't rush in blindly.
Indoors Difficulty Score: 🔴Unfavorable🔴
Her attacks deal a lot damage and are harder to avoid, and getting caught in her gamma will heal her, using special action will minimize the damage you take and how much she will heal.

Outdoors/Indoors Difficulty Score: 🟡Even🟡
Mirio is hard to hit because of his permeation, but he has to put himself at risk to deal damage against you. Time your dodge and punish him.
Pro tip:
Kirishima can punish Mirio's alpha combo by using Gamma.
Kirishima is able to jump and go through Mirio's barrier using the arial gamma.

Outdoors/Indoors Difficulty Score: 🔴🔴Very Unfavorable🔴🔴
Kirishima’s moves are way too slow and predictable. Do not engage because 1v1ing him is a throw.
Pro tip:
If you're at a decent distance, try to bait him. Charge straight at him with your Alpha, but right before you hit, flick your camera away to change direction to bait his counter then punish him and try to catch his wake-ups

Outdoors Difficulty Score: 🔴🔴Very Unfavorable🔴🔴
Tamaki uses his aimed Alpha to grab opponents and deal a lot of damage, he also can be in the air using his special action. Also, his Beta will knock you down immediately so trading against him won't work.
Indoors Difficulty Score: 🟡Even🟡
Tamakis can still grab you with Alpha and do a lot of damage. Dodge, punish and catch his wake-ups.

Outdoors Difficulty Score: 🔴🔴Very Unfavorable🔴🔴
Nejire can remain airborne for a long period, which makes her nearly impossible to hit. Try to engage her when she's in the ground and catch her wake-ups.
Indoors Difficulty Score: 🔴Unfavorable🔴
She still can be airborne indoors which makes her hard to hit but not impossible.

Outdoors/Indoors Difficulty Score: 🔴🔴Very Unfavorable🔴🔴
Nejire can remain airborne for a long period. Her Alphas are hard to avoid. Her Beta will punish you if you try to get close.

Outdoors Difficulty Score: 🔴🔴Very Unfavorable🔴🔴
Shinso can easily counter any action taken by Kirishima. The best you can do is catch him off-guard and catch him during his wake-ups.
Indoors Difficulty Score: 🟡Even🟡
He can still easily counter you, but it's also easier for you to catch his wake-ups.

Outdoors Difficulty Score: 🔴Unfavorable🔴
Assault All Might is considered a beamer, he can keep his distance easily since he has decent mobility. Tou can trade if he ever tries to do his Beta then easily catch his wake-up.
Indoors Difficulty Score: 🟢Favorable🟢
Getting close to him won't be a problem now, be careful since he's immune to all of Kirishima’s abilities while using his Gamma.

Outdoors/Indoors Difficulty Score: 🔴🔴Very Unfavorable🔴🔴
Rapid All Might can counter Kirishima in many ways. Do not engage in any fights with him. And do NOT trade against his alpha.

Outdoors/Indoors Difficulty Score: 🔴🔴Very Unfavorable🔴🔴
Armored All Might can stay airborne for a long period of time, and the fact he also has 3 stun abilities makes it impossible for Kirishima to do anything against him.

Outdoors/Indoors Difficulty Score: 🔴Unfavorable🔴
He can cancel your quirks and use his alpha to combo you, Using special action is necessary to avoid his high damage combos.

Outdoors/Indoors Difficulty Score: 🔴🔴Very Unfavorable🔴🔴
Present Mic will delete Kirishima's healthbar before he can do anything, especially if his speaker is on the ground. Present Mic's Beta can cancel all of Kirishima’s moves. Do not Engage alone at least because 1v1ing him is a throw.

Outdoors Difficulty Score: 🔴Unfavorable🔴
Cementoss can be very annoying due to his abilities, especially his alpha. You can easily catch his wake-ups though.
Indoors Difficulty Score: 🟢Favorable🟢
Kirishima can go through Cementoss's cement, making it easy to land a hit. Using special action is highly recommended.

Outdoors Difficulty Score: 🔴🔴Very Unfavorable🔴🔴
Endeavor can remain airborne for a long period of time, which makes him very hard to hit and makes you a very easy target for him. Try to catch him off-guard.
Indoors Difficulty Score: 🟢Favorable🟢
Endeavor will be easier to hit, and you won't be as vulnerable since Endeavor no longer has the distance advantage.

Outdoors Difficulty Score: 🔴🔴Very Unfavorable🔴🔴
Endeavor can remain airborne for a long period, which makes him very hard to hit and makes you a very easy target for him. His moves can punish you if you try to get close to him. Try to catch him off-guard.

Outdoors Difficulty Score: 🔴Unfavorable🔴
Hawks' good movement makes it difficult for Kirishima to land hits. Kirishima’s gamma can counter Hawks' Beta. When Hawks gets close, use your Gamma.
Indoors Difficulty Score: 🟢Favorable🟢
It will be much easier to land hits against him.

Outdoors/Indoors Difficulty Score: 🔴🔴Very Unfavorable🔴🔴
Hawks held Alpha completely shuts down Kirishima’s attempt to get close. Also, Hawks can easily punish Kirishima with his high damage combos.

Outdoors Difficulty Score: 🟡Even🟡
Mt. Lady's Alpha doesn't have good reach, so it's easier for Kirishima to get close since she also has to be close to be able to hit you. When she's in her giant form, you can avoid her Beta by also using Beta while jumping and looking up.
Indoors Difficulty Score: 🟢🟢Very Favorable🟢🟢
Mt. Lady is not a threat to Kirishima indoors.

Outdoors/Indoors Difficulty Score: 🔴🔴Very Unfavorable🔴🔴
Shigaraki can rot the area around him, making it impossible to reach him without having your HP deleted.

Outdoors Difficulty Score: 🔴Unfavorable🔴
Assault Shigaraki's Alpha has a long range, so he can just keep his distance.
Indoors Difficulty Score: 🟢Favorable🟢
Assault Shigaraki needs to be close to do his combo. You can stop him by using Gamma or by popping Special Action.

Outdoors/Indoors Difficulty Score: 🔴🔴Very Unfavorable🔴🔴
Kirishima’s damage is not strong enough to kill Shigaraki before Shigaraki kills you.

Outdoors/Indoors Difficulty Score: 🟢🟢Very Favorable🟢🟢
Default AFO really struggles to stop Kirishima. If he tries to use his Gamma to pull you in, just let him, it puts you exactly where you want to be: in melee range.
Using Special Action is recommended to prevent any team combos from AFO and his team, giving you a chance to retreat.

Outdoors Difficulty Score: 🔴🔴Very Unfavorable🔴🔴
His gamma form shuts down Kirishima’s kit.
Indoors Difficulty Score: 🔴Unfavorable🔴
He can always stop you with his gamma, you can get it him out of it if you manage to hit two Betas. Also, using Kirishima’s Special Action will help to not get Knocked.

Outdoors/Indoors Difficulty Score: 🟢🟢Very Favorable🟢🟢
Dabi can't do anything to stop Kirishima except for setting traps. If you're having a hard time avoiding them, try to exhaust his cooldowns.

Outdoors Difficulty Score: 🟡Even🟡
Dabi can keep his distance and use his Alpha to attack you, however, these are easy to dodge. If he tries to get close and grab you, using Gamma will keep him away.
Indoors Difficulty Score: 🟢Favorable🟢
Dabi can't do too much but grab you, and obviously, you can punish him for getting close.

Outdoors Difficulty Score: 🔴🔴Very Unfavorable🔴🔴
Her Alpha will cause Kirishima too much trouble, and with her mobility, it's very hard for Kirishima to close the distance.
Indoors Difficulty Score: 🟢Favorable🟢
If Toga tries to use Beta, you can keep her away with Gamma or Beta. You should be the first to engage since letting her dash with her beta will be annoying to deal with, especially indoors

Outdoors Difficulty Score: 🔴🔴Very Unfavorable🔴🔴
Her whole kit shuts Kirishima down.
Indoors Difficulty Score: 🟢Favorable🟢
Surprisingly, she can still stop you with her Gamma and Beta. Using special action is a must. Being agressive helps a lot too.

Outdoors Difficulty Score: 🟡Even🟡
A good Twice will keep his distance and drop clones to maximize his damage. Make sure to take down his clone first if he ever spawns him. Catching Twice's wake-ups should be easy for Kirishima.
Indoors Difficulty Score: 🟢Favorable🟢
Taking down the clone is important before engaging with the real Twice.

Outdoors Difficulty Score: 🔴🔴Very Unfavorable🔴🔴
Compress will be mostly airborne or running Space Hop, Kirishima can't do anything against him.
Indoors Difficulty Score: 🟢🟢Very Favorable🟢🟢
Kirishima's armor helps a lot against his alpha stun. Don't be afraid to engage Compress indoors.

Outdoors Difficulty Score: 🔴🔴Very Unfavorable🔴🔴
Kurogiri will mostly be airborne and snipe you with his drone, or keep his distance and use his alpha to attack you, it's kinda hard for Kirishima to do something here.
Indoors Difficulty Score: 🟡Even🟡
Kurogiri can still stop Kirishima with his Beta. You should be agressive and try not let him escape using portals.

Outdoors Difficulty Score: 🔴🔴Very Unfavorable🔴🔴
This is a fight you really, really want to avoid.
Indoors Difficulty Score: 🔴Unfavorable🔴
Kirishima's moves are easily dodgeable and will leave you open for her combo that deals a lot of damage.

Outdoors/Indoors Difficulty Score: 🟢Favorable🟢
The key to winning this fight is to be as aggressive as possible against him. Kirishima’s armor gives him a lot of advantage in this this fight.